

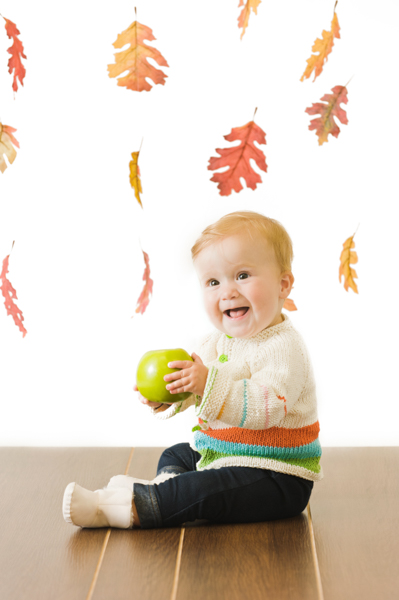
I’m a big fan of bright happy colors on babies ― and a sweater that will match multiple outfits is even better! Choose whatever color palette you love! Make this baby sweater as crazy or subdued as you like! As a bonus, this is a great stashbusting project. The stripes use less than 50 grams each.
Skill Level: Beginner
Size: Finished Chest Size 19 (20, 21, 22, 23)” to fit chest 16 (17, 18, 19, 20)”
3” positive ease recommended.
Shown in size 21”
Gauge: 18 sts and 28 rows = 4” [10 cm] in St st after wet blocking
Materials
Yarn:
![]() Brown Sheep Cotton Fleece (80% Cotton, 20% Merino; 215 yards [197 meters]/100 grams): #100 Cotton Ball (MC), 1 (1, 2, 2, 2) balls; #840 Lime Light (CC1), 1 (1, 1, 1, 1) ball; #555 Robin Egg Blue (CC2), 1 (1, 1, 1, 1) ball; #310 Wild Orange (CC3), 1 (1, 1, 1, 1) ball; #343 Sunflower Gold (CC4), 1 (1, 1, 1, 1) ball; #240 Pink-a-boo (CC5), 1 (1, 1, 1, 1) ball
Brown Sheep Cotton Fleece (80% Cotton, 20% Merino; 215 yards [197 meters]/100 grams): #100 Cotton Ball (MC), 1 (1, 2, 2, 2) balls; #840 Lime Light (CC1), 1 (1, 1, 1, 1) ball; #555 Robin Egg Blue (CC2), 1 (1, 1, 1, 1) ball; #310 Wild Orange (CC3), 1 (1, 1, 1, 1) ball; #343 Sunflower Gold (CC4), 1 (1, 1, 1, 1) ball; #240 Pink-a-boo (CC5), 1 (1, 1, 1, 1) ball
Needles: US size 6 (4 mm): straights or circular for working flat; double pointed needles (DPN) for sleeves and grafting purposes
Notions: 8 Stitch markers; stitch holders or waste yarn; tapestry needle; eight 0.5” (13 mm) buttons
Abbreviations
sl1kwyib – slip one stitch knitwise, with yarn in back
Special Stitches
Garter Stitch (work flat)
Knit all stitches on RS and WS.
Garter Stitch (work in the round)
Alternate knit and purl rounds.
Stockinette Stitch (work flat)
Knit all stitches on RS, purl all stitches on WS.
Pattern Notes
This cardigan is worked from the bottom up in one piece to the underarms. Both Sleeves are worked to the underarms. The cardigan is joined together and the yoke is worked. The buttonband is picked up and worked. Lastly, the sleeve underarm stitches are grafted together.
Pattern
Lower Body
With MC, CO 76 (80, 86, 90, 94) sts.
Work in Garter stitch for ½ (½, 1, ½, 1½)”.
Changing to St st, work 4 rows, increasing 10 sts evenly across first row using any desired increase method. The sample increases were made using kfb. Break yarn – 86 (90, 96, 100, 104) sts.
Change to CC1, work 8 (8, 8, 13, 13) rows in St st. Break yarn.
Change to CC2, work 8 (8, 8, 13, 13) rows in St st. Break yarn.
Change to CC3, work 8 (8, 8, 13, 13) rows in St st. Break yarn.
Change to MC, work in St st until lower Body measures 5 (5½, 6½, 7½, 8½)” from CO edge. Break yarn.
Set lower body aside.
Sleeves (make 2)
With MC and DPN, CO 30 (32, 34, 36, 38) sts, PM, and join in the round, being careful not to twist sts.
Work 4 (4, 8, 4, 10) rnds of Garter st.
Knit 1 rnd.
It is the knitter’s choice whether to break the MC here or to carry it along while working Sleeve stripes. The MC in the sample was carried along. The contrasting colors will not be able to be carried along, however.
Stripe Sequence
Change to CC1, work 1 (1, 1, 2, 2) rnd.
Change to MC, work 8 (9, 10, 10, 10) rnds.
Repeat Stripe Sequence, changing to CC4, then CC2, then CC5, then CC3, and AT THE SAME TIME, on any one round between the CC2 stripe and CC5 stripe, increase 1 st on both sides of the st marker – 32 (34, 36, 38, 40) sts.
After final rnds of MC have been worked, continue working in the rnds with MC until Sleeve measures 6 (6½, 7½, 8, 8½)”.
Joining Body and Sleeves
On both Sleeves place 3 (3, 4, 4, 5) sts on both sides of st marker onto waste yarn. Set aside.
K16 (17, 18, 19, 19) sts from Lower Body, PM, k2 sts, place next 6 (6, 8, 8, 10) sts from Lower Body onto waste yarn, k1 st from Sleeve, PM, k to last st on Sleeve, PM, k last Sleeve st, k2 sts from Lower Body, PM, k33 (35, 36, 38, 38) sts from Lower Body, PM, k2 sts from Lower Body, place next 6 (6, 8, 8, 10) sts from Lower Body onto waste yarn, k1 st from second Sleeve, PM, k to last st on Sleeve, PM, k last Sleeve st, k2 sts from Lower Body, PM, k last 16 (17, 18, 19, 19) sts from Lower Body – 126 (134, 136, 144, 144) sts.
Purl 1 row.
Next Row (RS): *K to marker, sm, p1, k1, p1, sm; rep from * to last marker, sm, k to end of row.
Next Row (WS): *P to marker, sm, k1, sl1kwyib, k1, sm; rep from * to last marker, sm, p to end of row.
Rep last 2 rows for 1”, ending with WS row.
Raglan Decreases
Work next 2 rows a total of 10 (11, 11, 12, 11) times.
Next Row (RS): *K to 3 sts before marker, k2tog, k1, sm, p1, k1, p1, sm, k1, ssk; rep from * to last marker, sm, ssk, k to end of row.
Next Row (WS): *P to marker, sm, k1, sl1kwyib, k1, sm; rep from * to last marker, sm, p to end of row.
Size 23” only
Work last 2 rows once more, but only decrease sts on sweater back raglan seams. Do not decrease on either fronts – 46 (46, 48, 48, 52) sts
All Sizes
Neck
Work in Garter st for 1”.
BO.
Buttonband
Pick up sts at a ratio of 3 sts to every 4 rows.
Work in Garter st for ½ (½, ½, ¾, 1)”.
BO.
Pick up same number of sts as first buttonband side.
Knit 1 row.
Place buttons on finished buttonband. Mark corresponding place on current buttonband with removable stitch markers. These markers are where your buttonholes will go.
On next row, work desired buttonhole at marker, removing markers as you come to them.
The sample uses k2tog at each marker to create the buttonhole. On the next row, the “bar was lifted” between the stitches to form a small afterthought yarn over.
Work in Garter st until second buttonband measures same as first.
Finishing
Place all sleeve underarm stitches and body underarm stitches onto two double pointed needles. Graft together with a third needle.
Weave in ends. Block to measurements.
Sew buttons on, making sure they are firmly attached. Tip: To make buttons even more secure, sew them on once, then with a new piece of thread, sew them again.
Sm- slip marker; ssk is slip, slip knit. You slip two stitches, one at a time, and then knit them together through the back loops
The abbrev. for sm and ask are not familiar to me.
Beautiful cardigan, thanks
Beginners are going to need some more explanations! Abbreviations, for starters.
I do not live near a yarn shop. Can I buy yarn in colors stated from this website?
there are no explanations for abbreviations. it would help as there are some that are unfamiliar to me.
Guessing that PM is Place Marker and sm is slip marker
I’m a pretty experienced knitter and if you still need help with abbreviations, I will do my best to help. Just let me know which ones. Mary