

The smock stitch is an interesting and fun-to-learn stitch. Try out this great technique by watching this video tutorial! Then, be sure to try the Vitamin Chic Bag pattern on the next page to try out your new skills.
Skill Level: Intermediate
Yarn: Lion Brand Hometown USA, Super Bulky #6 yarn, 5oz/142g 1 skeins: Syracuse Orange
Needle: US 11-8.0mm with 22-30” Cable
Gauge: 2 sts x 4 rows in stockinette – 1” square
Notes: The swatch is made in back and forth rows.
Tutorial
Cast on 24.
Vitamin Chic Bag Pattern calls for 72, but 24 is the perfect cast on to practice the smocking stitch.
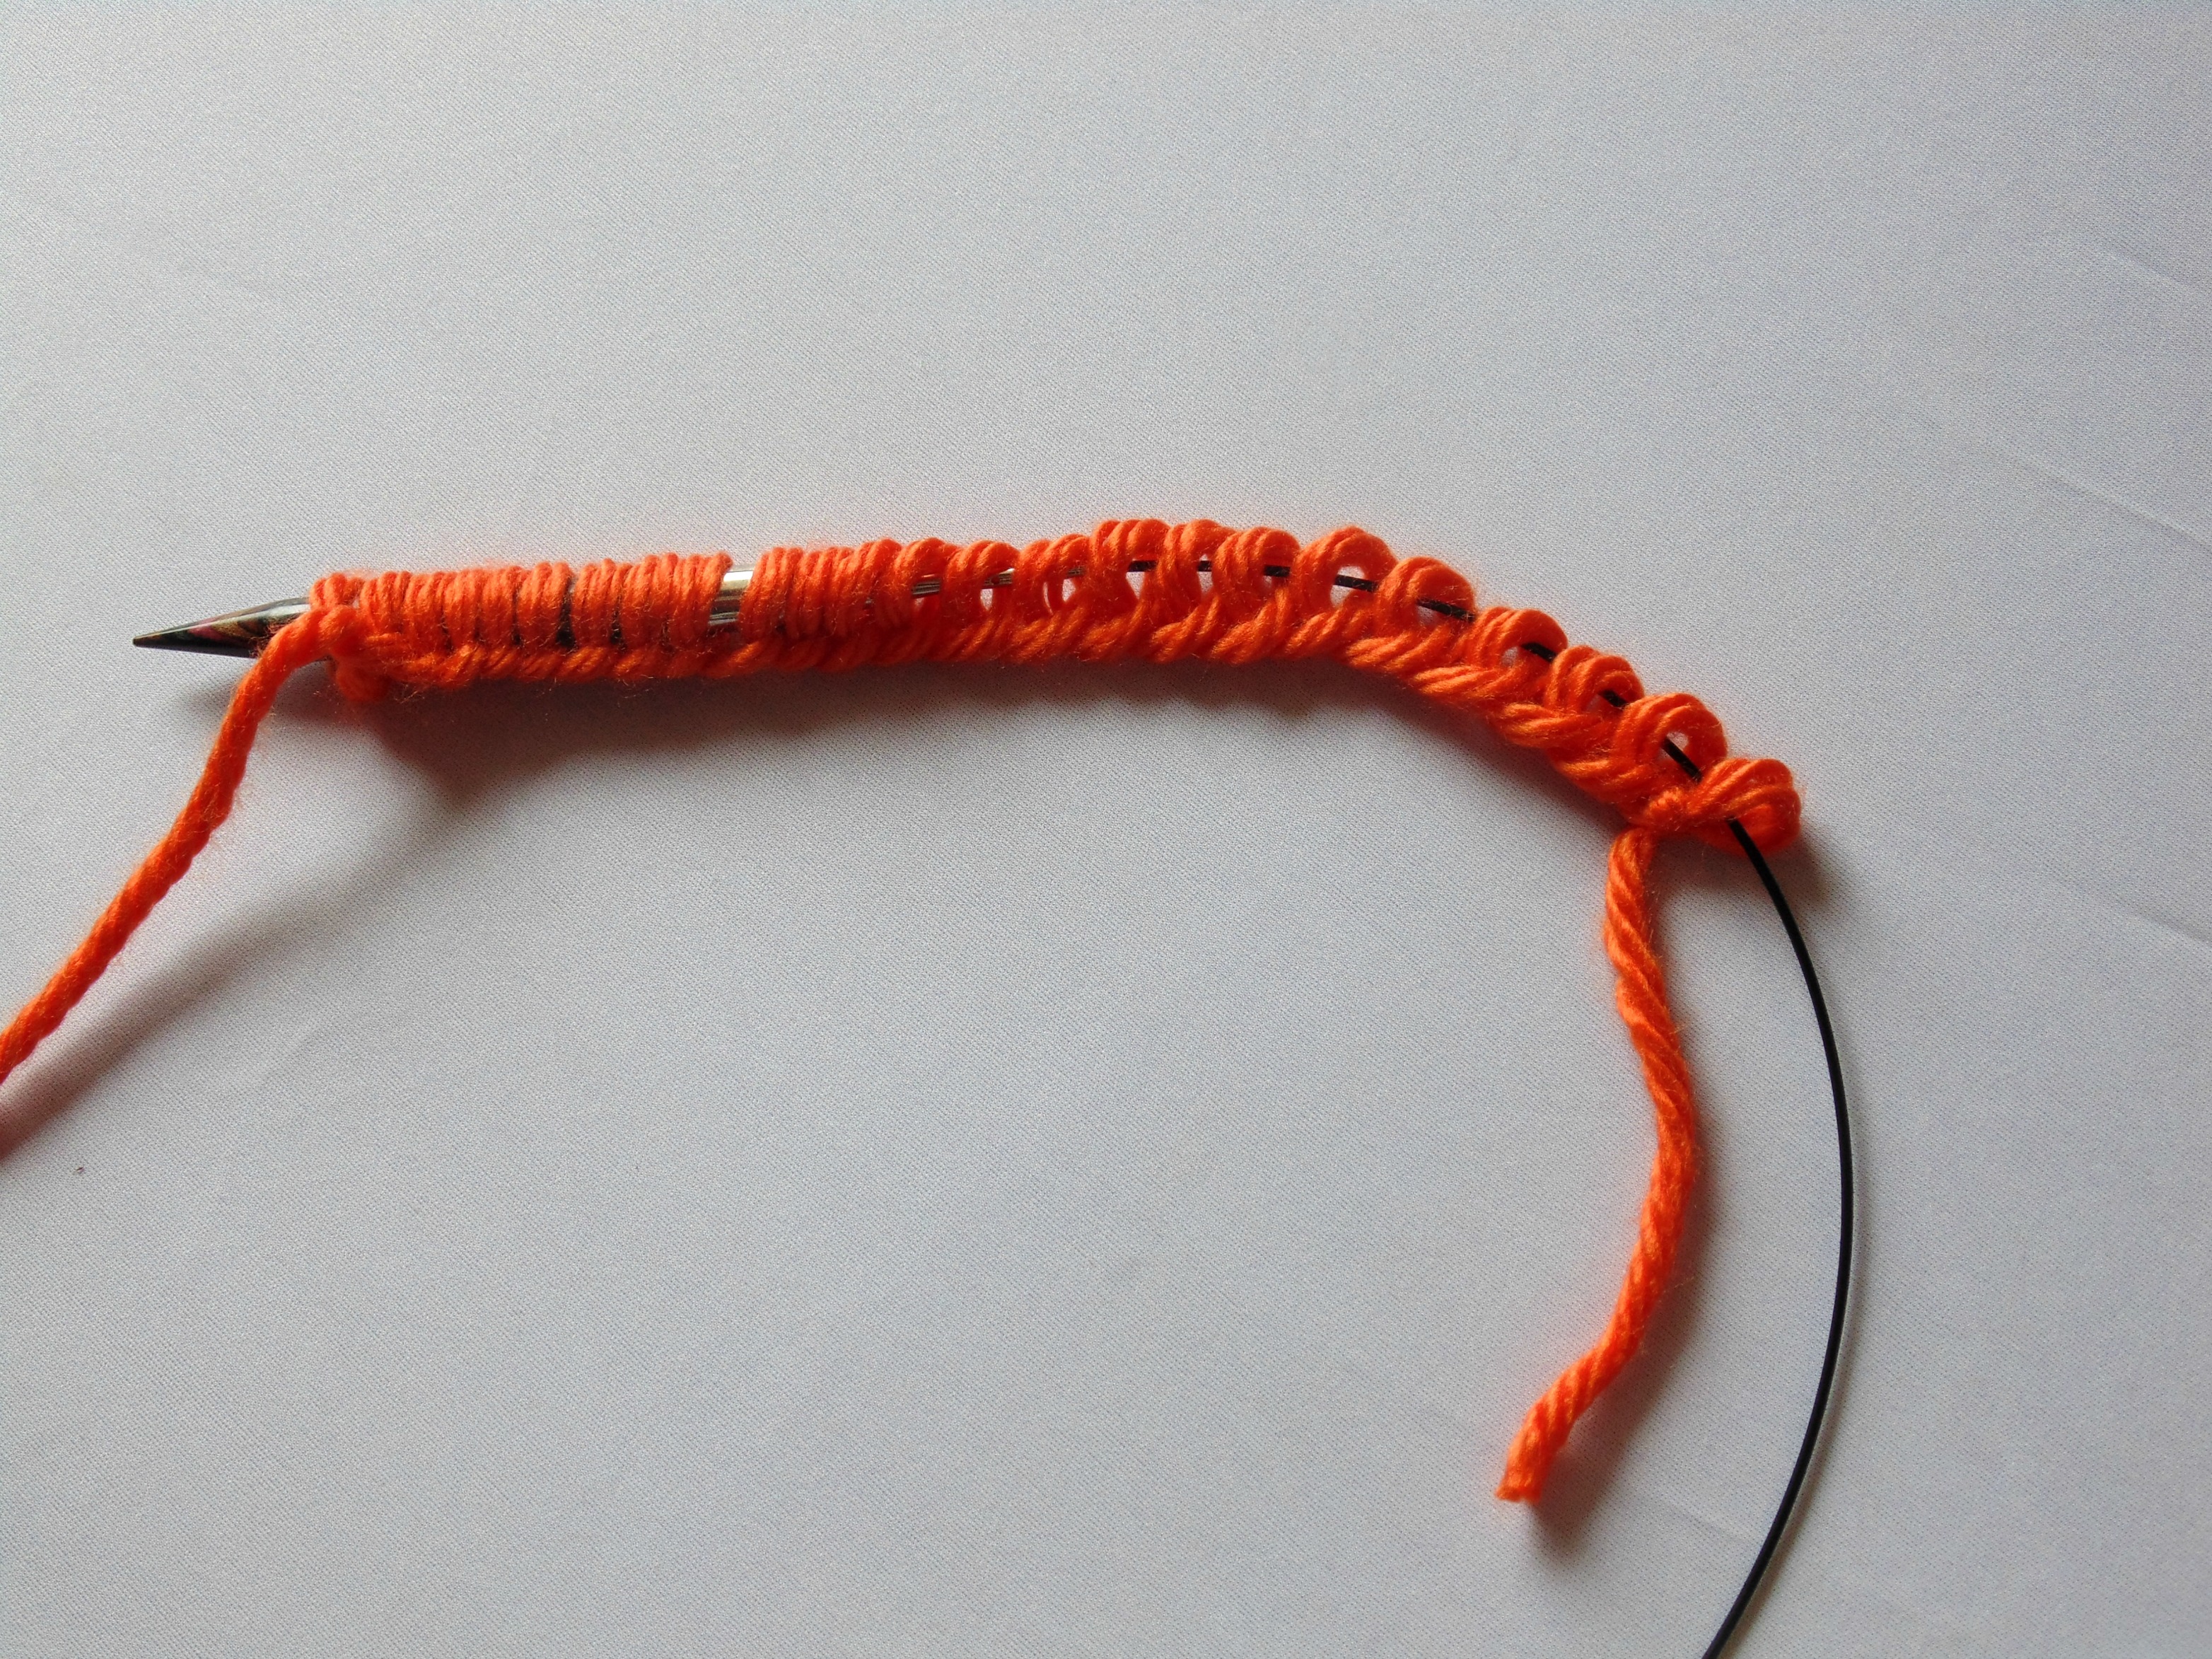
Rows 1-5: K2, p2.
Row 6: * Smocking Stitch, p2, repeat from * to end.
How to complete the Smocking stitch: slip the next 6 stitches onto cable or straight needle to the front, wrap working yarn around 6 stitches 2 times, working off of cable needle, k2, p2, k2 to complete stitch.
Let’s break it down so that you can see it step by step:
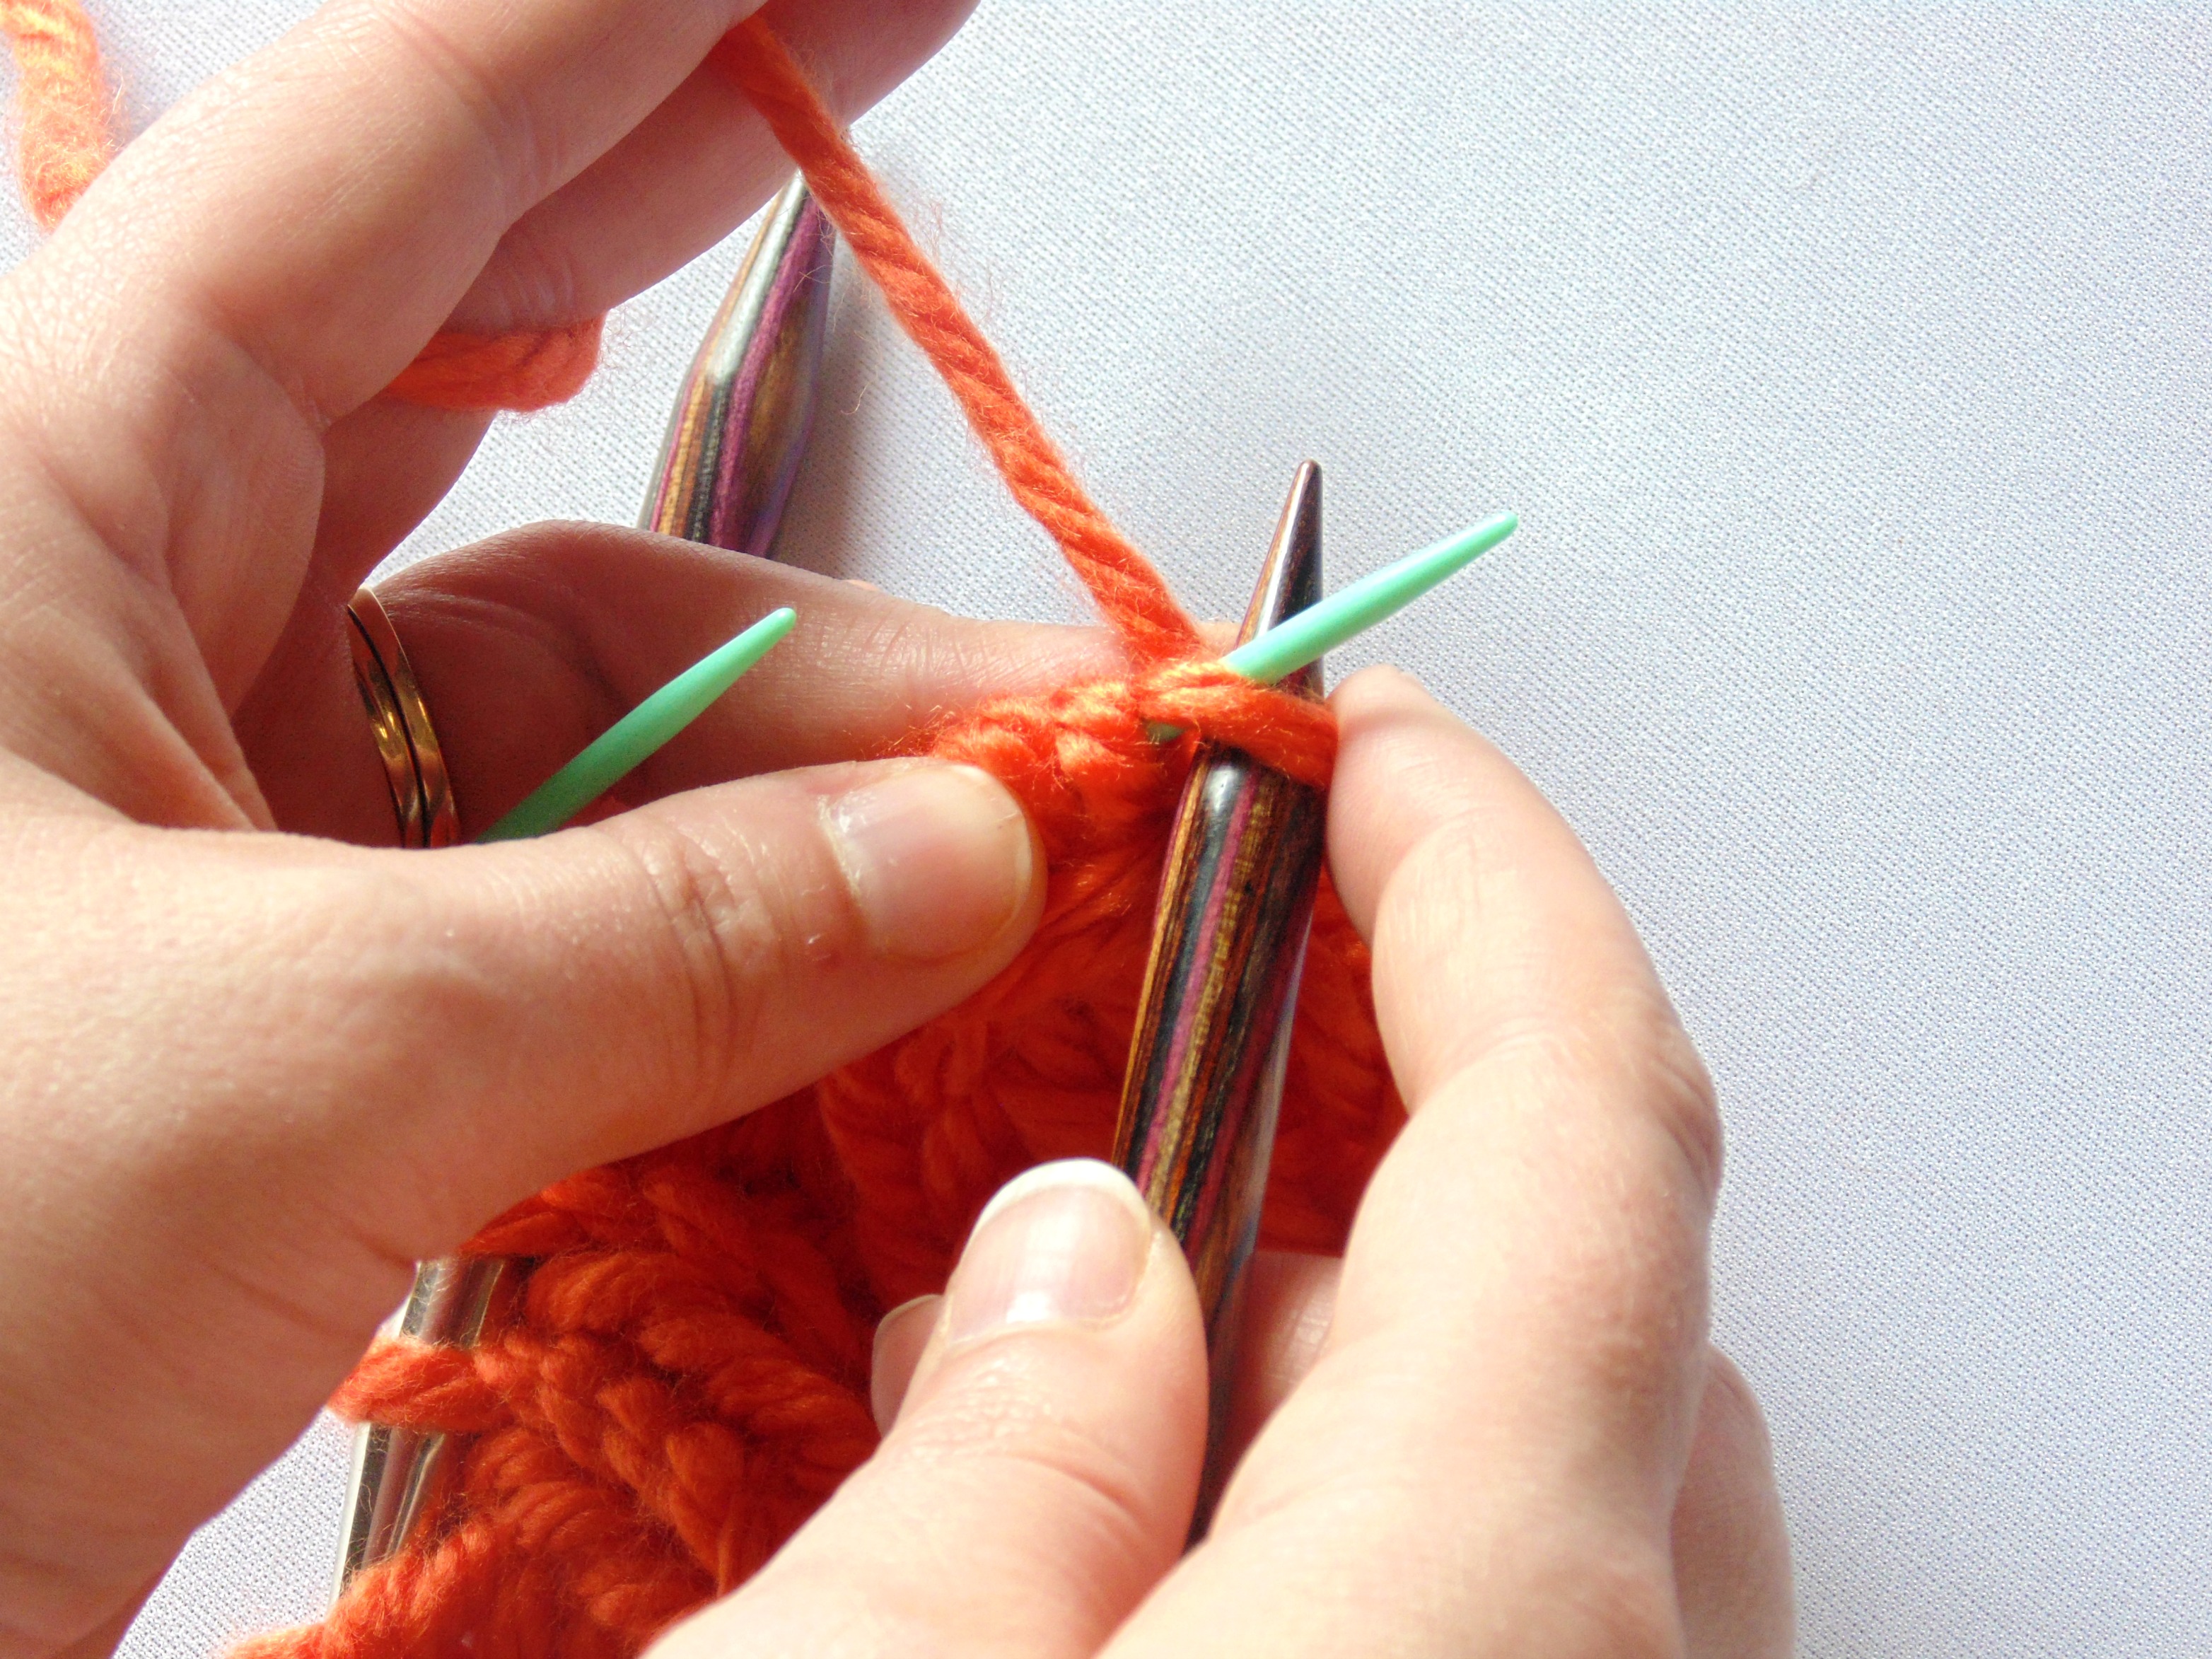
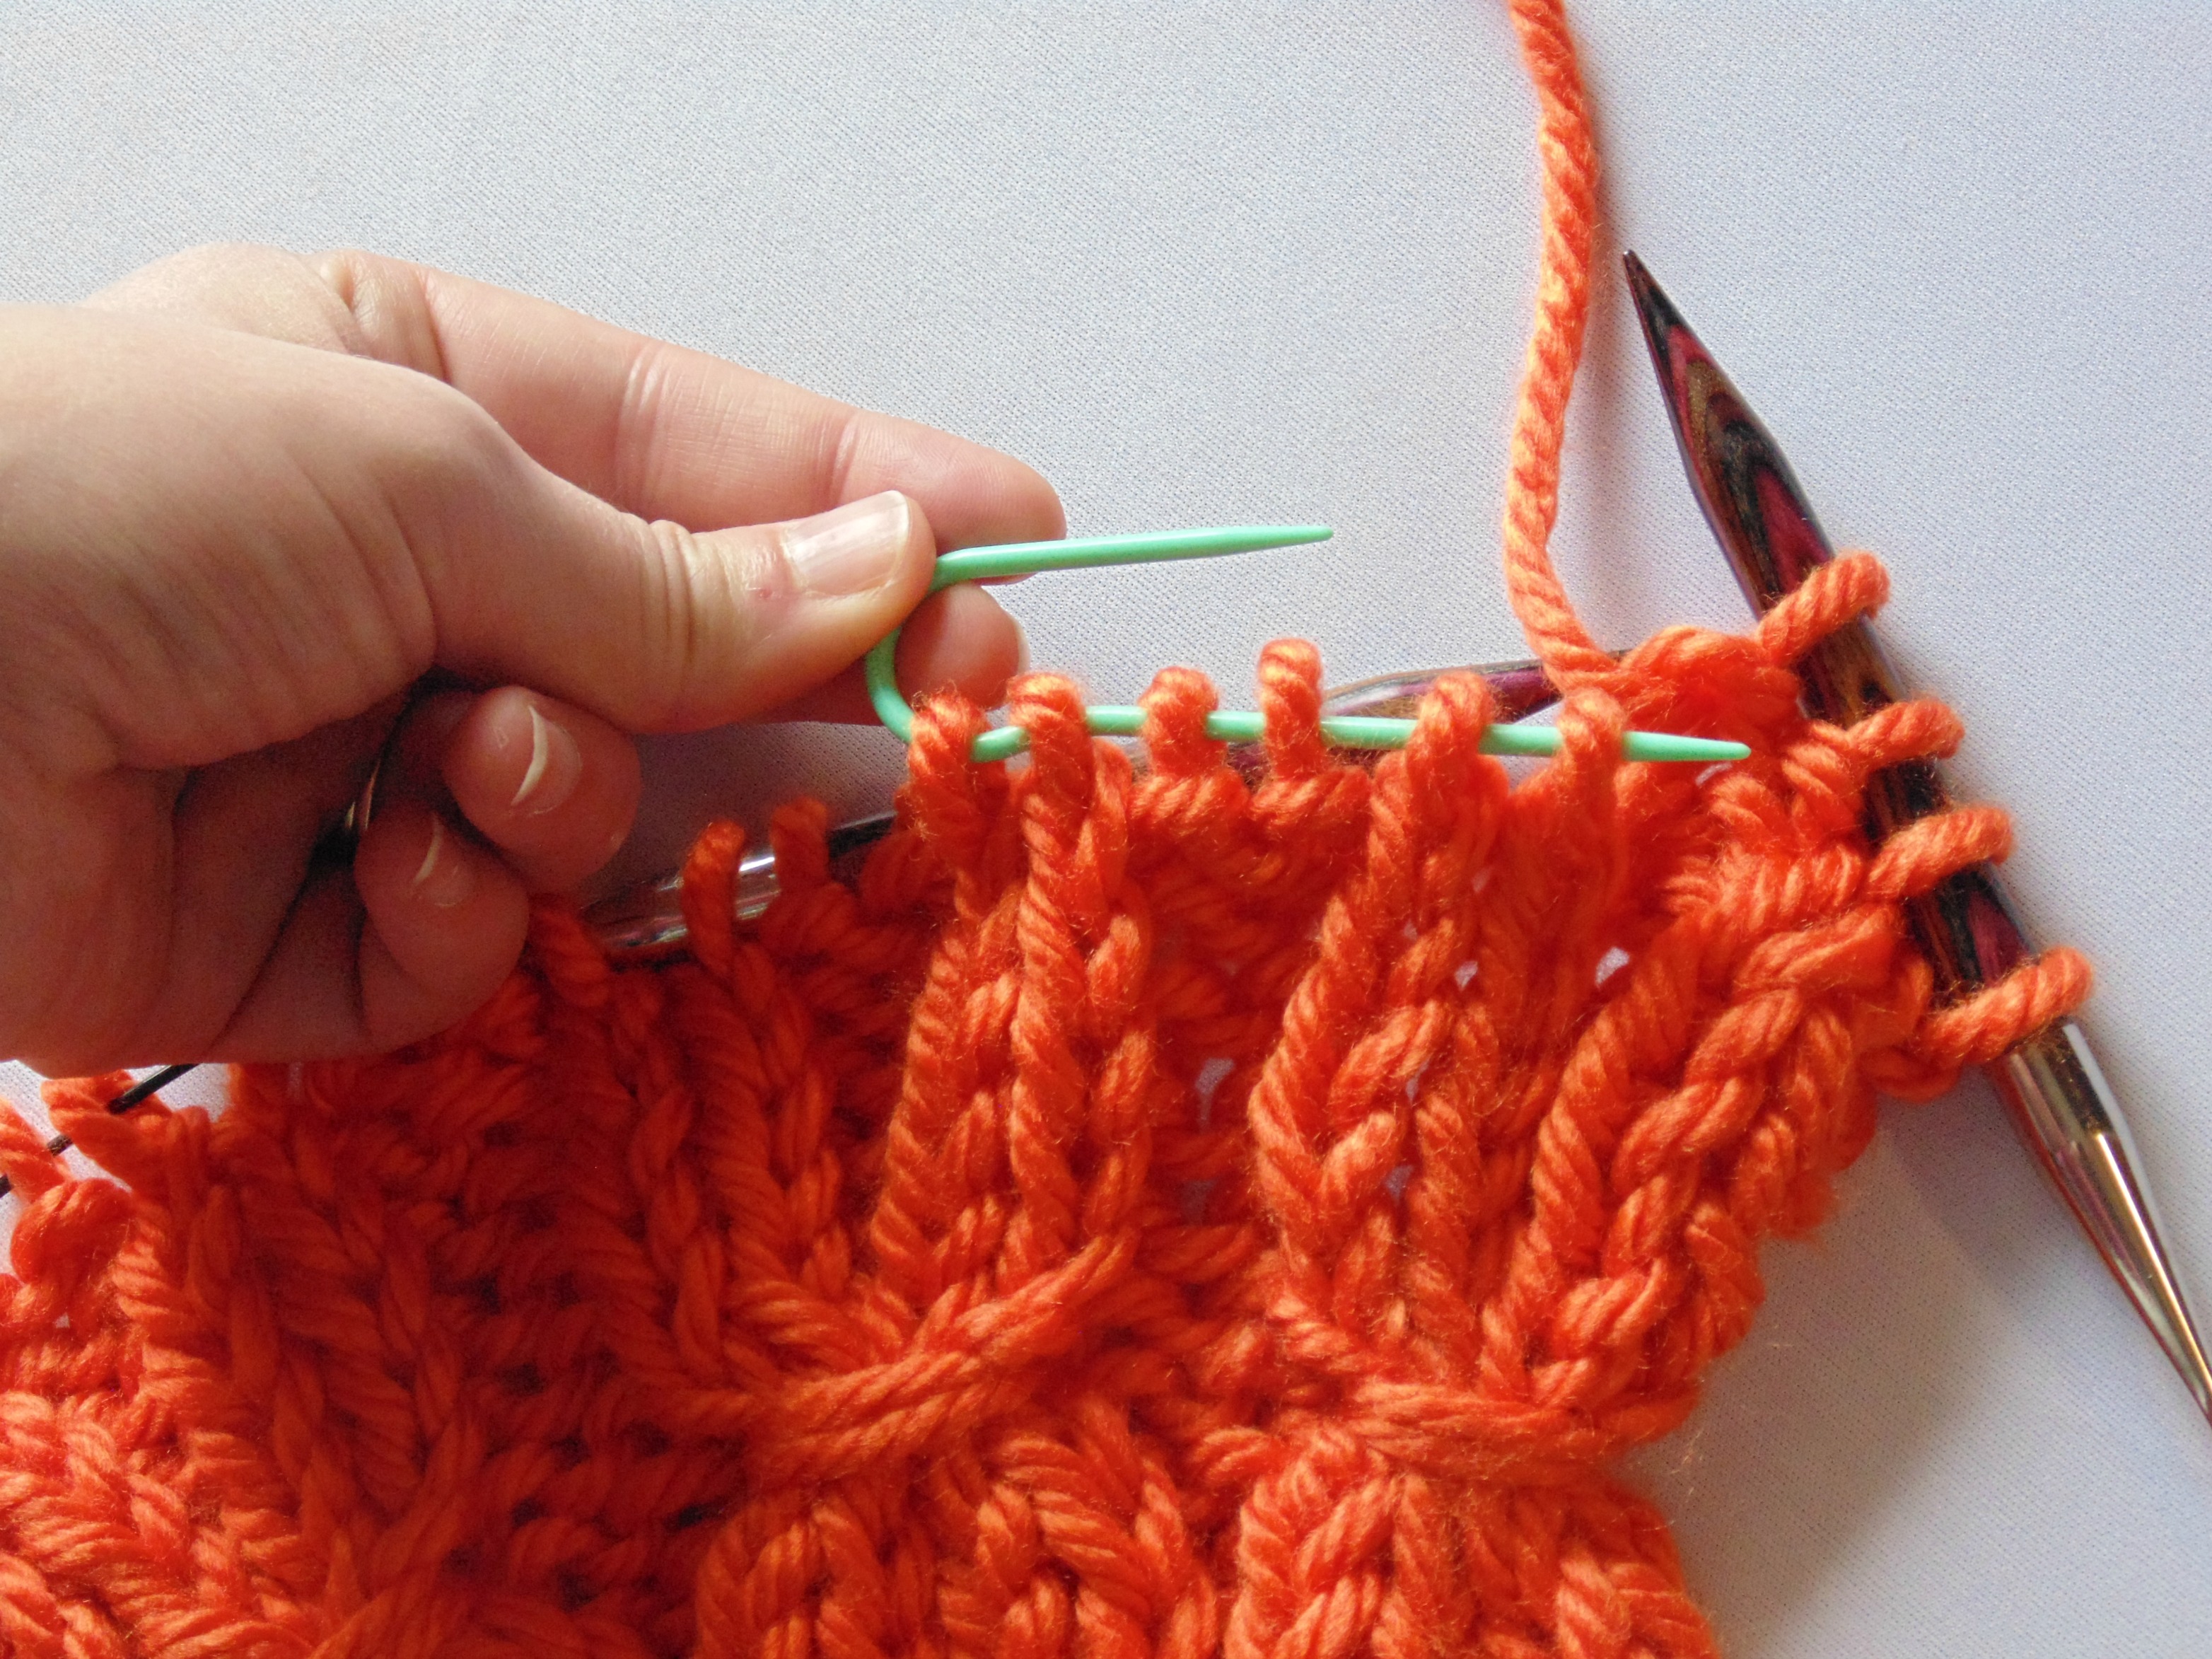
Slip the next 6 stitches onto cable or straight needle to the front,
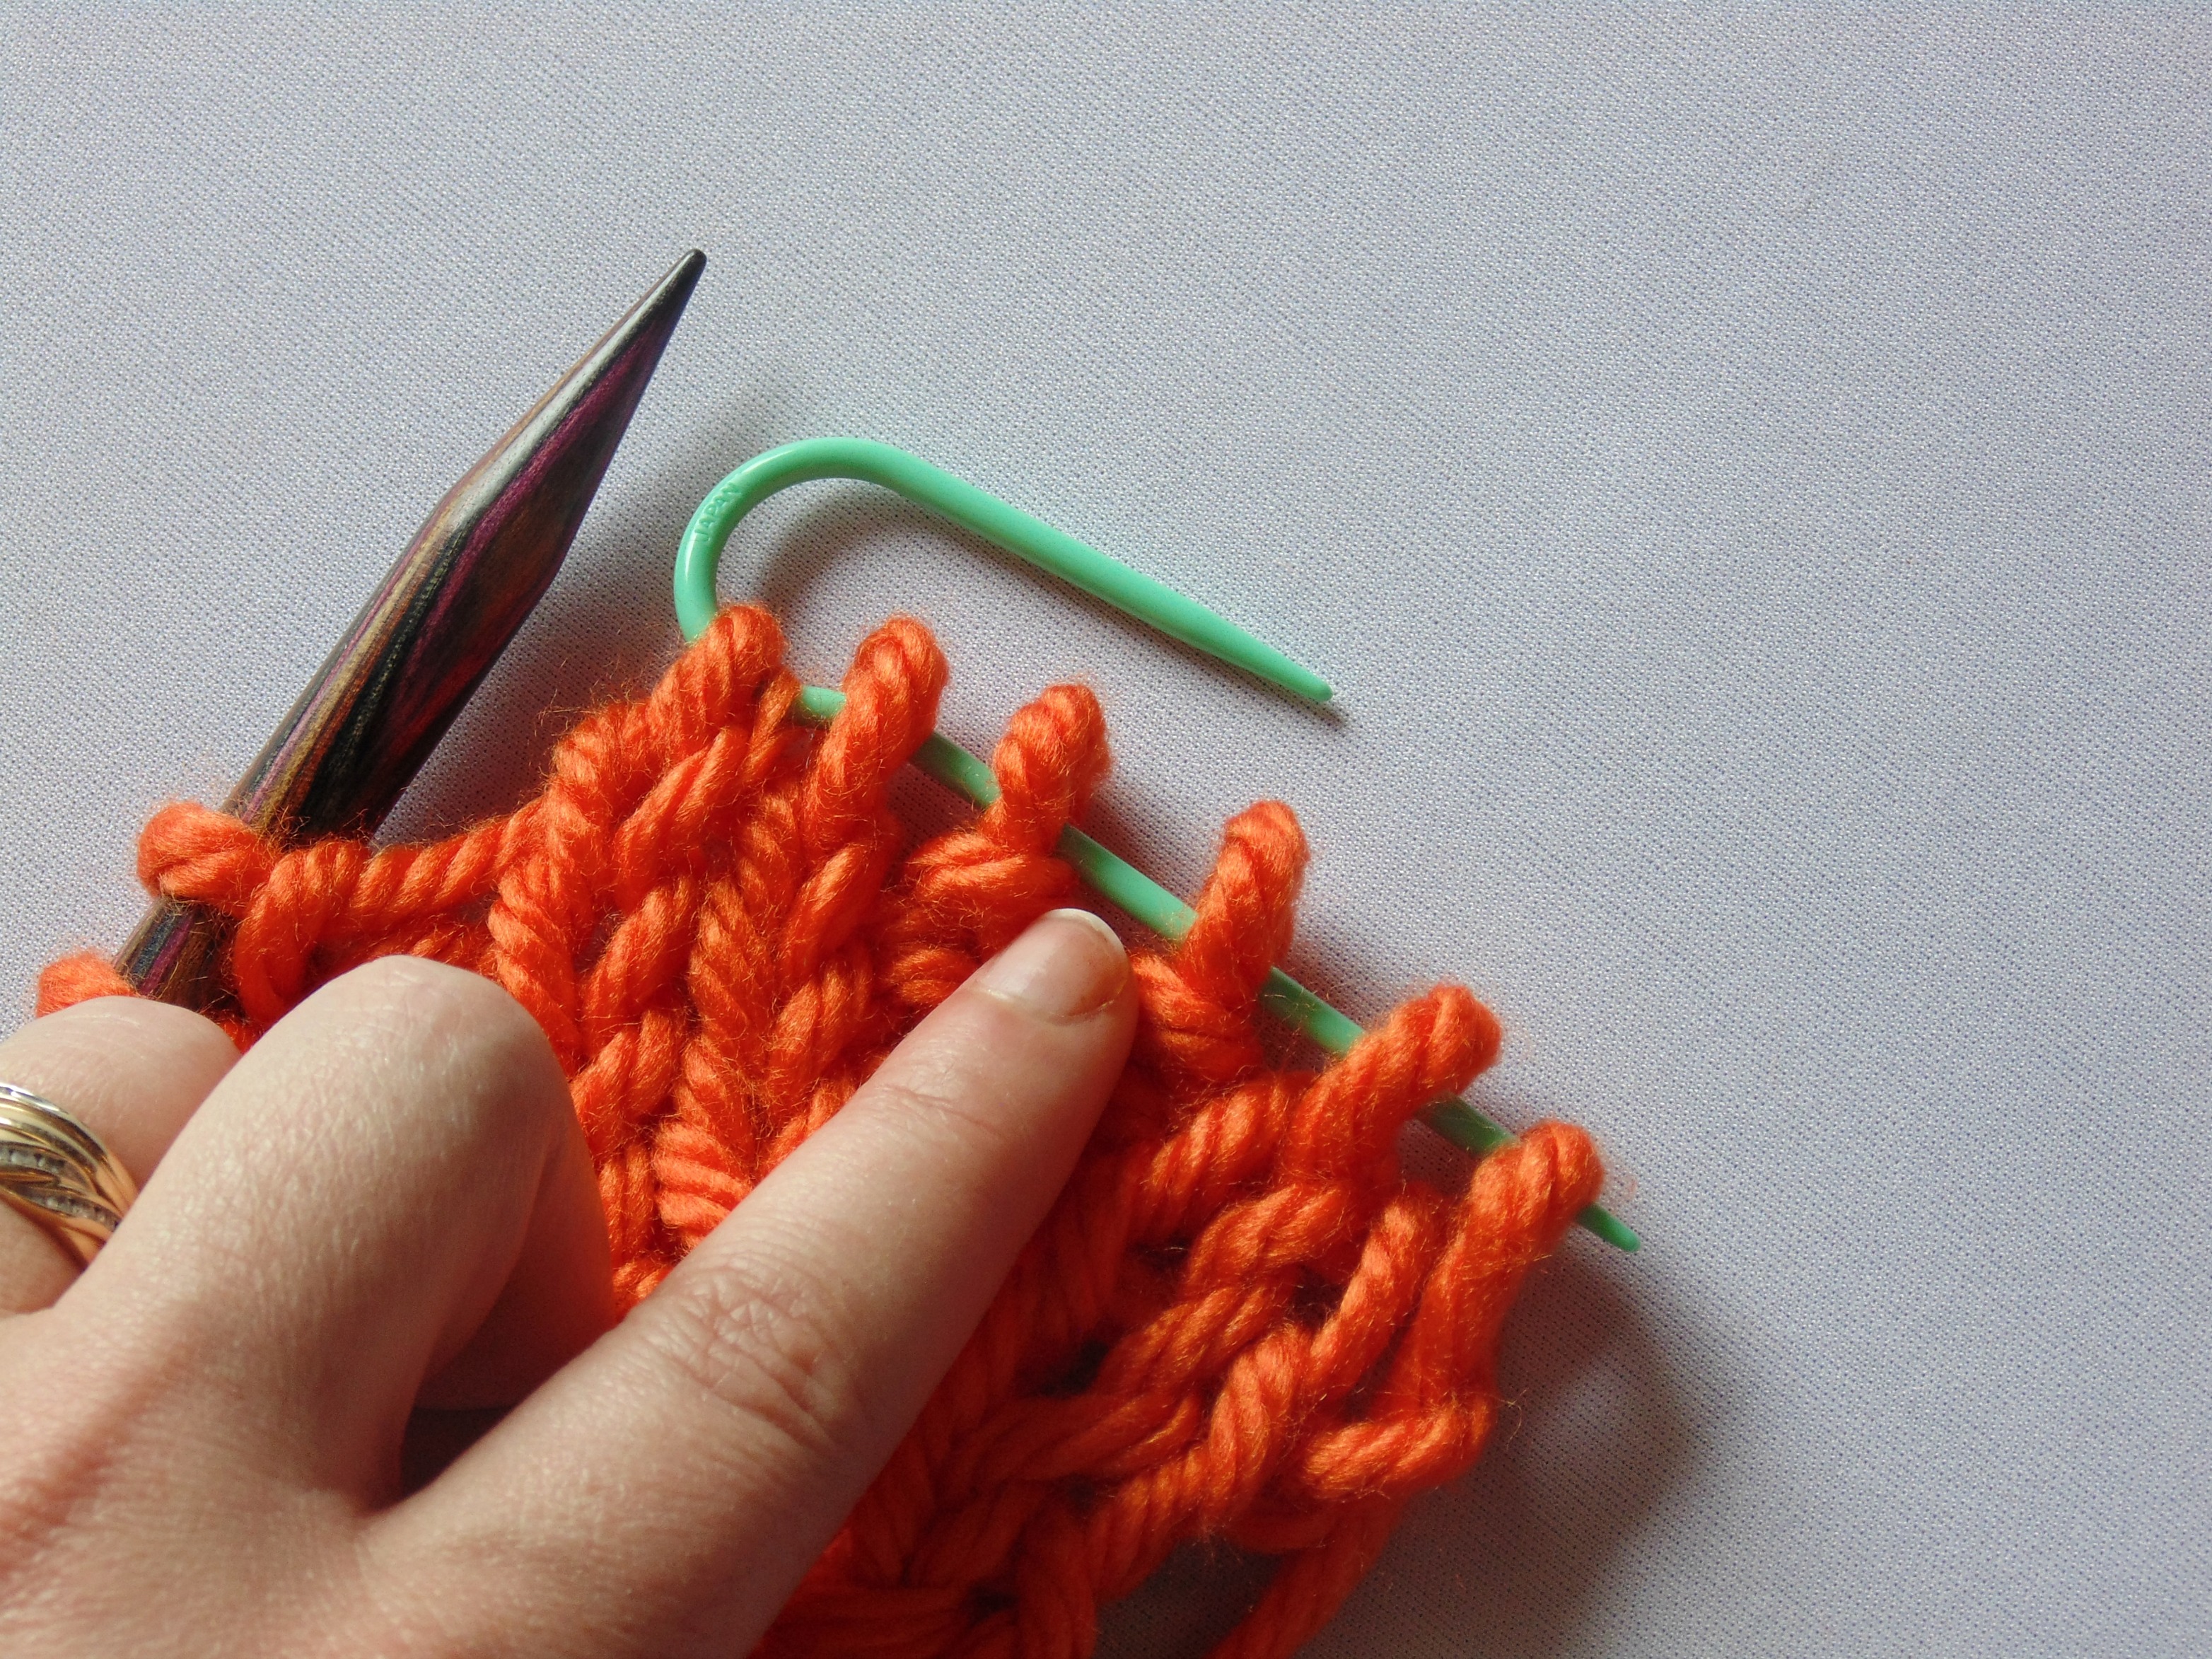
Wrap the working yarn 2 times from left to right around the 6 stitches on the cable needle. Do NOT pull tight.
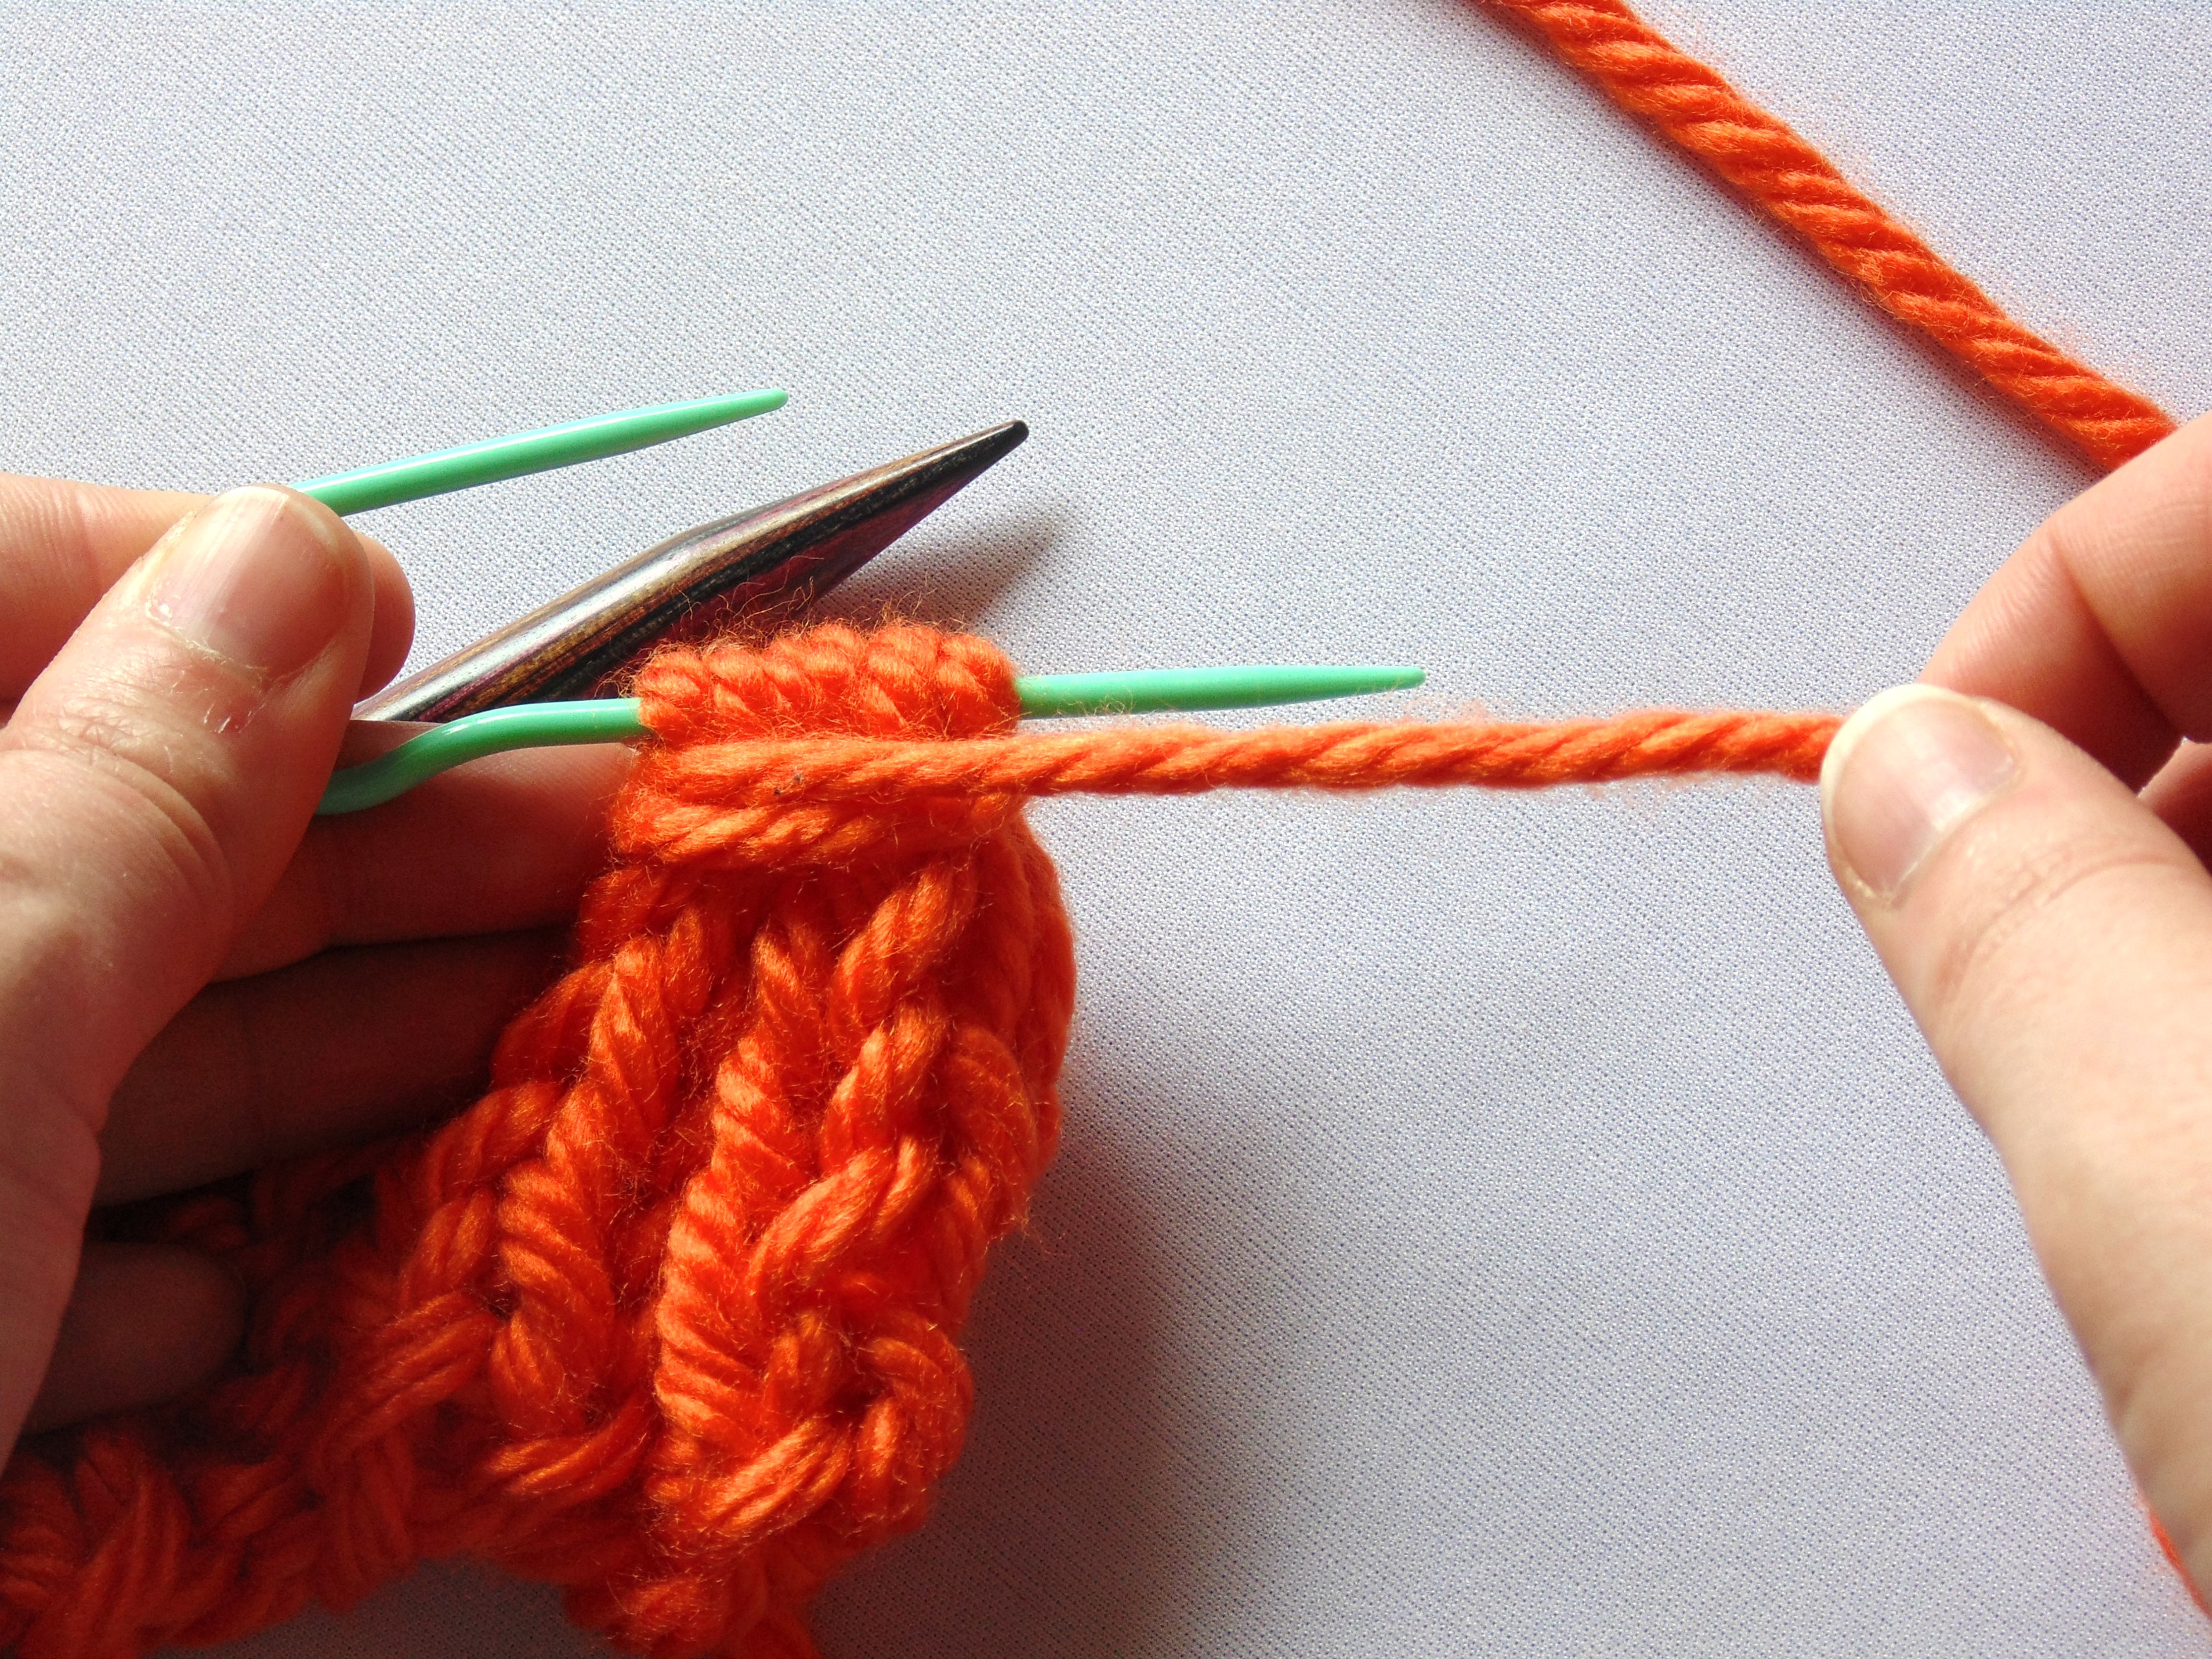
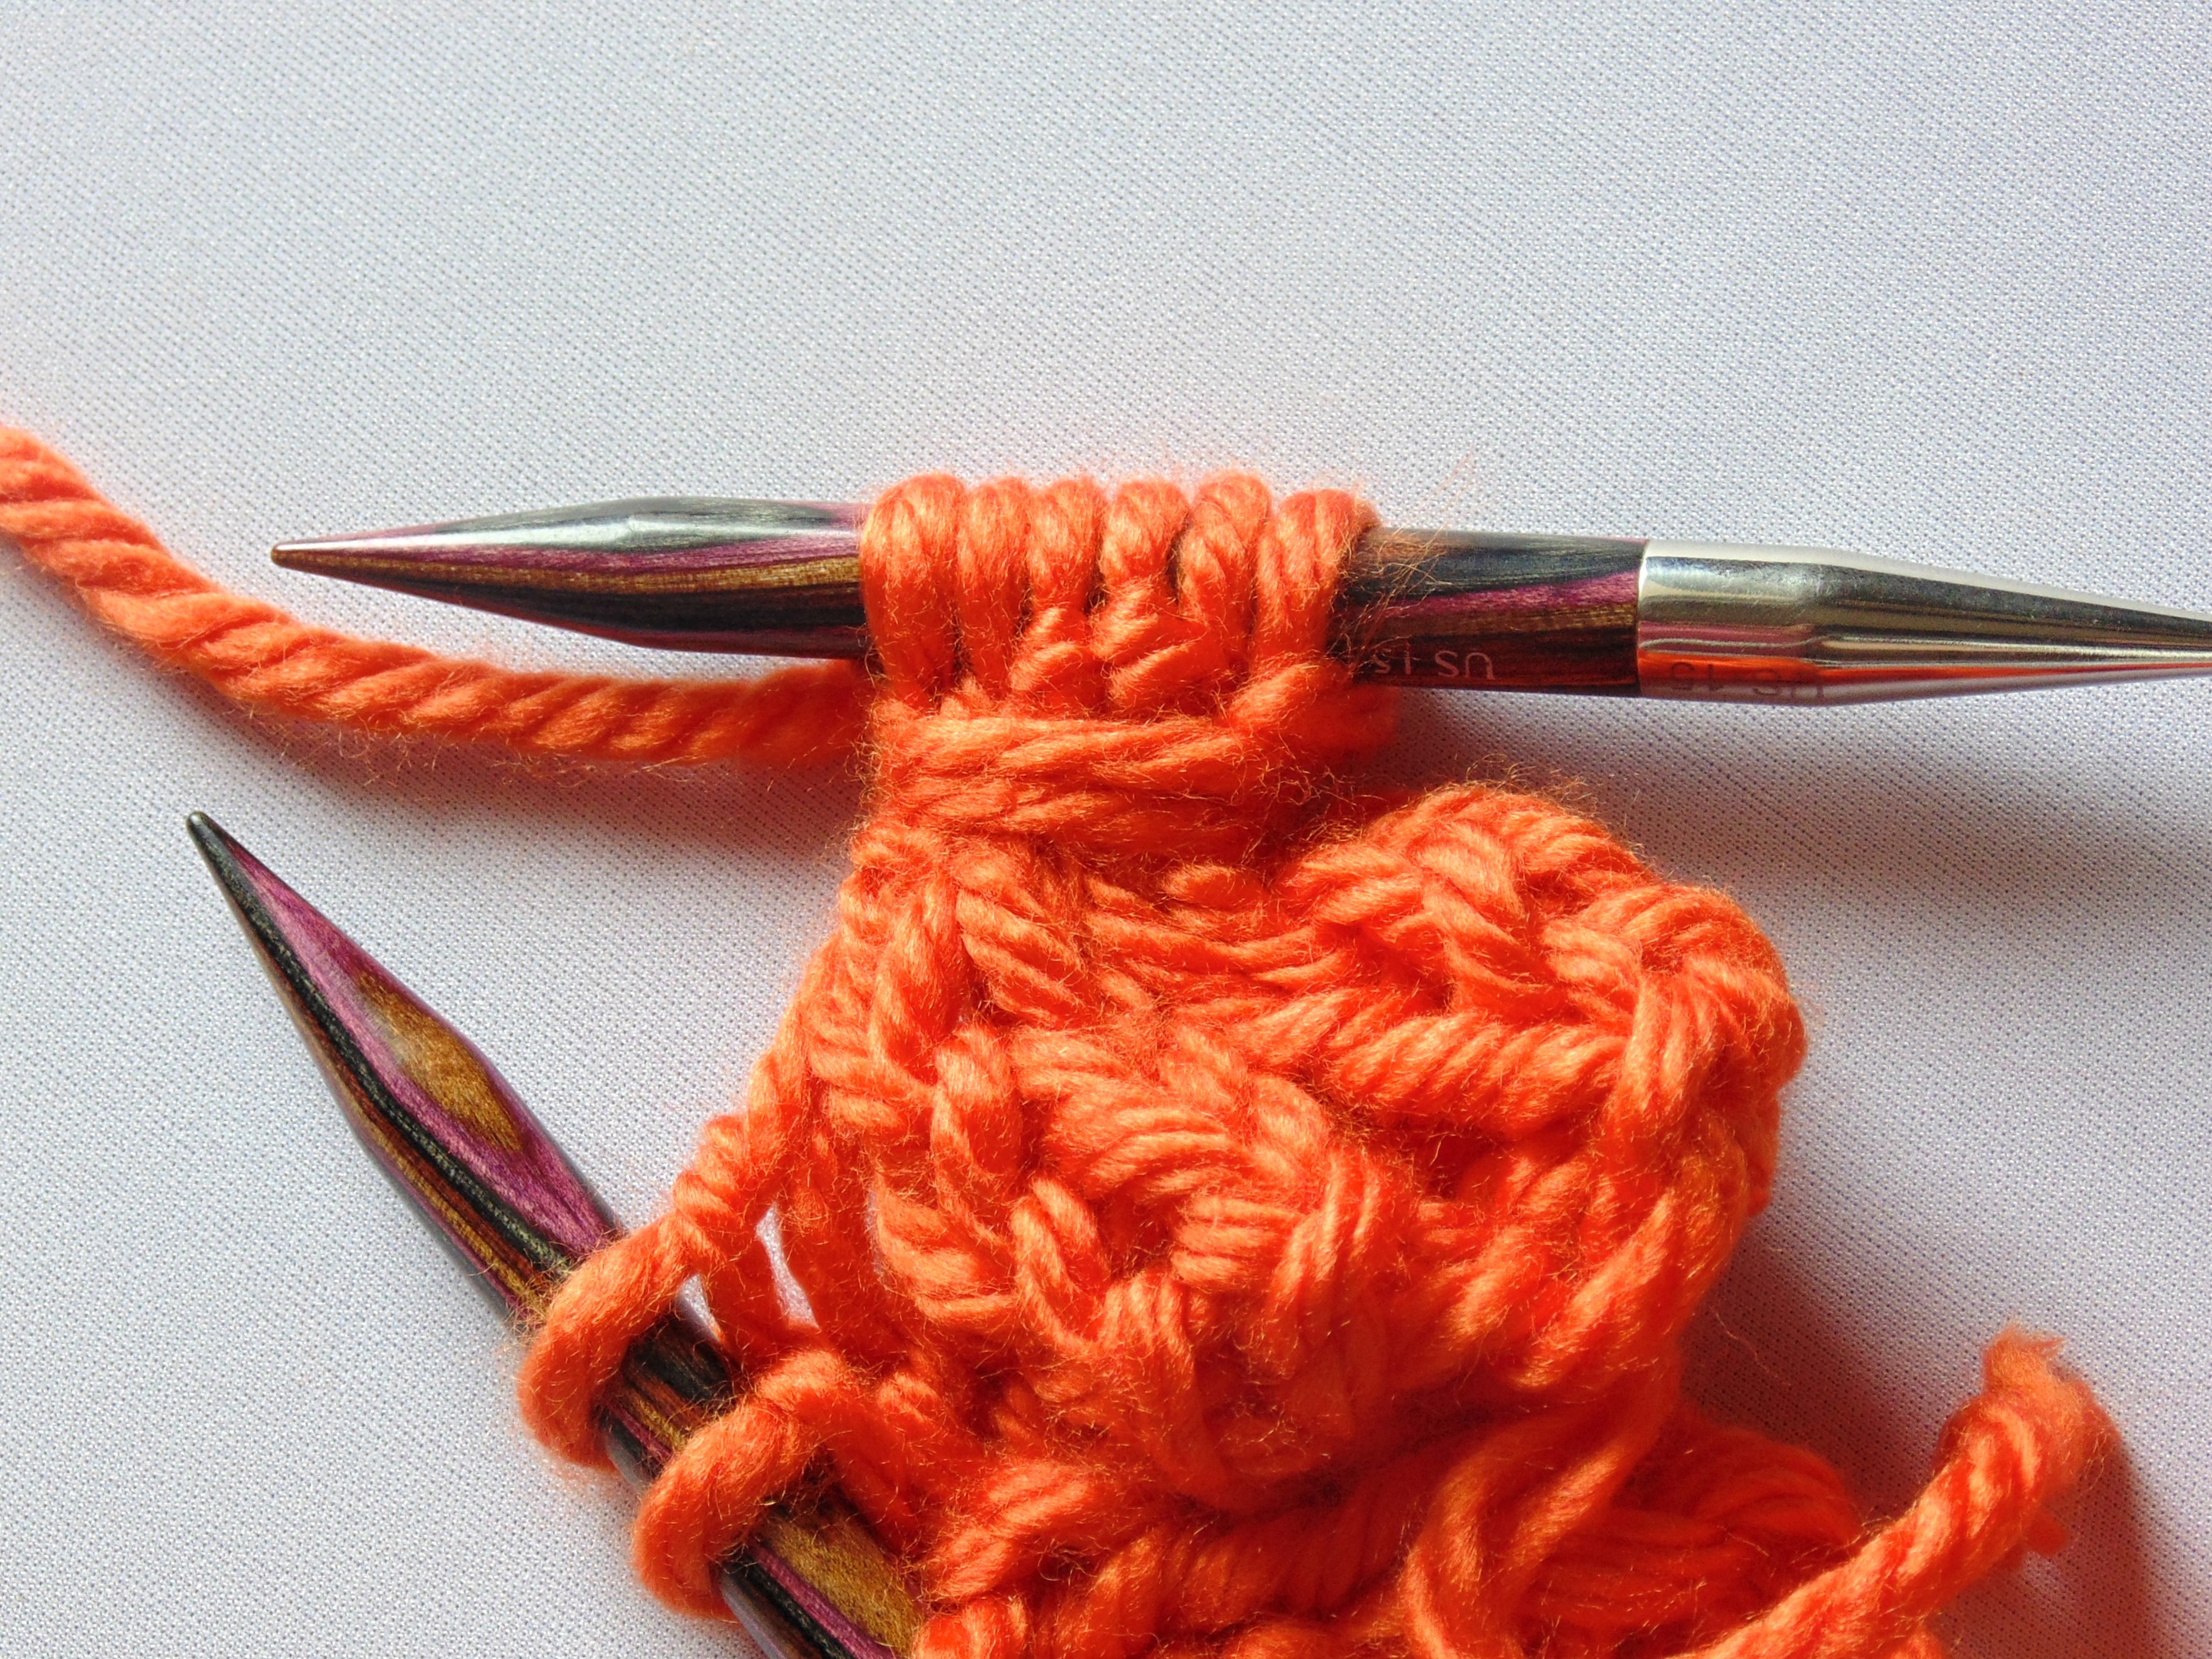
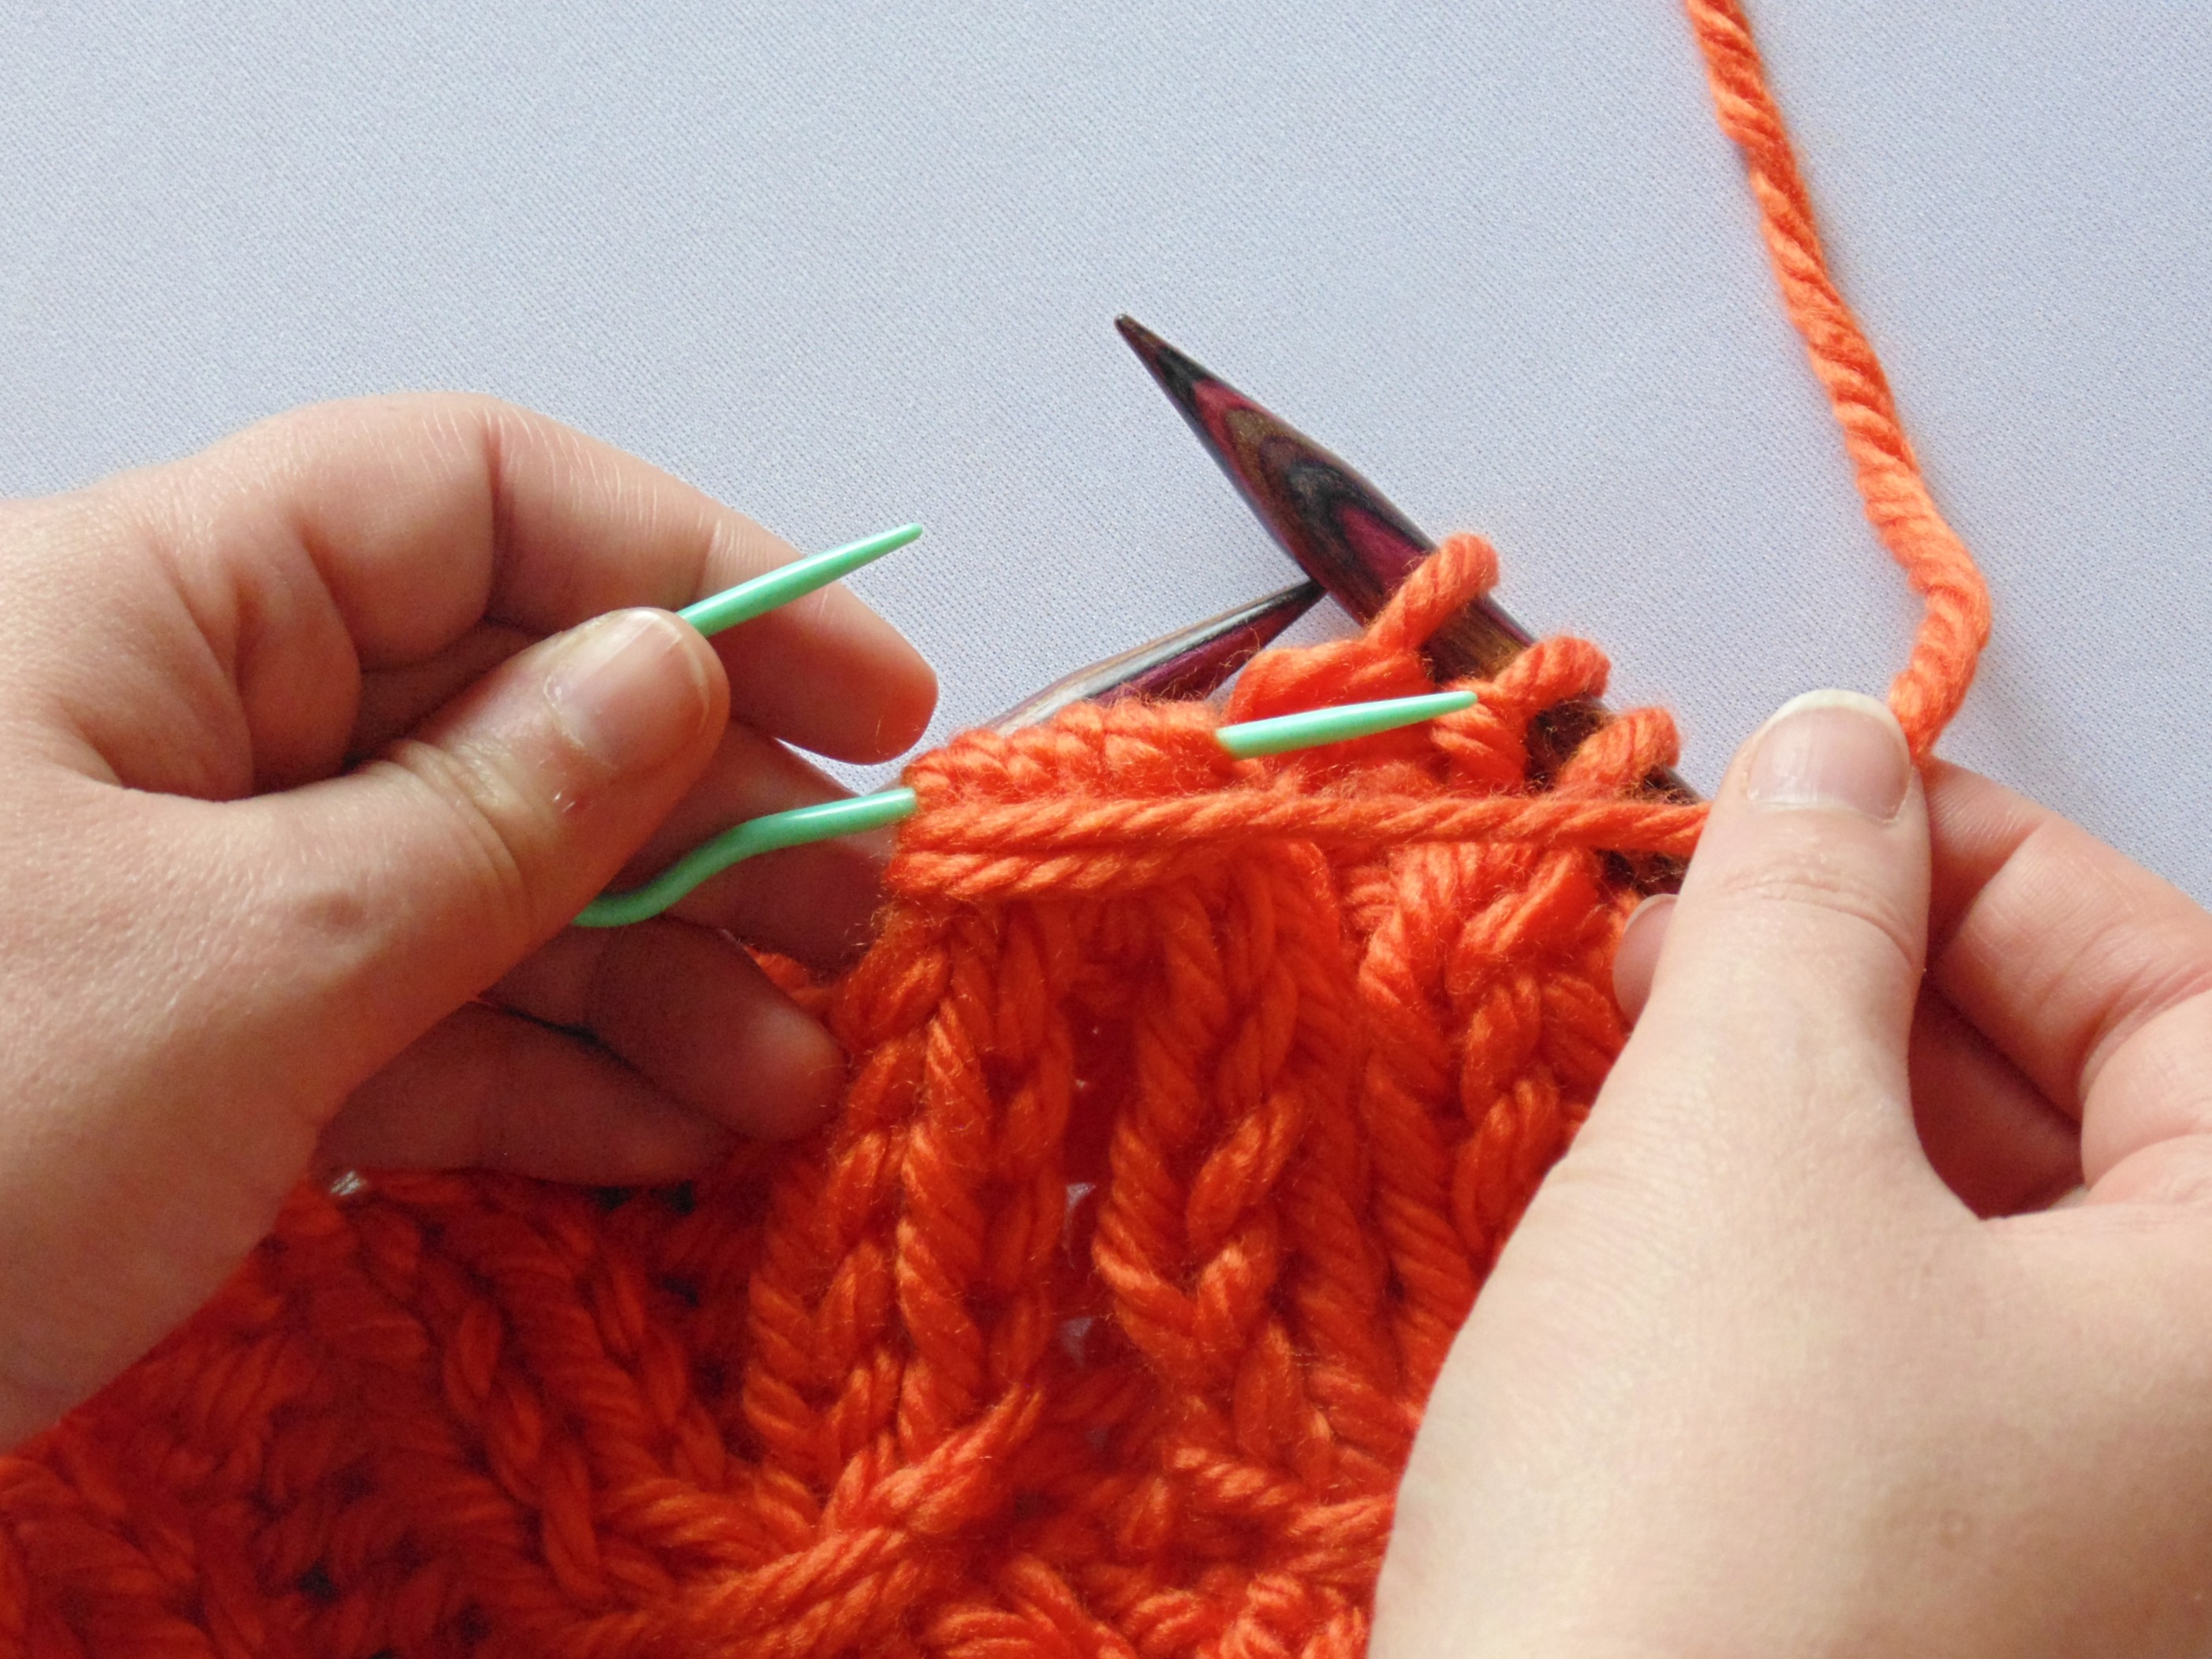
Working the 6 stitches off of the cable needle, K2, P2, P2
This is what it will look like when the first one is completed.
Purl the next two stitches and then Complete the smocking stitch again.
Slip the next 6 stitches onto cable or straight needle to the front,
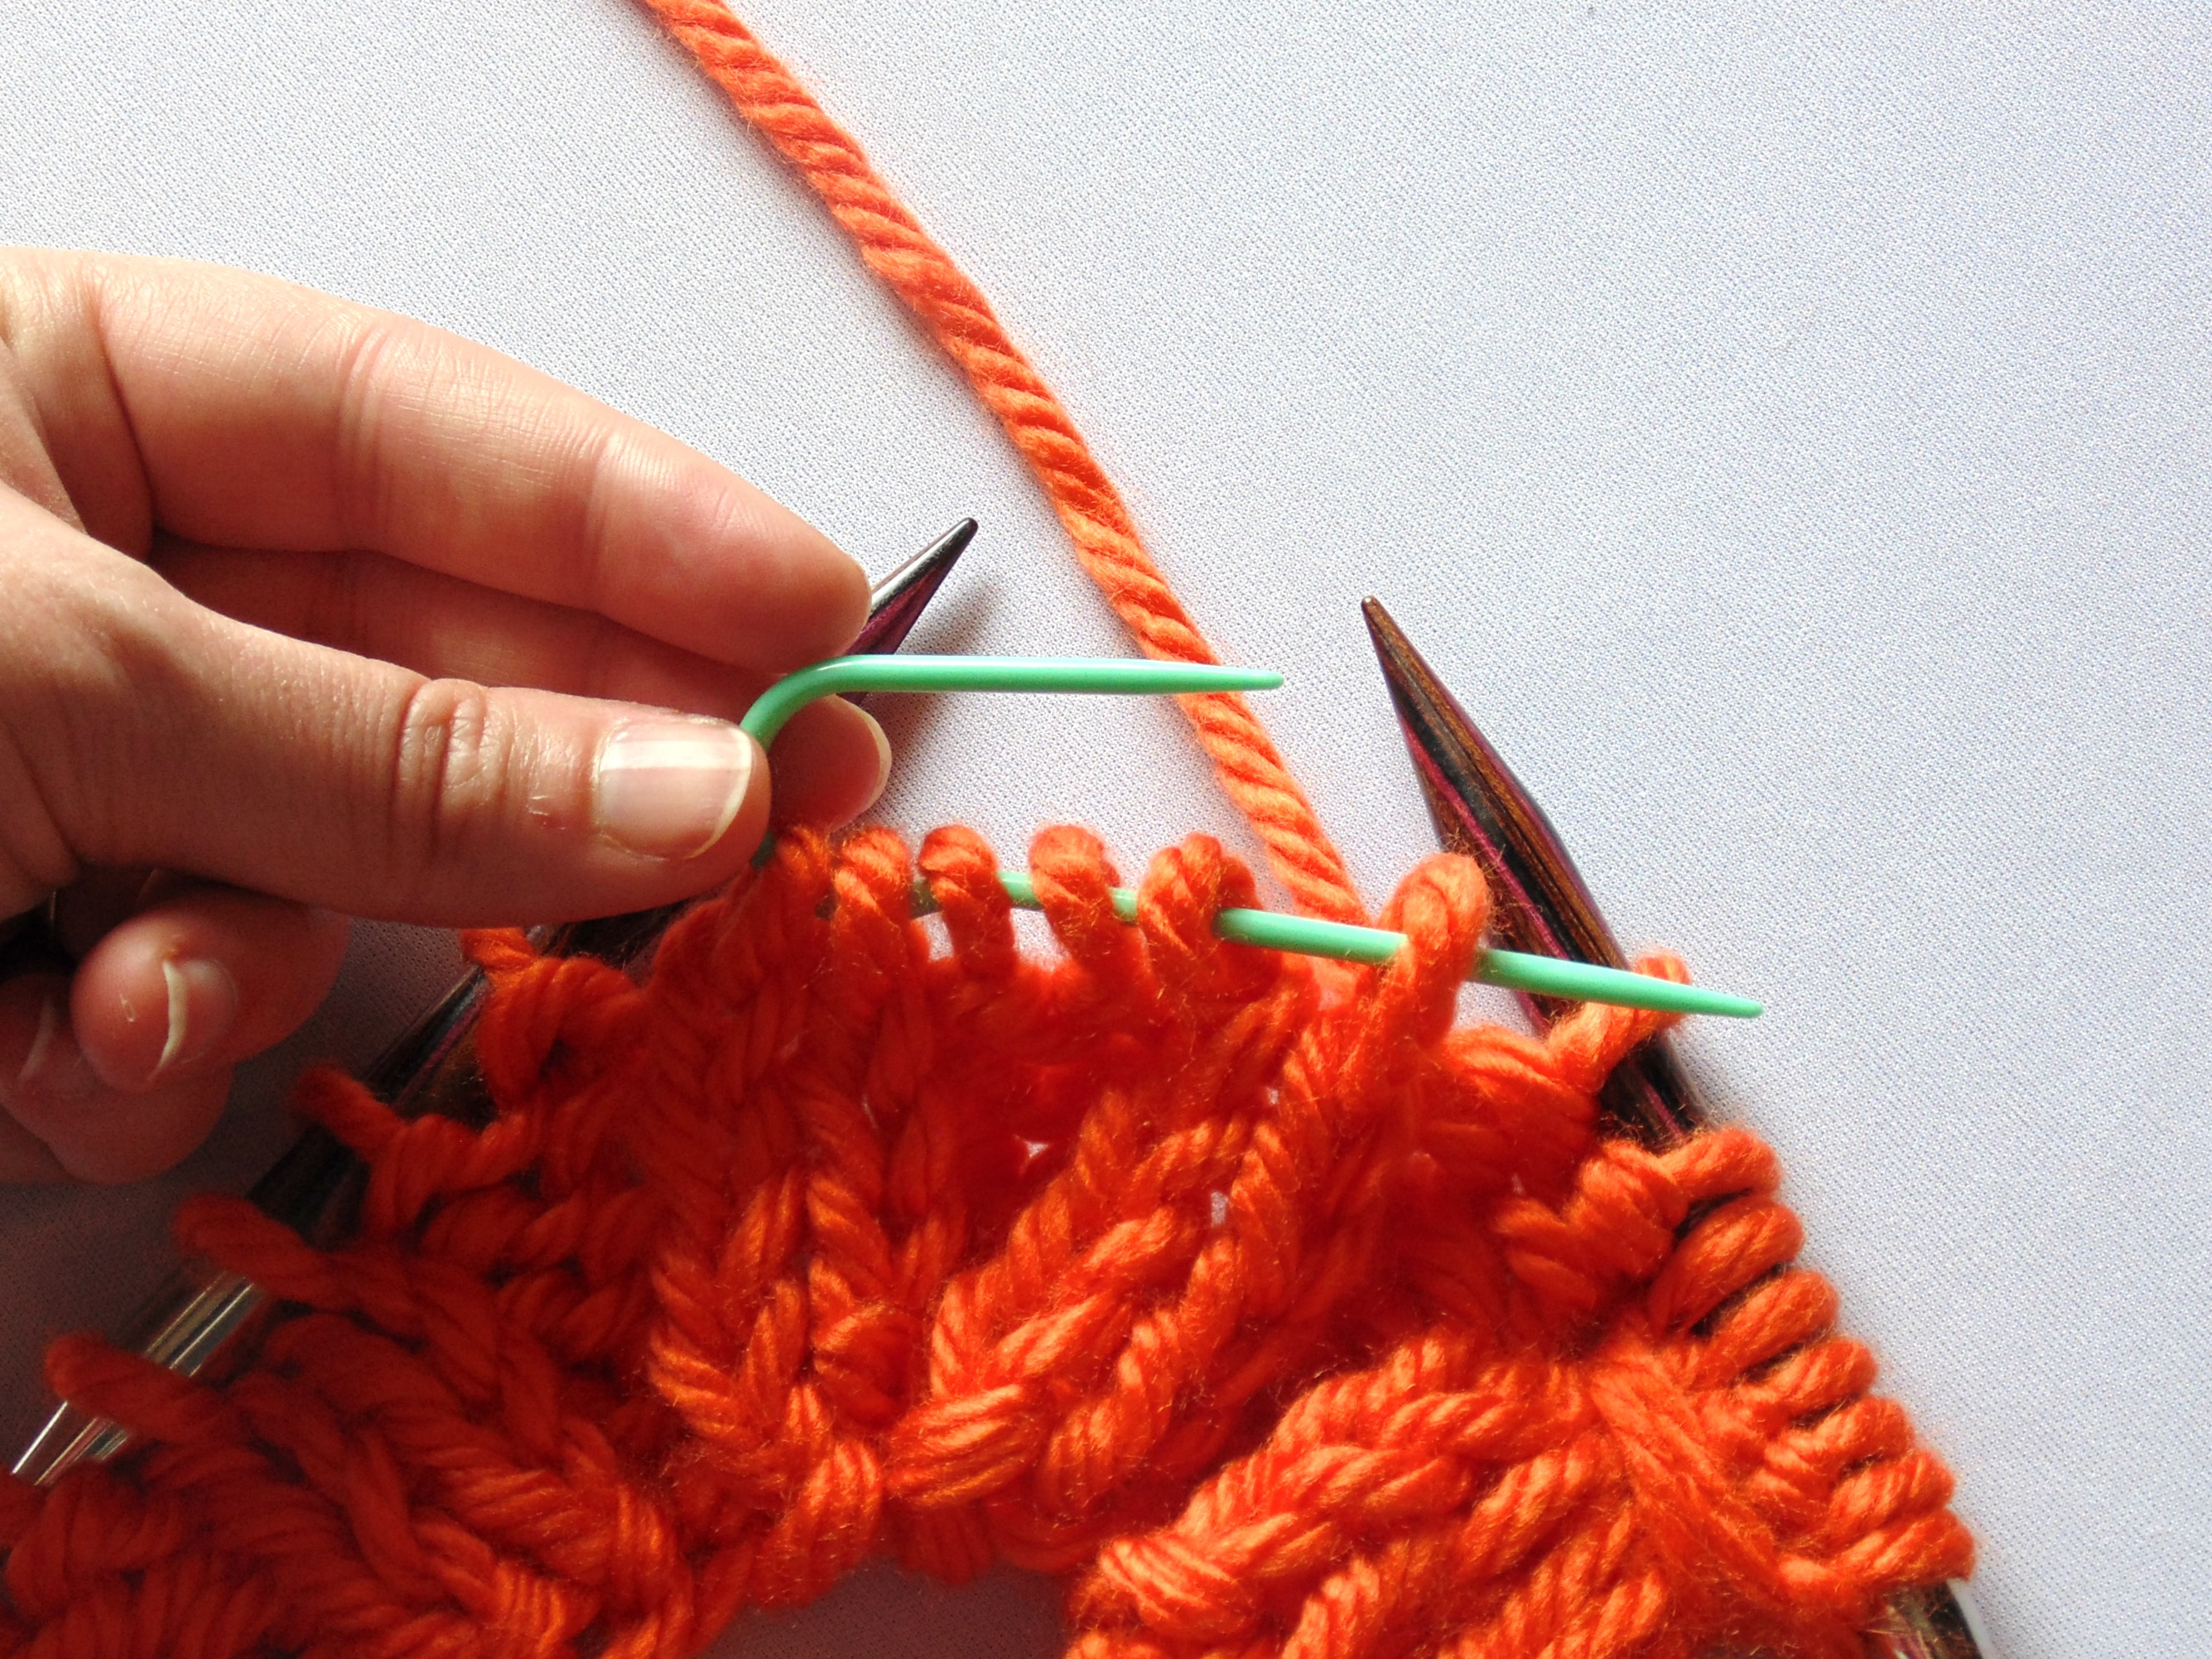
Wrap the working yarn 2 times from left to right around the 6 stitches on the cable needle. Do NOT pull tight.

Working the 6 stitches off of the cable needle, k2, p2, k2 to complete the smocking stitch, p2 This is the second Smocking stitch completed and P2.
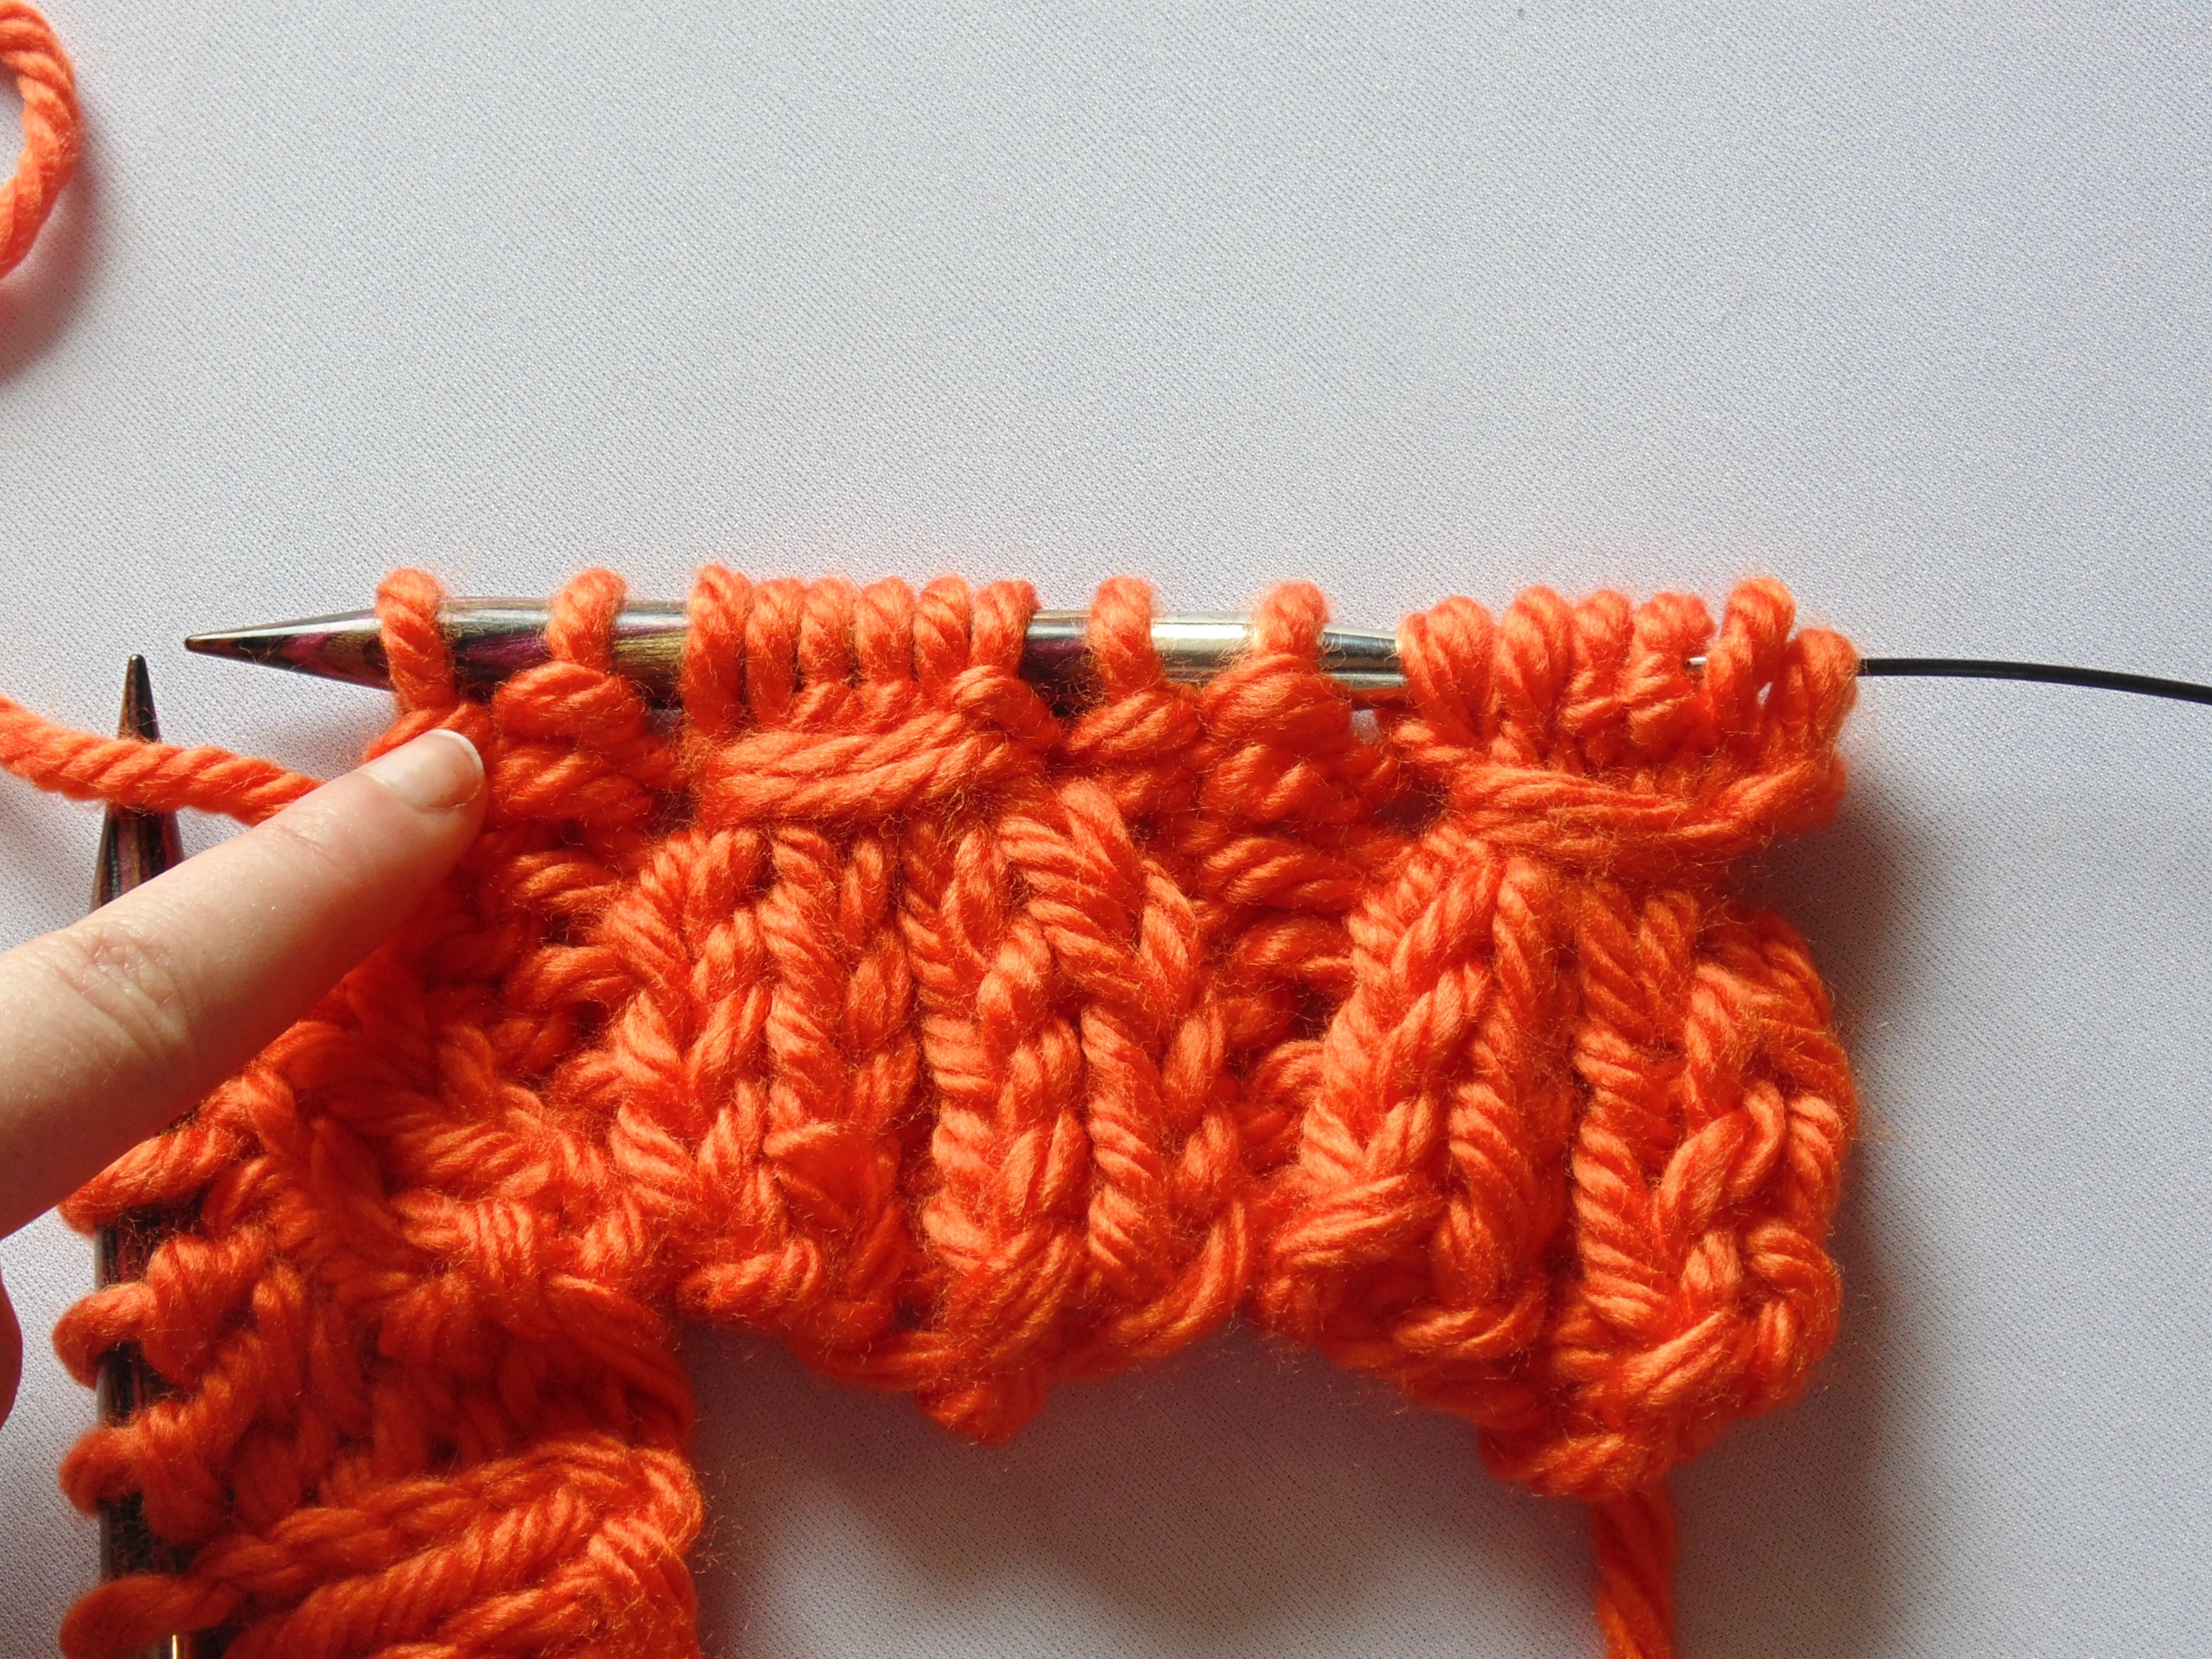
Complete the smocking stitch one more time and p2 to complete the row.
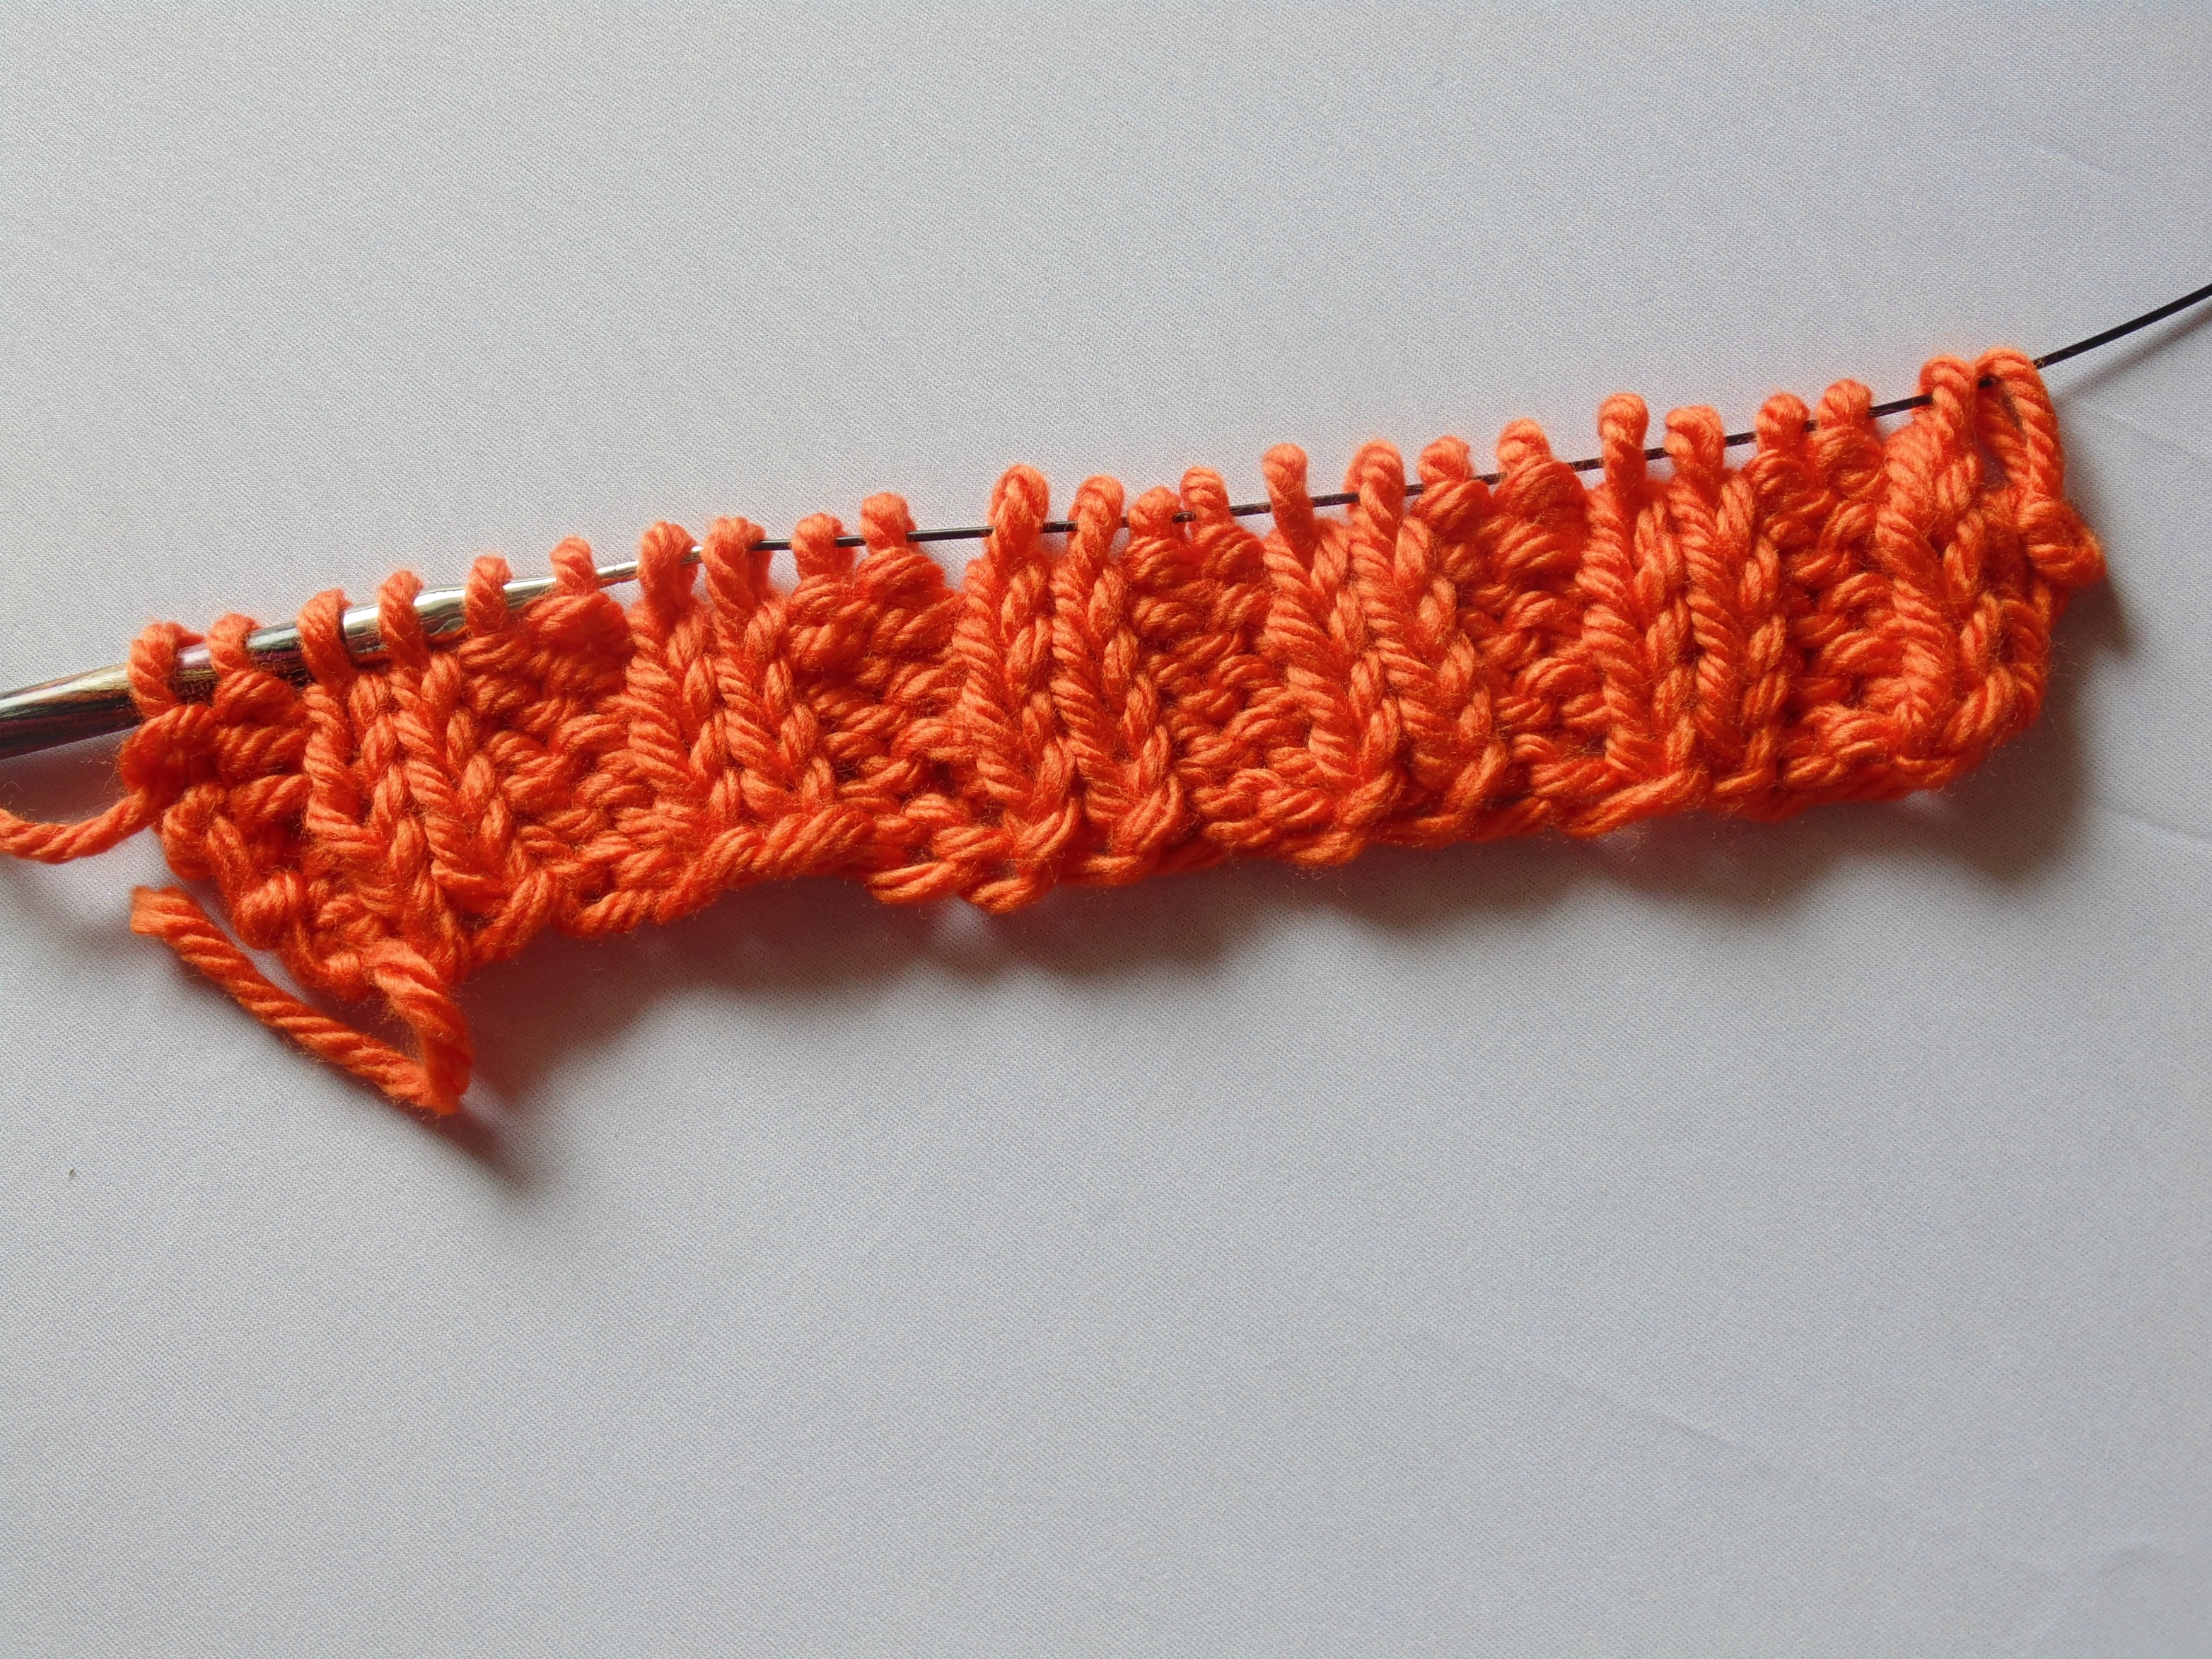
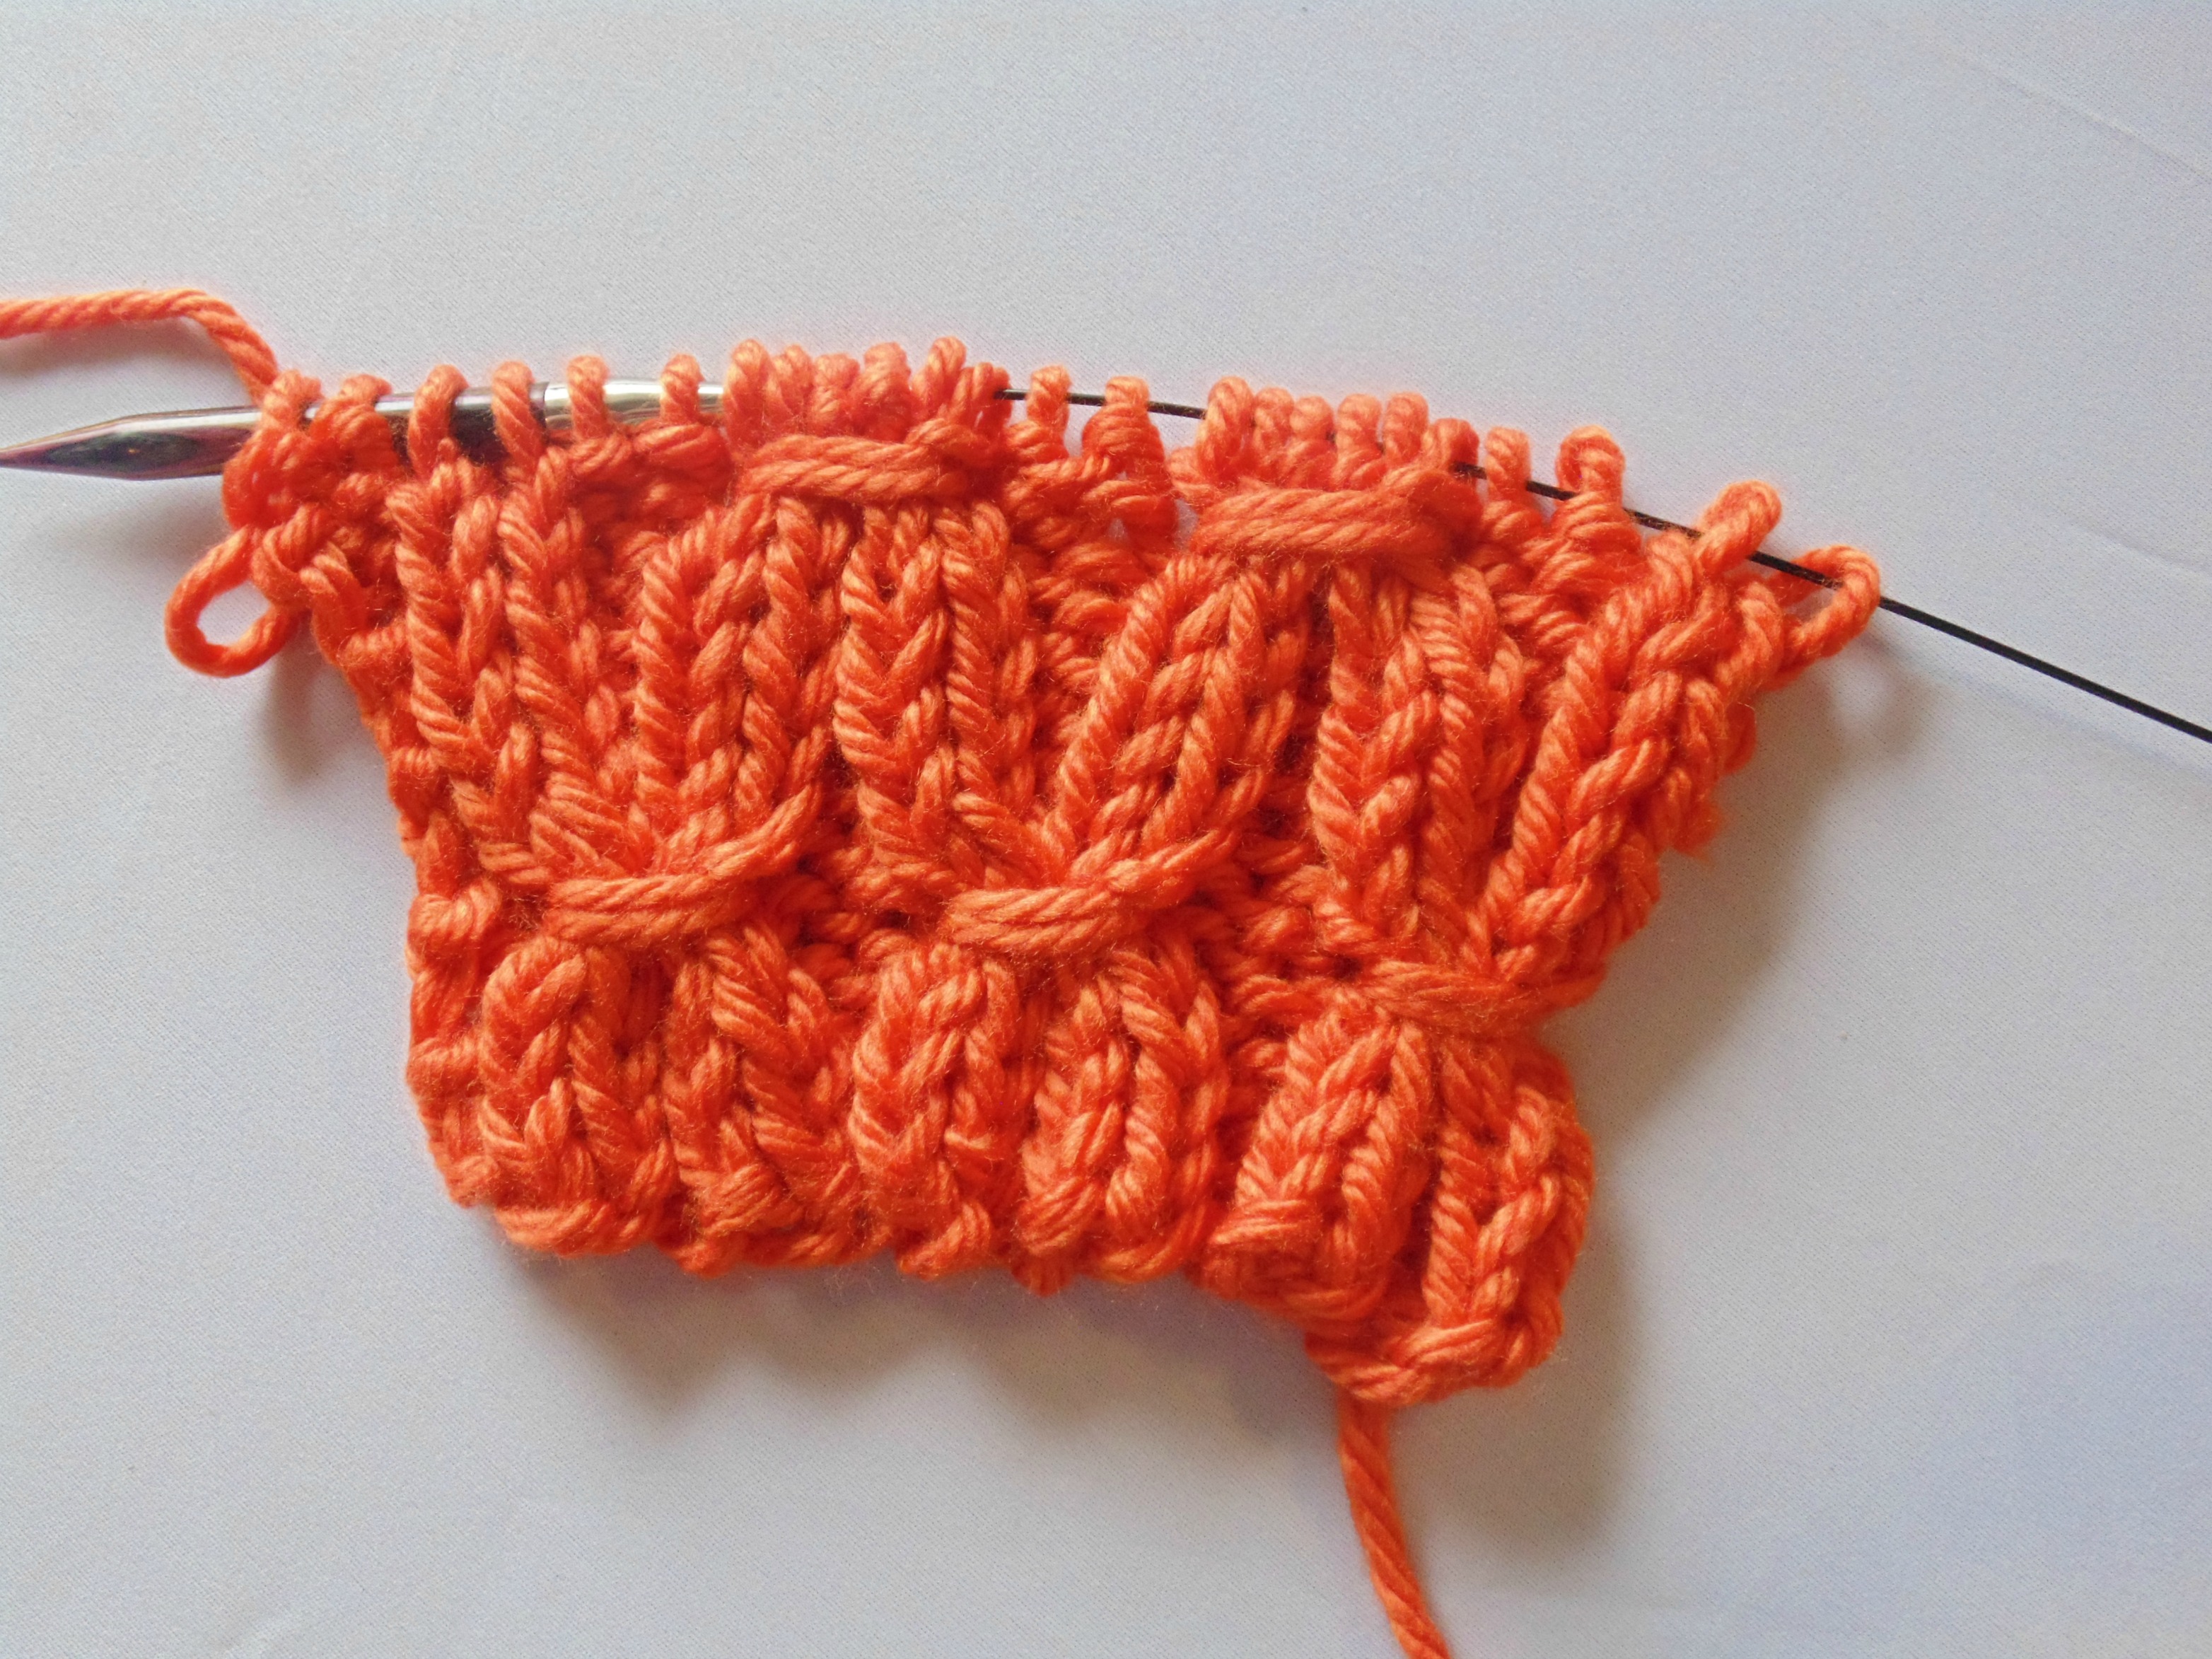
Finished row:
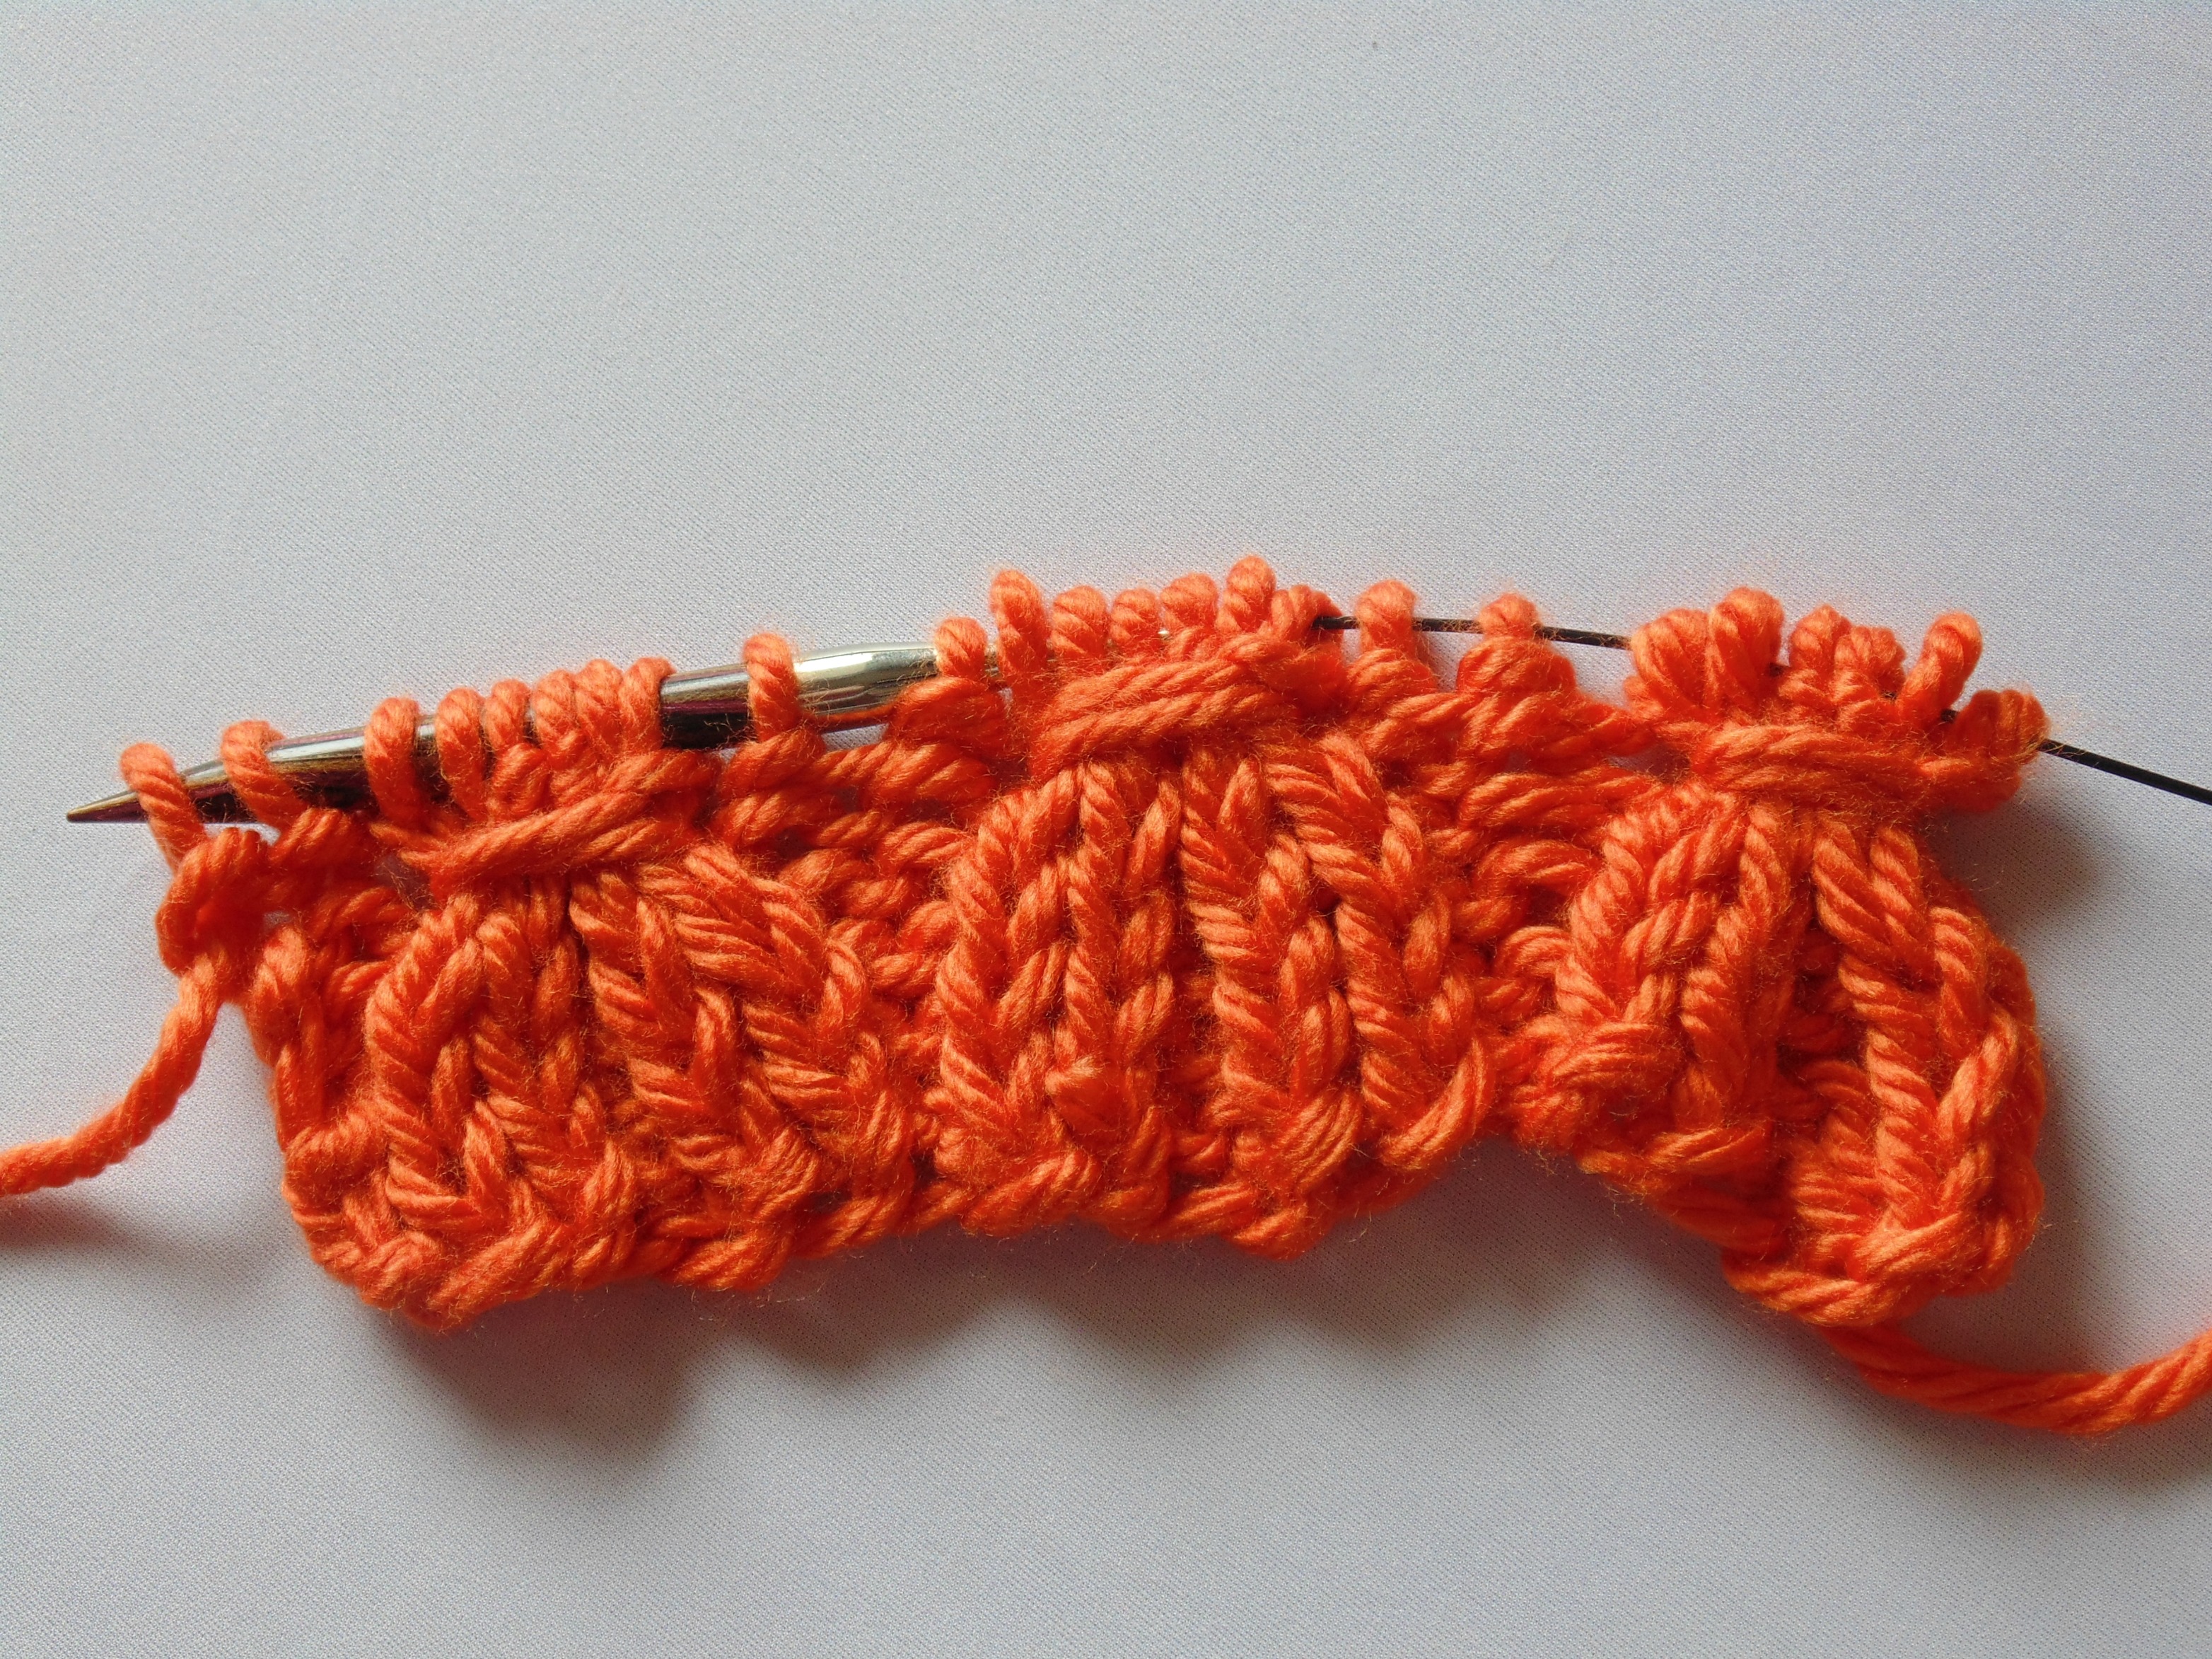
Rows 7-11: K2, p2
Completed section:
Row 12: K2, p2, * Smocking Stitch, p2, repeat from * to last 4 stitches, k2, p2.
Let’s break it down:
K2, p2 and then slip the next 6 stitches onto the cable needle.
Wrap the working yarn 2 times from left to right around the 6 stitches on the cable needle. Do NOT pull tight.
Working the 6 stitches off of the cable needle, K2, P2, P2 to complete the smocking stitch, p2.
Complete the smocking stitch again, p2, k2, p2 to complete the row.
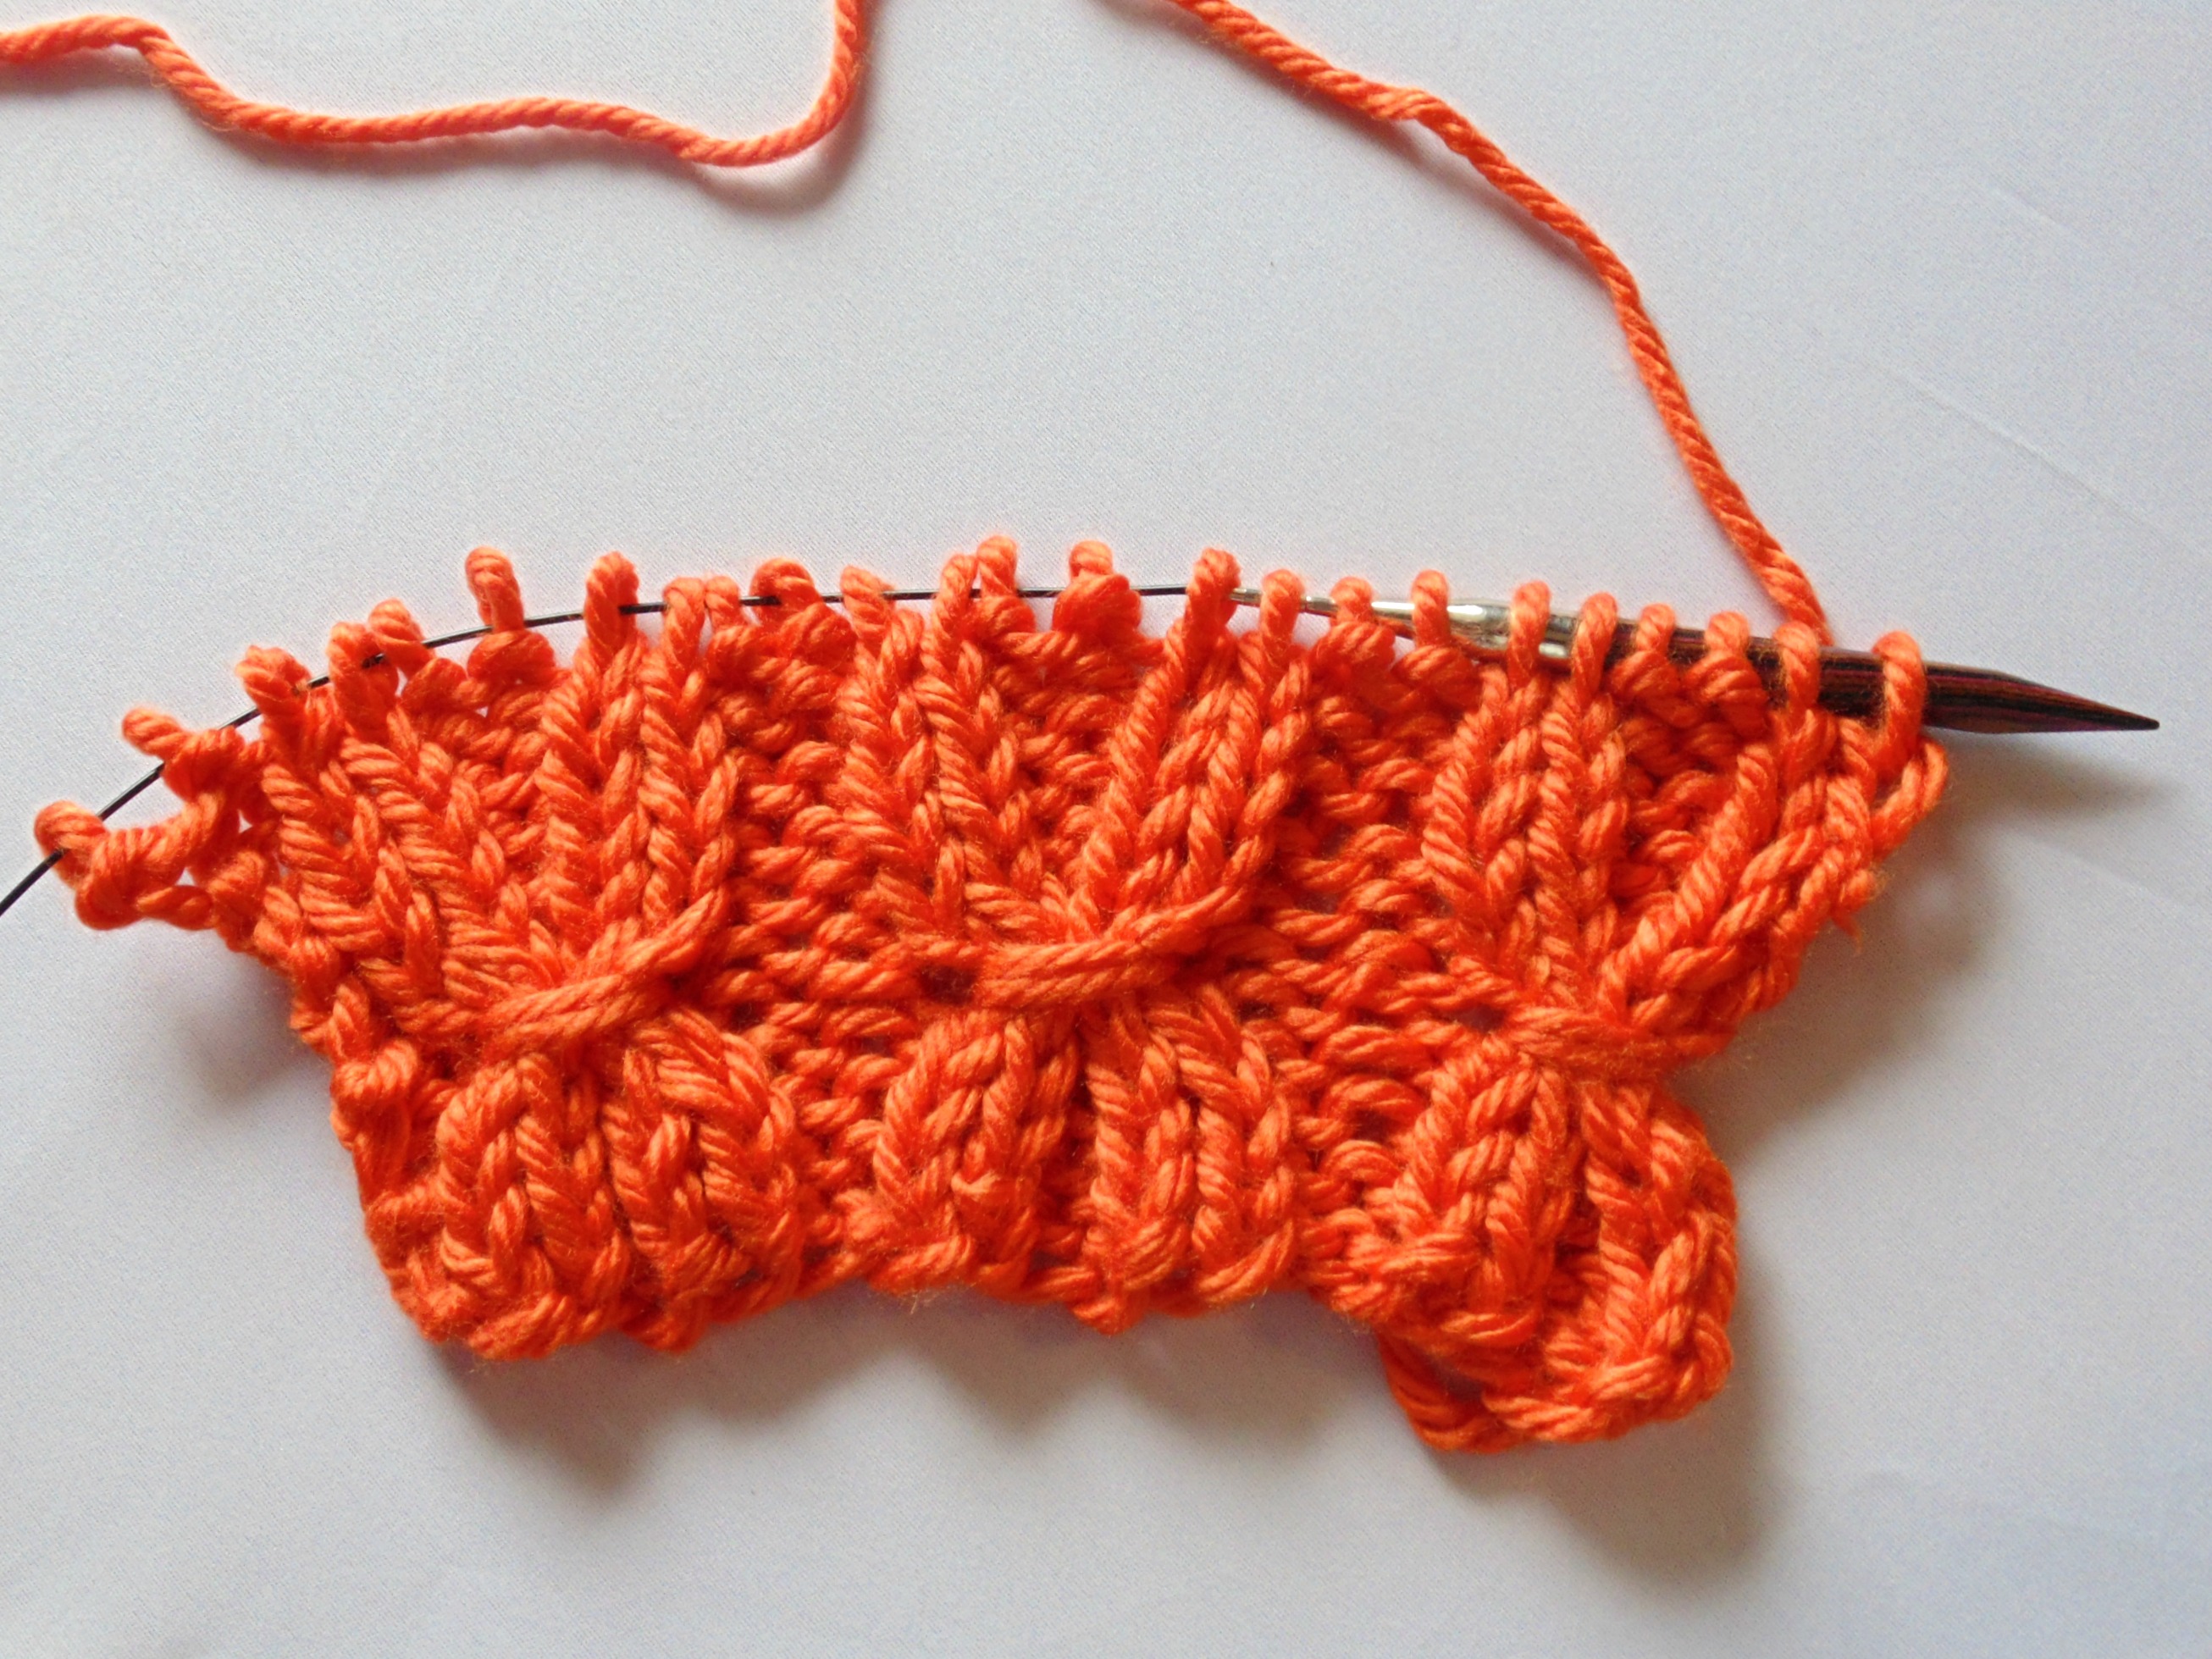
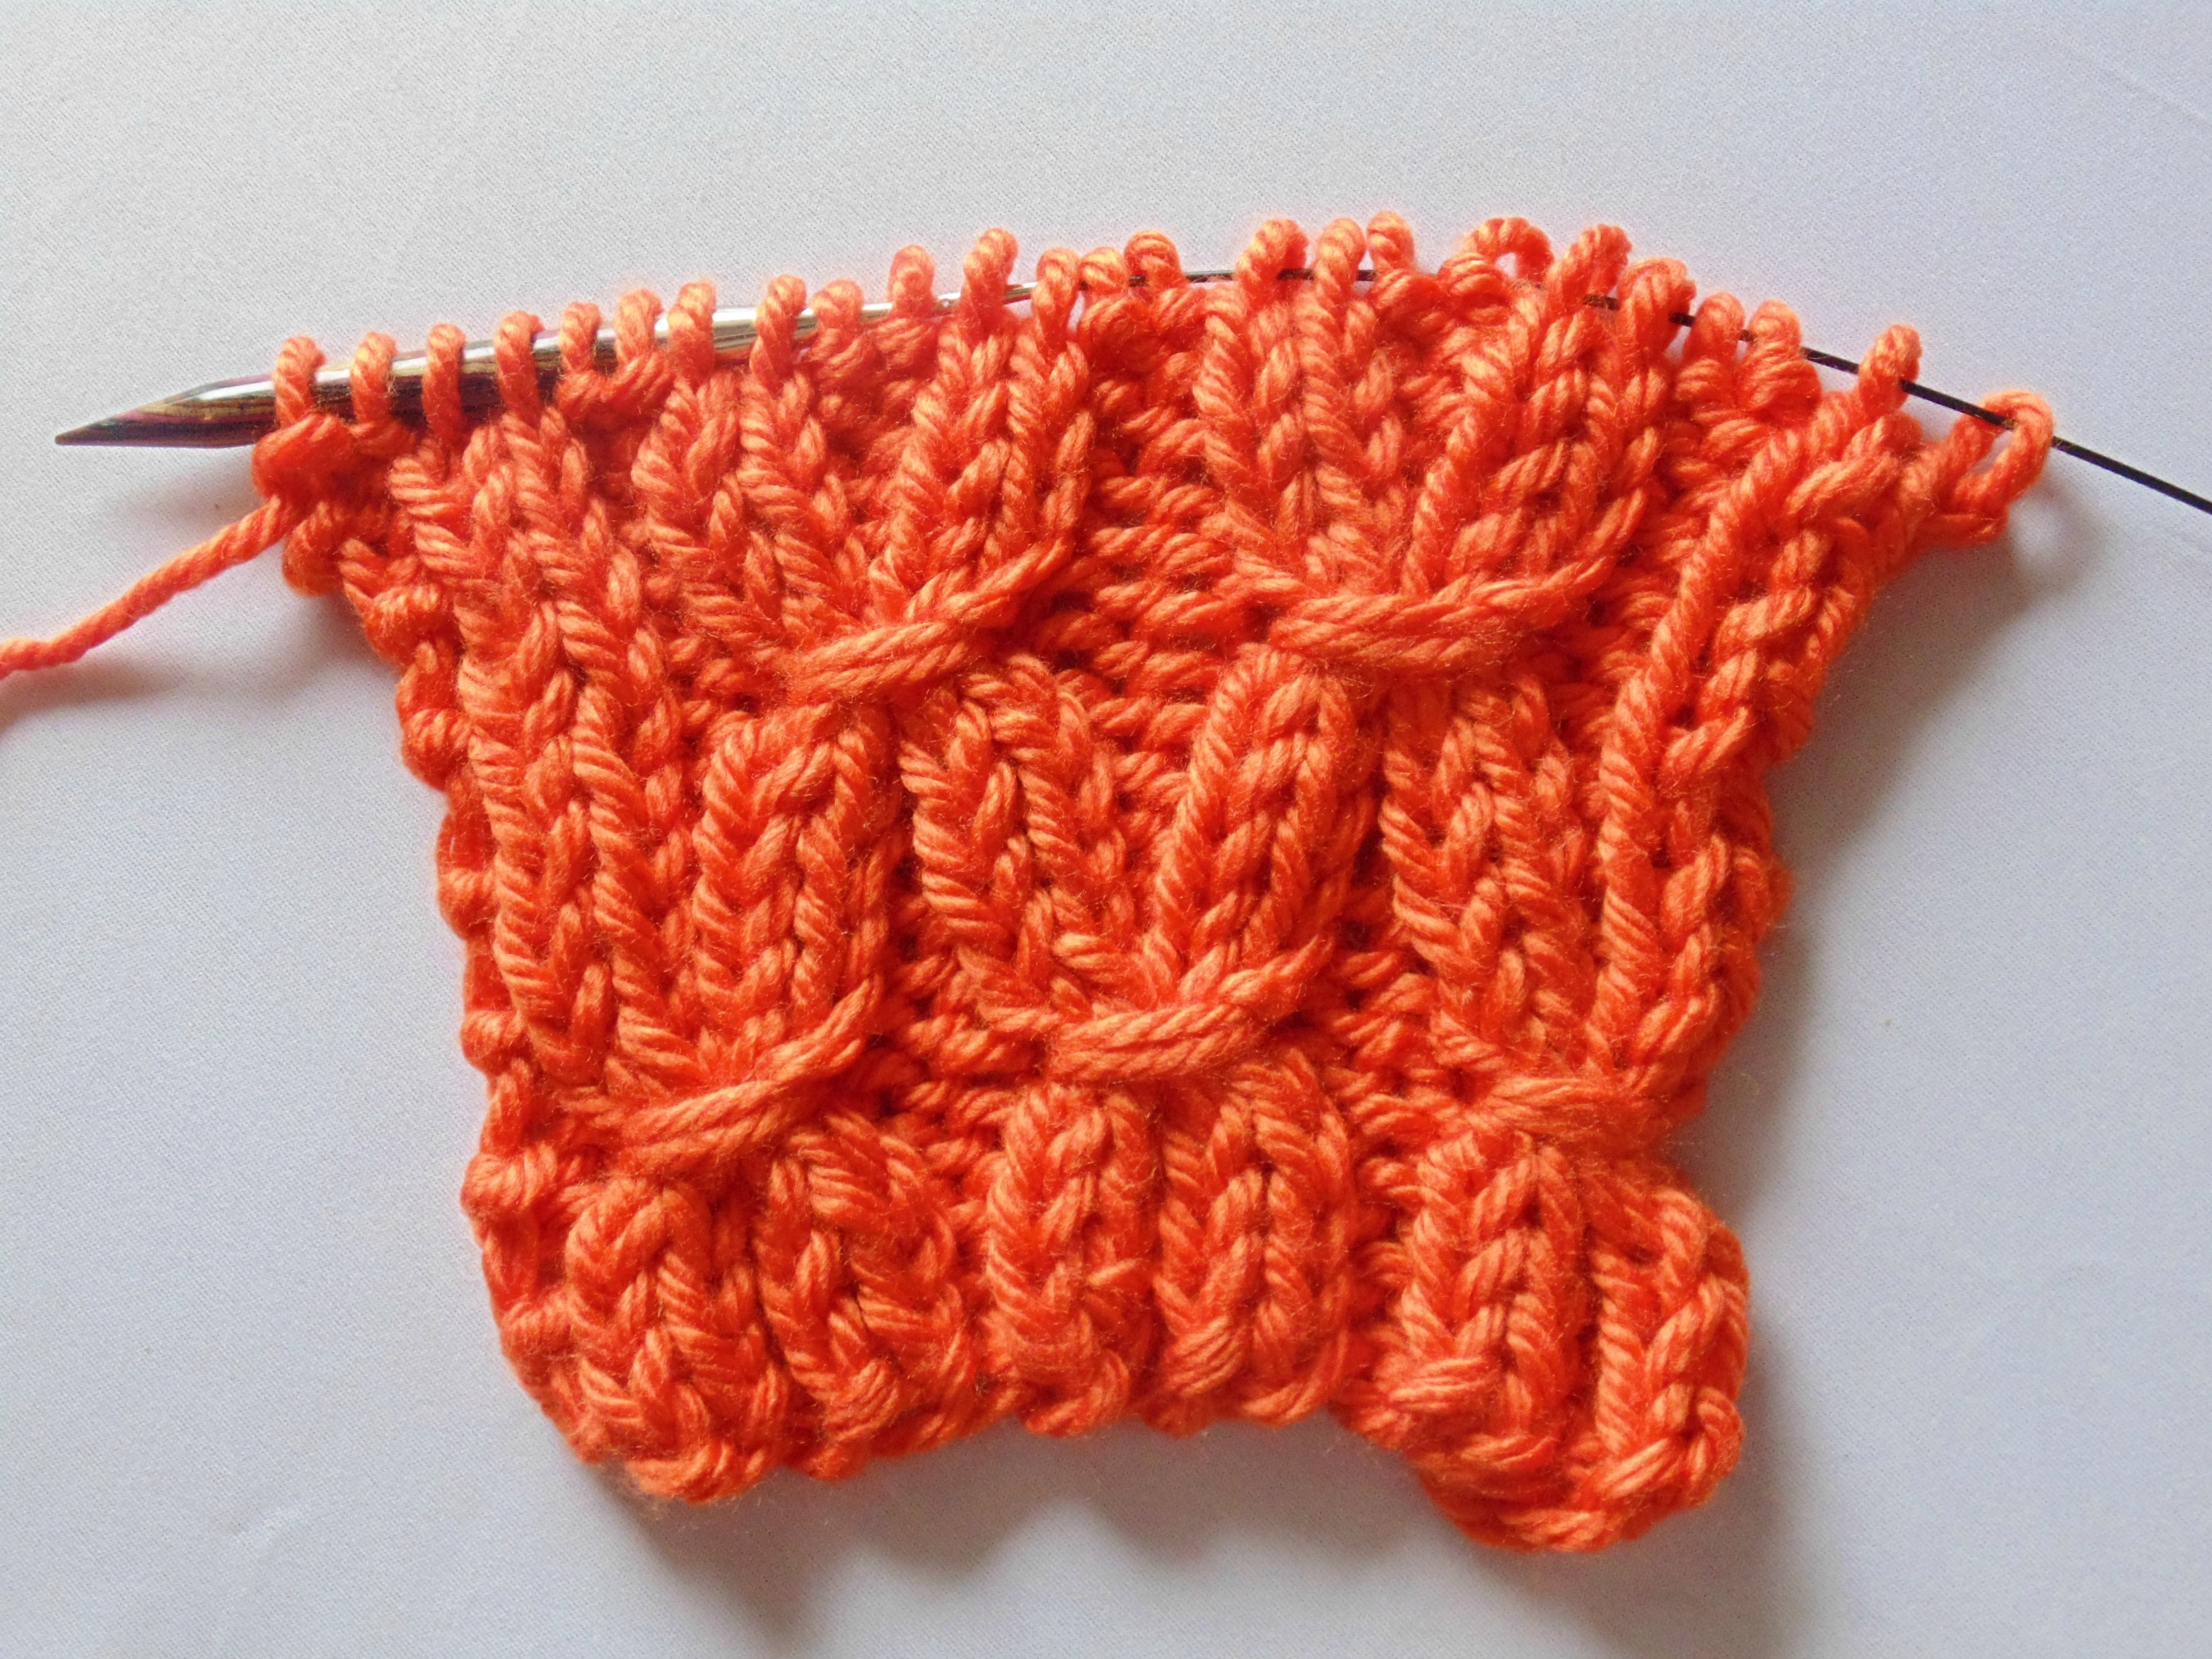
Completed row:
Rows 13-17: K2, p2. ( I only worked 3 rows here so that you can see the repeats).
Completed Section:
The next set of smocking stitch will line up with Row 6, the first set of Smocking stitch. Follow pattern through Row 28 until you are satisfied, comfortable with the stitch and ready to move onto the project.
Row 18: Repeat Row 6.
Rows 19-23: K2, p2.
Row 24: Repeat Row 12.
Rows 25-28: K2, p2.
Thanks this was very helpful. You did a great job at explaining the stick.
I was wondering if I could make a baby afghan out of this pattern? How many stitches would I need and what kind of yarn . I usually use Red Heart 4 ply.
You absolutely could make this stitch into a baby afghan. To do this, you’ll need to work a practice swatch and measure your gauge. Multiply that by how big you’d like the finished product to be and you’ll have a blanket with a beautiful stitch pattern. Good luck! 🙂
Where would you use this stitch in a pattery? Can you provide a picture of a finished piece with this stitch used- for a visual example?
You can use this stitch in so many ways – anything from a scarf, blanket or even a messenger bag. The texture is a great addition to anything you’re working on. Good luck!