

I-cords, also known as Idiot Cords, are useful for different purposes, including finishing knitted items. I-cords are sturdy and, when you look closely, look as though they are knitted in round. Different types of machines exist to create I-cords, like I-cord Knitting Machines and spool knitters, but you can achieve the same effect with double pointed
I-cords, also known as Idiot Cords, are useful for different purposes, including finishing knitted items. I-cords are sturdy and, when you look closely, look as though they are knitted in round. Different types of machines exist to create I-cords, like I-cord Knitting Machines and spool knitters, but you can achieve the same effect with double pointed knitting needles and yarn.
Having to work with 4 needles with only one stitch on each of them is not an easy task. But there is an easier way. You can use only two of your double pointed needles to make I-cords. Before, we begin, I should mention that I-cords can only be made with very few stitches mostly between 3 to 5 stitches. More than that, there would be a gap between stitches and create a ladder look.
To work an I-cord:
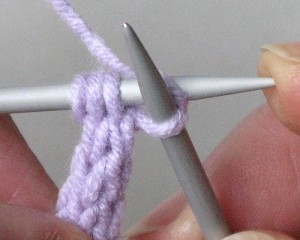
- Cast on 3 or 4 stitches. Do not turn your work.

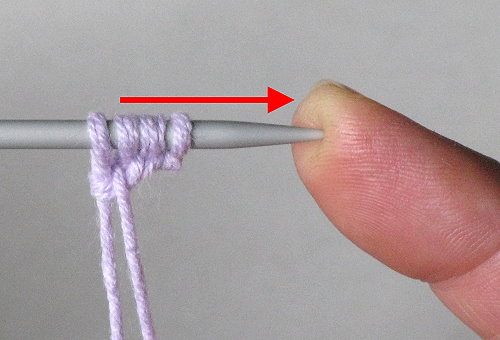
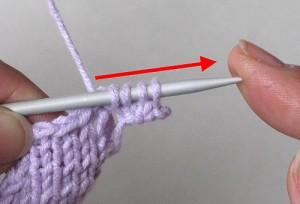
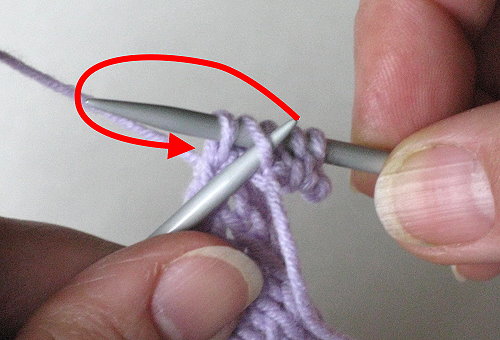
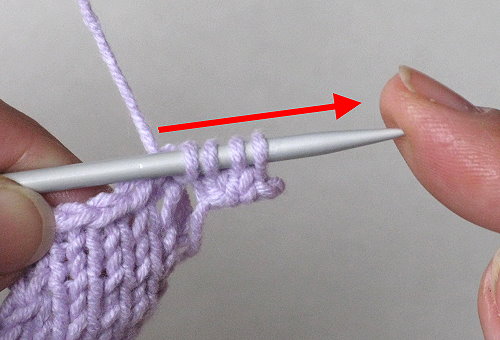
- Push stitches to the other end of the double pointed needle.

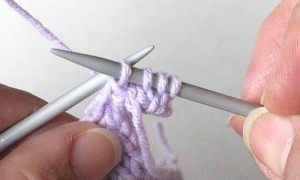
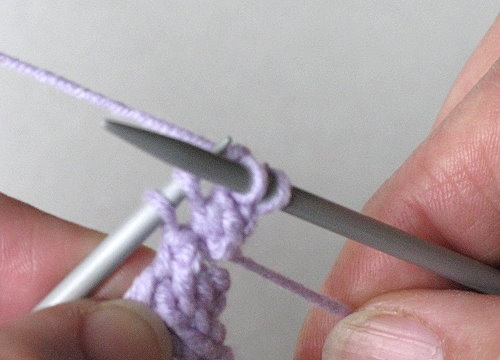
- Take the long end of the yarn from back, give it a tug, and knit all the stitches on the needle.
- Repeat steps 2-3 until you have the length of cord you need. When you are done, bind off all stitches as you always do. It’s easy!


It is quite possible to replace the ribbing at the edge of a sweater, cuffs and gloves with I-cords. To do so, simply knit a cord the length that you need and pick up stitches at the side-edge of the cord making sure not to twist. When you have the number of stitches you need, work the body of the garment.
Sometimes, you might want to finish a garment with I-cords like the edge of the neckline. One thought would be to make an I-cord as above and sew it to the edge of the garment. However, that is not easy and the result may not look professional. That is when applied I-cords come to play. Here is how they are made:
- Let’s say we want to have 4 stitches for the cord. Cast on 4 stitches on your double pointed needle and work one row as for a regular I-cord.
- Do not push the stitches to the other end yet. Pick up and knit one stitch at the edge of your work. You will have 5 stitches on the needle.

- Pass the previous stitch on the needle over the stitch just picked. You will have 4 stitches again.
- Push stitches to the other end, just like a regular I-cord.
- Take the yarn from the back and knit the stitches to the end of row.

- Repeat steps 2-5 to work the length of the garment’s edge. Bind off all stitches. In case of the neck edge, weave in the beginning and end of the cord to have a professional look.

The most common problem people have with applied I-cords is that they forget to do the decrease before pushing stitches back to the other end. If that happens, unravel to where you have 4 stitches. Begin working again, counting stitches at the end of each row to make sure you have the same number of stitches throughout the piece. Easy!
If you think you understand I-cord basics, try working on the Interlaced Diamond Top and put your skills to the test!
TOUGH I HAVE BEEN KNITTING FOR 74 YEARS, LEARNED FIRST WITH ROOFING NAILS AND STRING, I HAVE NEVER SEEN THIS BEFORE, CAME UPON IT KNITTING A MOUSE TAIL PATTERN. IT IS A SUPER STITCH. I LOVE IT, JUST GOES TO SHOW WE ARE ALWAYS LEARNING. THANK YOU FOR THIS TUTORIAL.
I finally know why the name I-Cord! I enjoyed reading the preface of the article.
I have learned to use it as termination of tunics with videos in You Tube. Your article with pictures and explanations are very well done! thank you, Marinella
I would like to see some pictures of garments with I-cord attached.
I can see the endless use of this technique, Thank you very much–Love it Pamela