

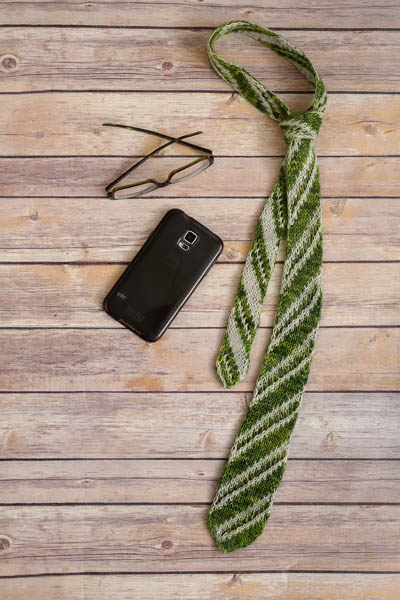
Knitting for men, especially in warmer weather, can be challenging, but accessories are always a good go-to. Featuring a gorgeous knit lace pattern to create a contrasting and open area, this advanced pattern is not only reversible but lays flat and doesn’t curl.
Skill Level: Advanced
Size: Finished length = 49 (58, 64)”; Finished width = 3” at widest, 11/8” at narrowest
Gauge: 32 st pairs and 26 rows = 4” [10 cm] in Double Knit St st after blocking
Materials
Yarn: Madeline Tosh Unicorn Tails (100% superwash merino; 52 yards /12 grams): Jade (MC, 2 (2, 2) skeins), Silver Fox (CC 2 (2, 2) skeins)
Needles: US size 2 (2.75 mm) straight needles
Notions: Cable needle (optional – to separate and rearrange stitches for decreases)
Abbreviations
wyif: with yarn in front
wyib: with yarn in back
tbl: through back loop
Special Stitches
dk MC: With MC and wyib, k1, with CC and wyif, p1.
dk CC: With CC and wyib, k1, with MC and wyif, p1.
dSelvage: Wyib, sl1, wyif, sl1.
dYO: With CC, yo, then with MC, yo (see pattern notes).
dRight CC increase: Wyib lift st below next knit st and place on left needle with front leg forward, with CC k1 tbl, wyif lift st below next purl st and place on left needle with front leg forward, with MC p1.
dRight MC increase: Wyib lift st below next knit st and place on left needle with front leg forward, with MC k1 tbl, wyif lift st below next purl st and place on left needle with front leg forward, with CC p1.
dLeft MC increase: Work next st pair as normal, wyib lift st below st that was just knit and place on left needle with front leg in back, with MC k1, wyif lift st below st that was just purl and place on left needle with front leg in back, with CC p1 tbl.
dLeft CC increase: Work next st pair as normal, wyib lift st below st that was just knit and place on left needle with front leg in back, with CC k1, wyif lift st below st that was just purl and place on left needle with front leg in back, with MC p1 tbl.
dDouble CC increase: Work dRight CC increase then dLeft CC increase.
dDouble MC increase: Work dRight MC increase then dLeft MC increase.
Sep 2: Separate the next 2 stitch pairs so that there are 2 RS sts (knit sts) followed by 2 WS sts (purl sts).
Sep 3: Separate the next 3 stitch pairs so that there are 3 RS sts followed by 3 WS sts.
dRight MC decrease: Sep 2, with MC and wyib, k2tog, sl 2 kwise then return to left needle, with CC and wyif, p2tog tbl.
dRight CC decrease: Sep 2, with CC and wyib, k2tog, sl 2 kwise then return to left needle, with MC and wyif, p2tog tbl.
dLeft MC decrease: Sep 2, sl 2 kwise then return to left needle, with MC and wyib, k2tog tbl, with CC and wyif, p2tog.
dLeft CC decrease: Sep 2, sl 2 kwise then return to left needle, with CC and wyib, k2tog tbl, with MC and wyif, p2tog.
dDouble left MC decrease: Sep 3, sl 3 kwise, with MC and wyib, k3tog tbl, with CC and wyif, p3tog.
Pattern Notes
1 st pair equals one pair of double-knit sts (1 knit and 1 purl).
Wyib means both yarns in back and wyif means both yarn in front.
Slip sts purlwise unless otherwise stated.
When working the dYO st (see abbreviations), the CC should be brought from behind and underneath the MC for the first yarn over.
Always twist the two strands of yarn together when working first st pair (both knit and purl). Continue this throughout the entire project.
The charts are the same for all sizes. All sizes work charts 1, 2, 3, 4, and 6 one time; the number of times chart 5 is worked is the only difference between sizes.
The shape of the tie is made primarily through blocking. When blocking start with the length of the tie and pin down top and bottom stitches, then block out the narrow section of the tie and pin it down. Finally, pin down the widest area and pin out a gradual slope from the widest to the narrowest area. You’ll know it’s right because the lace will open up and look quite lovely.
If you’re having trouble with the tie keeping its shape a little hair spray can work wonders but this can darken the color of the tie. Try it on a swatch first.
Pattern
Chart 1
Cast on by holding MC and CC together and creating a slip knot. Place the loops on left needle so that the CC loop is closer to the tip than MC. This is your cast on. (1 st pair)
Rows 1-11 (RS): Work rows 1-11 of chart 1 increasing where chart indicates. (15 st pairs)
Rows 12-52: Work rows 12-52 of chart 1. (15 st pairs)
Rows 53-54: Work rows 53 and 54 of chart 1 decreasing where chart indicates. (13 st pairs)
Chart 2
Rows 1-52: Work rows 1-52 of chart 2. (13 st pairs)
Rows 53-54: Work rows 53 and 54 of chart 2 decreasing where chart indicates. (11 st pairs)
Chart 3
Rows 1-52: Work rows 1-52 of chart 3. (11 st pairs)
Rows 53-54: Work rows 53 and 54 of chart 3 decreasing where chart indicates. (9 st pairs)
Chart 4
Rows 1-12: Work rows 1-12 of chart 4. (9 st pairs)
Chart 5
Rows 1-20: Work rows 1-20 of chart 5. (9 st pairs)
Repeat rows 1–20 7 (10,12) more times.
Chart 6
Row 1: Work row 1 of chart 6. (7 st pairs)
Row 2: Work row 2 of chart 6. (5 st pairs)
Row 3: Work row 3 of chart 6. (3 st pairs)
Row 4: Work row 4 of chart 6. (1 st pairs)
Bind off by passing first stitch of pair over second then pulling both strands of yarn through remaining stitch.
Finishing
Block to finished measurements (see pattern notes for more details) then weave in ends. 