

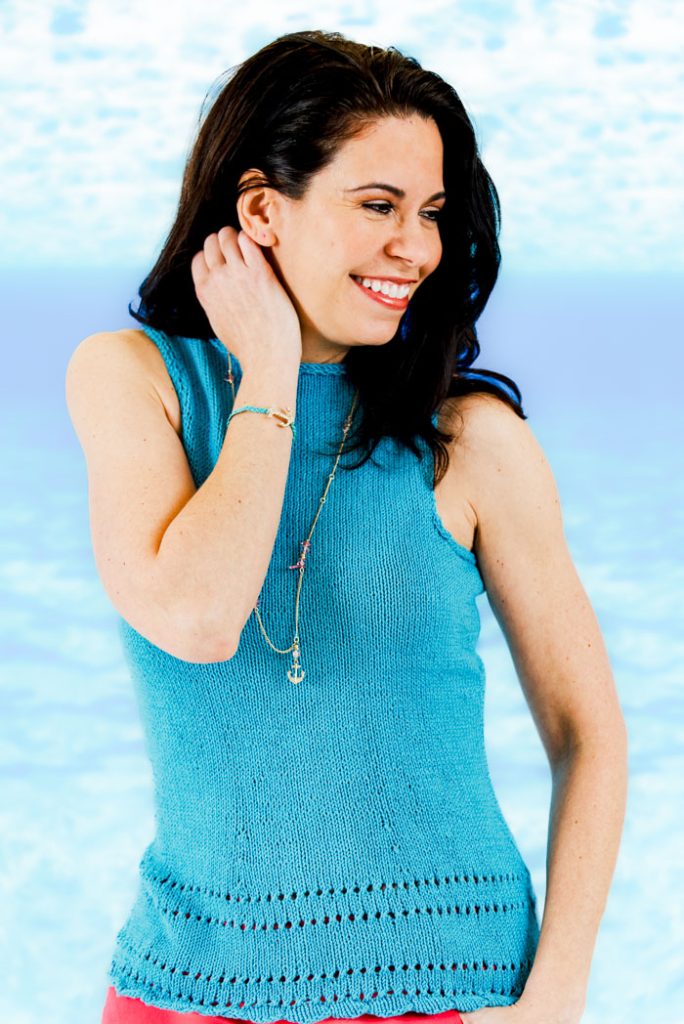
The electric blue of the Caribbean Sea finds its home in this stunning tank top. It is designed with an innovative stitch along the bottom that interprets the calming curve of a wave’s crest, and it will look great with shorts or a skirt.
Skill Level: Intermediate
Size: Finished Bust Size 32 (34, 36, 38, 42)”
2″ positive ease at hem due to yarn overs and patterning and 1″ positive ease at bust.
Shown in size 34”
Gauge: 22 sts and 28 rows = 4” [10 cm] in St st.
Materials
 Yarn: Universal Yarn Bamboo Pop (50% Cotton, 50% Bamboo; 292 yards [266 meters]/100 grams: Ocean 2 (3, 3, 4, 4) skeins
Needles: US Size 4 (3.5 mm): 24-32″ circular; US Size 3 (3.25 mm): 24-32″ circular, 16″ circular or DPNs
Notions: Tapestry needle; four stitch markers; stitch holders or scrap yarn
Special Stiches
K6&twist: K6, then while holding the 6 sts in place, circle the tip of the right needle away from you, down and around and back up to the starting position. The stitches on the needle will be curled around the needle. Continue in this manner to end of row.
Edge Stitch
On WS, work all edging rnds with WS facing as foll:
Rnd 1 (WS): Knit.
Rnd 2: *Sl1 with yarn held on RS, k1; rep from * around.
Rnd 3: *P1, Sl1 with yarn held on RS; rep from * around.
Rnd 4: Knit.
BO all sts knitwise tbl
Pattern Notes
The ruffle edge and first inch thereof are worked flat to facilitate joining the work in the round as the ruffle edge can be difficult to create and work in the round and the additional stockinette makes it easier to join properly.
This tank top is worked in the round to the armhole, at which point the back and front are worked separately and seamed using a 3-needle bind off at the shoulder prior to working the trim.
When shaping the armholes and neckline the stitches are not bound off, they are slipped to a holder or scrap yarn so these live stitches may be used, in combination with picked up stitches, to work the border edging. Using the live stitches and slipped stitches creates a smoother transition between the two than picking up bound off stitches.
Designed to transition from office to dock this tank top is a bit longer than one may otherwise expect so as to provide extra coverage when seated. Increases and decreases are done after measuring.
The bamboo/cotton blend will bloom slightly when washed but the gauge does not change. The gauge swatch and sample were both washed in a gently cycle using cold water in a front loading washing machine, air dried, then placed in the dryer for 15 minutes on low to give the fabric a softer hand than air drying.
All slipped stitches are slipped as if to purl throughout unless otherwise noted.
When neck stitches and armhole stitches are completed, these openings will be tightened up therefore, while the measurements for the armholes may seem too large, they will close up based upon the number of stitches for which the edge stitch is used.
Pattern
With smaller needle, CO 1 st, PM, CO 90 (96, 102, 108, 114) sts, PM, CO 90 (96, 102, 108, 114) sts, PM, CO 1 st – 182 (194, 206, 218, 230) sts.
Row 1: Purl.
Row 2: Knit.
Rows 3-4: Rep Rows 1-2.
Row 5: Purl.
Row 6: K1, *k6&twist; rep from * to last st, k1.
Switch to larger needle.
Row 7: Purl.
Row 8: K1, *yo, k2tog; rep from * to last st, k1.
Row 9: Purl.
Row 10: Knit.
Rows 11-12: Rep Rows 9-10.
Row 13: Rep Row 9.
Join to work in the rnd, PM to indicate end of rnd.
Set-up Rnd: K1, remove m, k to 2 sts before next m, ssk, sm, k2tog, k to next m, remove m – 90 (96, 102, 108, 114, 120) between each m; 180 (192, 204, 216, 228) sts total.
Rnd 1: *K2tog, yo; rep from * around.
Rnds 2-15: Knit.
Rnd 16: Rep Rnd 1.
Rnds 17-22: Rep Rnd 2.
Rnd 23: Rep Rnd 1.
Rnds 24-25: Rep Rnd 2.
Rnd 26: K2tog, k to 2 sts before m, ssk, sm, k25, pm, ssk, k36, k2tog, pm, k25 – 176 (188, 200, 212, 224) sts.
Rnds 27-33: Knit.
Rnd 34: K2tog, k to 2 sts before m, ssk, sm, k to m, sm, ssk, k to 2 before m k2tog, sm, k25 – 172 (184, 196, 208, 220) sts.
Rep Rnds 27-34 twice more – 8 sts dec’d; 164 (176, 188, 200, 212) sts.
Remove two markers added in Rnd 26, leave the two original markers from the Set-up Rnd.
Work even in St st in the rnd until piece meas 10 (10, 11, 12, 13)” / [12.5 (12.5, 28, 30, 33) cm].
Bust
Rnd 1: M1l, k25, m1l, PM, k32 (38, 44, 50, 56) PM, m1r, k25, m1r, k to end of rnd – 4 sts inc’d; 168 (180, 192, 204, 216) sts.
Rnds 2-5: Knit.
Cont in this manner, increasing as indicated at markers on Front every 5th rnd 4 more times – 184 (196, 208, 220, 232) sts.
Cont even in St st without additional shaping until piece meas 16 (16, 17, 18, 19)” / [41 (41, 43, 46, 49) cm]
Shape Armholes Front
Begin working back and forth in rows – 102 (108, 114, 120, 126) sts for Front.
Row 1: K to 8 (8, 8, 10,10) sts from next m, place these sts on holder, remove m, turn work – 94 (100, 106, 110, 116) sts for Front
Row 2: Sl1, p to 8 (8, 8, 10,10) sts from m, place these sts on holder, remove m, turn work – 86 (92, 98, 100, 106) sts front
Row 3: Sl1 to holder, k to 1 st before end, sl1 to holder, turn work – 2 sts dec’d.
Row 4: Sl1 to holder, p to 1 st before end, sl1 to holder, turn work – 2 sts dec’d.
Rep Rows 3-4 until 54 (60, 72, 84, 96) sts rem or desired width is reached.
Cont even in patt without decreasing until Armhole meas approx. 5 (5, 6, 6½, 7½)” / [13 (13, 15, 17, 18) cm], ending with Row 4.
Shape Neck at Left Front Shoulder
After moving stitches to a stitch holder, do not work them on subsequent rows, they will be picked up along the edges later.
Row 1: K15 (15, 17, 19, 21), sl1 to holder, turn work. and only work these stitches
Row 2: Sl1, p14 (14, 16, 18, 20).
Row 3: Sl1, k12 (12, 14, 17, 19), sl2 (2, 2, 1, 1) to holder
Row 4: Sl2 to holder, p11 (11, 13, 16, 18).
Row 5: Sl1, k10 (10, 12, 15, 17).
Row 6: Sl1 to holder, p10 (10, 12, 15, 17).
Row 7: Sl1, k8 (8, 10, 13, 15), sl1 to holder
Row 8: Sl1, p8 (8, 10, 13, 15).
Cont even in patt for 8 rows or until desired length, without shaping, knitting and purling sts as presented, slipping the first st of each row.
Place rem 9 (9, 11, 14, 16) sts on holder, these will be used for the 3-needle bind off to form the shoulder seam. Leave a 36” tail, cut yarn.
Shape Neck at Right Front Shoulder, reversing shaping, using same number of stitches on the Right Front Shoulder.
Shaping Armholes Back
Note: There will be fewer stitches on the back as increases for bust were done only on the front. This creates a nicer frame for the shoulder blades and lies flatter along the back so as to present with minimal or no gapping between the knit fabric and back of the person wearing it. Therefore, when decreasing, the recommended number of stitches to which one would decrease is a bit narrower 50 (56, 60, 68, 70) sts and the rate at which this is reached is done in fewer rows as there are fewer stitches on the back from which one begins the decreases
Work as for Front using same shaping technique as was used on Shaping Armholes Front. Continue without shaping until work measures same length less 1 (1, 1, 2, 2)” of that of the Front Armholes.
Back Neck Shaping
Place center 24 (30, 30, 32, 32) sts on shorter circular needles or two DPNs with stoppers, these sts will be for the neck. Working with the rem sts on each side, begin with the Left Back Shoulder Shaping – 13 (13, 15, 16, 17) sts rem each side.
Work these two sets separately, beginning with the Left Shoulder back. Move Right Shoulder back to stitch holder temporarily or simply don’t work them while working Left Back Shoulder shaping.
Left Back Shoulder Shaping
Shaping on shoulders is done one side at a time using the sts on each side of the back of the neck.
Row 1: K to neck sts set aside for back of neck shaping, turn work.
Row 2: Sl2 to circular needle, p to end.
Row 3: Sl1, k to 2 (2, 2, 2,1) sts before end, sl these sts to circular needle.
Row 4: Sl1, p to end.
Cont in St st until desired length.
Place 9 (9, 11, 14,16) sts on holder.
Shape Right Back Shoulder, reversing Left Back Shoulder Shaping .
With RS facing each other and using 3-needle bind off method, BO all sts.
Finishing
Sew side seams. Weave in end.
Transfer Front Left and Back Left Shoulder sts to DPNs, with RS facing each other and using 3-needle bind off, BO 9 (9, 11, 14,16) sts.
Rep on Front Right and Back Right Shoulder.
With smaller circular needles, pick up 92 (98, 98, 104, 104) sts total along neckline (combination of live sts from holders and slipped sts along the neckline). If there are gaps, pick up extra sts on the first rnd and decrease as necessary to begin edging, PM.
Work Edge Stitch patt to complete the neckline
With smaller circular needles, pick up 86 (90, 90, 94, 98) total sts around left armhole (combination of slipped sts and live sts from holders). To eliminate gaps, pick up extra sts on this first rnd and decrease if necessary to begin edging, PM.
Work Edge Stitch patt to complete the armhole.
Rep for Right Armhole.