

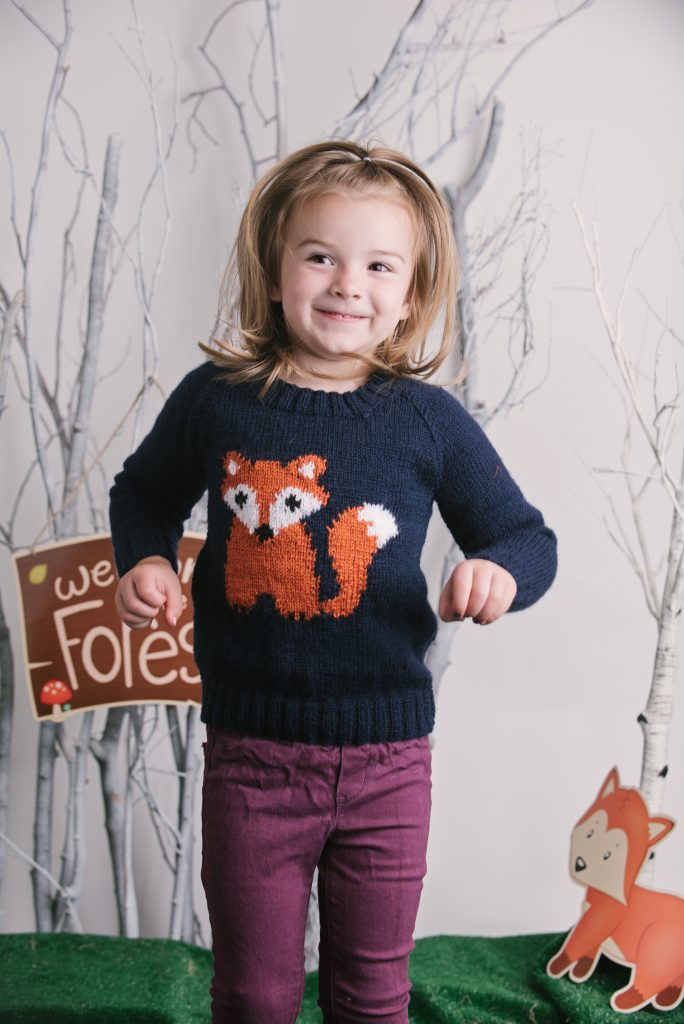
This little fox is here to make your little one giggle with glee! Perfect for a classroom party day or any day of the week, this fox sweater is bound to become a well-loved piece in her wardrobe.
Skill Level: Intermediate
Size: Finished bust size 24 (26.25, 27.75, 29, 30.5)” to fit bust 20.75 (23, 25, 26.5, 28)”
2-3” positive ease recommended
Shown in size 26.25”
Gauge: 22 sts and 30 rows = 4” [10 cm] in St st after wet blocking
Materials
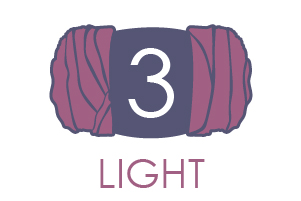 Yarn: Stylecraft Life DK (75% Acrylic, 25% Wool; 326 yards [298 meters]/100 grams): 2313 Navy (MC, 2 (2, 3, 3, 3) balls), 2312 Copper (CC1, 1 ball), 2307 Black (CC2, 1 ball), and 2300 White (CC3, 1 ball)

Needles: US size 6 (4.0 mm) straight
US size 4 (3.5 mm) straight and 16” circular
Notions: Yarn bobbins, markers (2), tapestry needle, chart row marker
Special Stitches
2 x 2 Ribbing (worked flat)
Row 1 (RS): *K2, p2; rep from * to final 2 sts, k2.
Row 2 (WS): *P2, k2; rep from * to final 2 sts, p2.
Rep Rows 1-2 for patt.
2 x 2 Ribbing (worked in the rnd)
Rnd 1: *K2, p2; rep from * to end of rnd.
Rep Rnd 1 for patt.
Pattern Notes
The fox jumper is worked in pieces from the bottom up. The neckline is worked on in the round after seaming the shoulders of the jumper.
The fox motif is added using intarsia.
Pattern
Back
Using MC and smaller needles, CO 66 (74, 78, 82, 86) sts.
Work in 2 x 2 Ribbing (worked flat) for 1.5”.
Change to larger needles.
Row 1 (RS): K17 (19, 20, 21, 22), m1 (0, 0, 0, 0), k32 (36, 38, 40, 42), m1 (0, 0, 0, 0), k17 (19, 20, 21, 22). (68 (74, 78, 82, 86) sts)
Row 2 (WS): Purl.**
Work a further 64 (68, 72, 84, 90) rows in St st, ending with a WS row. At this point the Back should meas 10.25 (10.75, 11.25, 13, 13.75)”. If you wish to add extra length to the body of the jumper, work extra rows here, then add the same number of rows to the Front of the jumper before incorporating the chart.
Armholes
BO 5 sts at start of next 2 rows. (58 (64, 68, 72, 76) sts)
Work 8 (8, 6, 6, 10) rows in St st, ending with a WS row.
Raglan Decreases
Row 1 (RS): K1, ssk, k to final 3 sts, k2tog, k1. (2 sts dec’d; 56 (62, 66, 70, 74) sts)
Row 2 (WS): Purl.
Work Rows 1-2, 11 (13, 15, 17, 18) more times. (34 (36, 36, 36, 38) sts)
BO all sts loosely.
Front
Work as for Back as far as **. (68 (74, 78, 82, 86) sts)
Work a further 18 (24, 28, 38, 46) rows in St st, ending with a WS row, and the same number of extra rows you may have added to the Back for length, ending with a WS row.
Chart Placement Row (RS): K14 (17, 19, 21, 23), pm, work 40 sts from the Fox chart, pm, k14 (17, 19, 21, 23).
Starting with a WS row, cont in St st, working the Fox chart between the stitch markers, until you have worked a total of 46 (44, 44, 46, 44) rows of the Fox chart.
Cont working the chart between the markers while you are working the armhole and raglan rows. Once you have completed the chart, remove the chart markers and cont in MC.
Armholes
BO 5 sts at start of next 2 rows. (58 (64, 68, 72, 76) sts)
Work 8 (8, 6, 6, 10) rows in St st, ending with a WS row.
Raglan Decreases
Row 1 (RS): K1, ssk, k to final 3 sts, k2tog, k1. (2 sts dec’d; 56 (62, 66, 70, 74) sts)
Row 2 (WS): Purl.
Work Rows 1-2, 1 (3, 5, 7, 8) more times. (54 (56, 56, 56, 58) sts)
Next Row: K1, ssk, k16, BO 16 (18, 18, 18, 20) sts, k16, k2tog, k1. (18 sts rem on each side of BO)
Work only on the sts that the working yarn is attached to.
***Next Row (WS): Purl
Row 1 (RS): K1, ssk, k to final 3 sts, k2tog, k1. (2 sts dec’d; 16 sts)
Row 2 (WS): Purl.
Work Rows 1-2, 6 more times. (4 sts)****
Next Row (RS): K1, k2tog, k1. (3 sts)
Next Row (WS): Purl.
Next Row: K2tog, k1. (2 sts)
Next Row: Purl.
BO all sts.
Re-join yarn at the neckline edge at the Back of the work. Then work as for the other neckline edge from *** to ****.
Next Row (RS): K1, ssk, k1. (3 sts)
Next Row (WS): Purl.
Next Row: K1, ssk. (2 sts)
Next Row: Purl.
BO all sts.
Sleeves (work both the same)
Using MC and smaller needles, CO 38 (42, 42, 46, 50) sts.
Work in 2 x 2 Ribbing (worked flat) for 1.5″.
Change to larger needles.
Starting with a k row, work 6 (8, 6, 8, 10) rows in St st.
Increase Row (RS): K1, m1, k to final st, m1, k1. (2 sts inc’d; 40 (44, 44, 48, 52) sts)
Next Row (WS): Purl.
Work these 8 (10, 8, 10, 12) rows 4 (4, 6, 6, 5) more times. (48 (52, 56, 60, 62) sts)
Cont in St st until Sleeve meas 8.5 (10.5, 11.5, 12.5, 13.5)”, ending with a WS row.
Armholes
BO 5 sts at start of next 2 rows. (38 (42, 46, 50, 52) sts)
Work 8 (8, 6, 6, 10) rows in St st, ending with a WS row.
Raglan Decreases
Row 1 (RS): K1, ssk, k to final 3 sts, k2tog, k1. (2 sts dec’d; 36 (40, 44, 48, 50) sts)
Row 2 (WS): Purl.
Work Rows 1-2, 11 (13, 15, 17, 18) more times. (14 sts)
BO all sts loosely.
Neckline
Weave in all ends. Join shoulder seams along raglan decrease lines using mattress stitch.
Using MC and circular needles, and starting at top right of the Back with RS facing, PU and k32 (34, 34, 34, 36) sts along BO edge of Back, 12 sts along BO edge of left Sleeve, 12 sts down Front left edge diagonal, 16 (18, 18, 18, 20) sts across the neckline BO, 12 sts up Front right edge diagonal, and 12 sts along BO edge of right Sleeve. (96 (100, 100, 100, 104) sts)
PM and join in the rnd.
Work in 2 x 2 Ribbing (worked in the rnd) for 1″.
BO all sts loosely in patt.
Finishing
Join side and underarm seams.
Soak the jumper in lukewarm water. Squeeze out excess water, lay the jumper out to the dimensions shown in the schematic and leave to dry flat.
??? Sorry but no matter how hard I look I cannot see a link for the chart anywhere. Not under photos, not in the text.
This is my first visit to your site…..so maybe there’s some magic that needs to happen for me to make the chart appear??
Hi Sue, charts are available for logged-in Gold Members only, please reach out to our customer service team if you are having trouble accessing your subscription.
Where is the chart for this sweater?
Please see a link for the chart under the photos.