

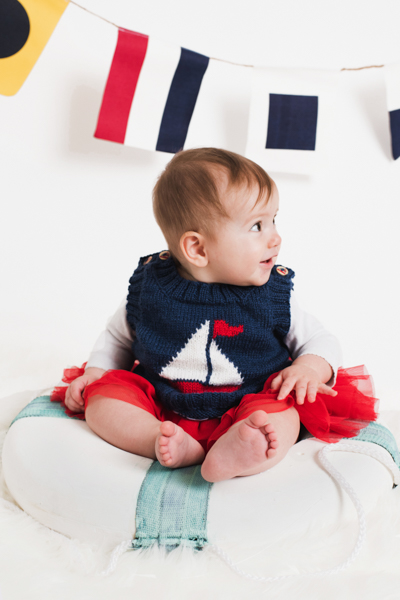
Make a sweet vest for the little sailor in your life. Featuring an intarsia sailboat on the front, this vest is inspired by vintage nautical designs. The shoulders are fastened using buttons to allow for easy dressing.
Skill Level: Intermediate
Size: Finished Bust Size 18.25 (19, 20.25, 20.75, 22.75)” to fit bust 16 (17, 18, 19, 21)”
2” positive ease recommended.
Shown in size 20.25”
Gauge: 25 sts and 32 rows = 4” [10 cm] in St st after wet blocking.
Materials
 Yarn: Bergere de France Idéal (40% Wool, 30% Acrylic, 30% Polyamide; 136 yards [125 meters]/50 grams): 21821 Alpin (MC, 2 (2, 2, 3, 3) balls), 20933 Linaire (CC1, 1 ball), 24408 Pavot (CC2, 1 ball), 51220 Everest (CC3, 1 ball)
Needles: US size 4 (3.5 mm) straight; US size 3 (3.25 mm) straight
Notions: Two markers, tapestry needle, four 0.5” (15 mm) buttons, yarn bobbins, chart row marker
Special Stitches
Ssk: slip 2 sts kwise wyib, k2tog through backs of loop. 1 st dec’d
Ssp: slip 2 sts kwise wyif, p2tog through backs of loops. 1 st dec’d
2 x 2 ribbing
Row 1 (RS): K2, *p2, k2; rep from * to end.
Row 2: P2, *k2, p2; rep from * to end.
Rep Rows 1-2 for patt.
Pattern Notes
The vest is worked from the bottom up in pieces. The boat is worked on a St st background using the intarsia technique.
The hem, armholes and necklines are worked using 2 x 2 rib. The armholes and necklines are picked up and worked after the garment has been seamed. The shoulders are fastened using buttons to allow for easy dressing.
Pattern
Back
Using MC and smaller needles, CO 58 (58, 62, 66, 70) sts.
Work in 2 x 2 ribbing for 1″, ending on a WS row.
Change to larger needles.
Inc Row (RS): K16 (16, 16, 18, 18), m0 (1, 1, 0, 1), k13 (13, 15, 15, 17), m1, k13 (13, 15, 15, 17), m0 (1, 1, 0, 1), k16 (16, 16, 18, 18). (1 (3, 3, 1, 3) sts inc’d; 59 (61, 65, 67, 73) sts)
Next Row: Purl.**
Starting with a RS row, work 36 (42, 44, 46, 48) rows in St st.
At this point Back should meas 5.75 (6.5, 6.75, 7, 7.25)” from CO edge. If you wish to add extra length to Body of Vest, work extra rows here, then add same number of rows to Front before incorporating chart.
Back Armhole
***BO 5 (6, 6, 6, 7) sts at start of each of next 2 rows. (49 (49, 53, 55, 59) sts)
BO 3 (3, 3, 3, 4) sts at start of each of next 2 rows. (43 (43, 47, 49, 51) sts)
BO 2 sts at start of each of next 2 rows. (39 (39, 43, 45, 47) sts)
BO 1 st at start of each of next 2 rows. (37 (37, 41, 43, 45) sts)****
Starting with a RS row, work a further 18 (20, 22, 24, 26) rows in St st.
At this point Back should meas 9 (10, 10.5, 11, 11.5)” from CO edge.
Back Neckline
Next Row (RS): K5 (5, 6, 6, 7), k2tog, k1, BO 21 (21, 23, 25, 25) sts, k1, ssk, k5 (5, 6, 6, 7). (7 (7, 8, 8, 9) sts remaining on either side of Neckline)
Work only on the sts that the working yarn is attached to.
Next Row (WS): P to final 3 sts, ssp, k1. (6 (6, 7, 7, 8) sts)
Next Row: K1, ssk, k to end. (5 (5, 6, 6, 7) sts)
Next Row: P to final 3 sts, ssp, k1. (4 (4, 5, 5, 6) sts)
Work 4 rows in St st.
At this point Back should meas 10 (11, 11.5, 12, 12.5)” from CO edge.
BO all sts loosely.
Re-join yarn at Neckline Edge at back of work.
Next Row (WS): P1, p2tog, p to end. (6 (6, 7, 7, 8) sts)
Next Row: K to final 3 sts, k2tog, k1. (5 (5, 6, 6, 7) sts)
Next Row: P1, p2tog, p to end. (4 (4, 5, 5, 6) sts)
Work 4 rows in St st.
At this point Back should meas 10 (11, 11.5, 12, 12.5)” from CO edge.
BO all sts loosely.
Front
Work as for Back to **.
Starting with a RS row, work 2 (8, 8, 12, 12) rows of St st, and the same number of extra rows you may have added to Back for length, ending with a WS row.
Chart placement Row (RS): K17 (18, 20, 21, 24), pm, work 25 sts from the Sail Away chart, pm, k17 (18, 20, 21, 24).
Starting with a WS row, cont in St st, working the appropriate character chart between the stitch markers until you have worked a total of 34 (34, 36, 34, 36) rows of the Sail Away chart.
Cont working the chart between the markers while you are working the Armhole and raglan rows.
Front Armhole
Work as for Back Armhole from *** to ****.
Starting with a RS row, work a further 4 (6, 6, 8, 8) rows in St st.
At this point Back should meas 7.25 (8.25, 8.5, 9, 9.25)” from CO edge.
Front Neckline
Next Row (RS): K8 (8, 9, 10, 11), k2tog, k1, BO 15 (15, 17, 17, 17) sts, k1, ssk, k8 (8, 9, 10, 11). (10 (10, 11, 12, 13) sts remaining on either side of Neckline)
Work only on the sts that the working yarn is attached to.
Next Row (WS): Purl.
Row 1 (RS): K1, ssk, k to end. (9 (9, 10, 11, 12) sts)
Row 2: Purl.
Work Rows 1-2, 5 (5, 5, 6, 6) more times. (4 (4, 5, 5, 6) sts)
Work 8 (8, 10, 8, 10) rows in St st.
At this point Back should meas 10 (11, 11.5, 12, 12.5)” from CO edge.
BO all sts loosely.
Re-join yarn at Neckline Edge at back of work.
Next Row (WS): Purl
Next Row: K to final 3 sts, k2tog, k1. (9 (9, 10, 11, 12) sts)
Next Row: Purl.
Work Rows 1-2, 5 (5, 5, 6, 6) more times. (4 (4, 5, 5, 6) sts)
Work 8 (8, 10, 8, 10) rows in St st.
At this point Back should meas 10 (11, 11.5, 12, 12.5)” from CO edge.
BO all sts loosely.
Weave in all ends. Join side seams.
Armhole Edging
With RS facing, MC, and smaller needles, starting at the right-hand corner of Armhole, PU and k58 (62, 66, 70, 74) sts evenly along Armhole edge.
Starting with a WS row, work in 2 x 2 ribbing for 1″.
BO all sts loosely in patt.
Repeat for second side.
Front Neckline Edging
With RS facing, MC and smaller needles, starting at the right-hand corner of Front Neckline, PU and k46 (46, 50, 50, 54) sts evenly along Neckline Edge.
Starting with a WS row, work in 2 x 2 ribbing for 1″.
BO all sts loosely in patt.
Back Neckline Edging
With RS facing, MC, and smaller needles, starting at the right-hand corner of Back Neckline, PU and k38 (38, 38, 42, 42) sts evenly along Neckline edge.
Starting with a WS row, work in 2 x 2 ribbing for 1″.
BO all sts loosely in patt.
Front Shoulder Edging (buttonhole band)
With RS facing, MC, and smaller needles, starting at the right-hand corner of Front Shoulder, PU and k14 sts evenly along Back Shoulder edge.
Row 1 (WS): Sl1 pwise wyif, p1, *k2, p2; rep from * to end.
Row 2 (RS): Sl1 pwise wyib, k1, *p2, k2; rep from * to end.
Row 3: Rep Row 1.
Row 4 (Buttonhole Row): K2, p2tog, yo, k2, p2, k2, yo, p2tog, k2.
Rows 5 and 7: Sl1 pwise wyif, p1, *k2, p2; rep from * to end.
Rows 6 and 8: Sl1 pwise wyib, k1, *p2, k2; rep from * to end.
BO all sts loosely in patt.
Back Shoulder Edging (buttonband)
With RS facing, MC and smaller needles, starting at the far-right hand corner of Back Shoulder, PU and k 14 sts evenly along Front Shoulder Edge.
Rows 1, 3, 5 and 7 (WS): Sl1 pwise wyif, p1, *k2, p2; rep from * to end.
Rows 2, 4, 6 and 8 (RS): Sl1 pwise wyib, k1, *p2, k2; rep from * to end.
BO all sts loosely in patt.
Rep for second Front Shoulder Edgings.
Finishing
Weave in any remaining ends.
Sew buttons into position on the Shoulder Buttonbands.
Wash Vest according to the instructions on the ball band.
Lay out to schematic dimensions and leave to dry flat.
There is NO chart! Can’t do the sail boat! Glad I didn’t start without reading all the directions.
Hi! Charts are always on the right hand side of the pattern. I’ve linked them here:
https://www.ilikeknitting.com/wp-content/uploads/Little-Sailor-Baby-Vest-Chart.png
https://www.ilikeknitting.com/wp-content/uploads/Little-Sailor-Baby-Vest-Schematic.png
-Nicola, Editor