

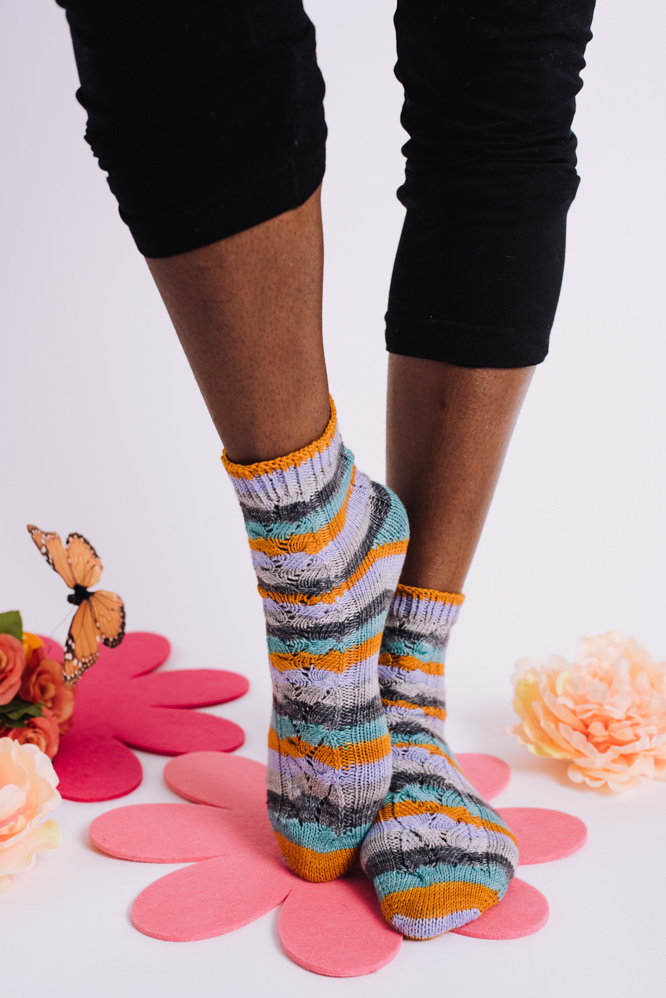
This beautiful self-striping yarn is reminiscent of butterflies, fluttering about through the wildflowers. Never staying in one place, and moving along so fast, you can hardly keep your eyes focused on one spot of color of their wings. Featuring a butterfly-inspired center stitch, these colorful socks will remind you of nature’s beauty each time you wear them.
Skill Level: Intermediate
Size: Small (Medium, Large); approx. 6.75 (7.75, 8.75)” foot and ankle circumference. The leg height and foot length of all sizes are adjustable to fit and preference.
Shown in size Medium.
Gauge: 36 sts and 44 rows = 4” [10 cm] in St st, blocked.
Materials
 Yarn: Blue Moon Fiber Arts Socks That Rock Lightweight (100% Merino; 405 yards [370 meters]/146 grams): Princess Plummy (1 skein).
Needles: US size 1.5 / (2.5 mm) or size required to obtain gauge.
Notions: 1 stitch marker (optional), one stitch marker, tapestry needle
Abbreviations
kfb – knit into the front of the stitch and then into the back of the stitch
ktbl – knit through back loop
4/4 RC – slip 4 sts to cn, hold in back, k4, k4 from cn.
4/4LC – slip 4 sts to cn, hold in front, k4, k4 from cn.
Stitch Pattern
Note: The written instructions are for the first half of the sts.
For Foot and Leg in St st, work round instructions followed by K28 (32, 36).
If you wish to have the pattern on the front and back of the leg, work round instructions twice. For the second sock, if you wish to have two matching socks, work second sock the same as the first. If you wish to have mirrored socks, work Rnds 9-16 and then repeat Rnds 1-16 until desired length, ending on either Rnd 8.
Rnd 1: K4 (6, 8), p2, 4/4 RC, k3, yo, k3, k2tog, p2, k4 (6, 8).
Rnd 2 and all even rnds: K4 (6, 8), p2, k16, p2, k4 (6, 8).
Rnd 3: K4 (6, 8), p2, ssk, k6, yo, k4, yo, k2, k2tog, p2, k4 (6, 8).
Rnd 5: K4 (6, 8), p2, ssk, k5, yo, k6, yo, k1, k2tog, p2, k4 (6, 8).
Rnd 7: K4 (6, 8), p2, ssk, k4, yo, k8, yo, k2tog, p2, k4 (6, 8).
Rnd 9: K4 (6, 8), p2, ssk, k3, yo, k3, 4/4LC, p2, k4 (6, 8).
Rnd 11: K4 (6, 8), p2, ssk, k2, yo, k4, yo, k6, k2tog, p2, k4 (6, 8).
Rnd 13: K4 (6, 8), p2, ssk, k1, yo, k6, yo, k5, k2tog, p2, k4 (6, 8).
Rnd 15: K4 (6, 8), p2, ssk, yo, k8, yo, k4, k2tog, p2, k4 (6, 8).
Rnd 16: K4 (6, 8), p2, k16, p2, k4 (6, 8).
Rep Rnds 1-16 for patt.
Pattern Notes
The pattern is written for DPNs referring to Needles 1-4.
You can accommodate it for Magic Loop or 2 circulars by in the beginning, using the front for Needles 1 and 2 and the back for Needles 3 and 4.
Pattern
Toe
Using a toe up cast on, (I prefer Judy’s Magic Cast-On), CO 28 (32, 36) sts. Divide sts evenly on the needles. If using DPNs, you may need to move sts from needle to needle from time to time to accommodate the Stitch Pattern. Place a stitch marker to note the beg of rnd.
Note: Needles 1 and 2 are the top of Toe sts. Needles 3 and 4 are the bottom of Toe sts.
Knit across sts on each needle.
Rnd 1: Needle 1: Kfb, knit to end of needle.
Needle 2: K to last 2 sts, kfb, k1.
Needle 3: Kfb, k to end of needle.
Needle 4: K to last 2 sts, kfb, k1.
Rnd 2: K across sts on each needle.
Rep Rnds 1-2 until you have a total of 56 (64, 72) sts.
Note: If you prefer a more pointed toe, cast on fewer stitches and then work more rounds until you have increased to 56 (64, 72) sts. If you prefer a different toe, by all means, work your toe of preference until you have the desired amount of sts.
Foot
Once you have reached 56 (64, 72) sts, you will begin working the Foot.
Needles 1 and 2 will be the top of Foot (working the Stitch Pattern) and Needles 3 and 4 will become the Sole sts (working in St st).
Begin working from the charts or from the written instructions, you will be repeating Rnds 1-16.
Cont working the Foot until your work measures 2.5” shorter (LESS) than the entire length of your foot.
Creating the Gusset
In this section, Needles 1 and 2 will cont in Stitch Pattern and cont working up Foot and towards the front of the leg.
Needles 3 and 4 will be increasing and forming the instep gusset on the sole part of Foot working towards the heel of the sock.
Rnd 1: Needles 1 and 2: Cont working the next rnd in patt.
Needle 3: Kfb, k to end of needle.
Needle 4: K until 2 sts remain, kfb, k1.
Rnd 2: Needles 1 and 2: Cont working in patt.
Needles 3 and 4: K all sts.
Rep last 2 rnds until you have a total of 48 (56, 64) sts on Needles 3 and 4.
Turning the Heel
Once you have reached 48 (56, 64) sts, you will begin turning the heel.
Work over Needles 1 and 2 once more, they will hold you the top sts.
Cont working back and forth over Needles 3 and 4, turning the heel.
Note: Make special of note the last rnd you worked in Stitch Pattern, as you will cont working that same rnd once the heel has been turned.
Row 1 (RS): K27 (31, 35), ssk, k1, turn.
Row 2 (WS): Sl1 pwise, p7, p2tog, p1, turn.
Row 3: Sl1 pwise, k until one stitch before the gap, ssk, k1, turn.
Row 4: Sl1 pwise, p until 1 st before the gap, p2tog, p1, turn.
Rep Rows 3-4 until you have a total of 28 (32, 36) sts remaining on Needles 3 and 4.
Leg
Note: Resume working on all 4 needles, paying careful attention as to working the rest of the same rnd in Stitch Pattern where you left off to turn the heel.
The sample is shown with the pattern on both Front and Back of the sock.
You can make this sock as simple or as detailed as you would like.
If you wish to keep the Back of Leg in St st, keep working the patt as you were.
If you wish to have the Stitch Pattern on the back of the sock that is on the front, start working Back, repeating the same row that you worked over Needles 1 and 2 before working the Gusset and then after that working the Stitch Pattern twice.
Either way you choose to do Leg, you may need to pick up a st on either side to close up any holes there may be, remembering to k2tog or ssk with an end st to maintain the correct st count.
Work Leg until 1.5-2” less than the entire desired length of sock.
Cuff
Knit 1 rnd.
Ribbing Rnd 1: *Ktbl, p1; rep from * around.
Rep Ribbing Rnd 1 for 1.5-2”.
BO all sts in patt using a stretchy bind-off.
Make second sock same as the first. Enjoy!
Could you please offer a chart for this knitting design?
Hello! I’ve reached out to the designer for advice and she or I will reply as soon as possible. Thanks! – Nicola, Editor
Hello! I’ve included the original charts for this design. Please note, that I do not believe these were tech edited at the time, but hopefully they are still helpful. -Nicola, Editor