

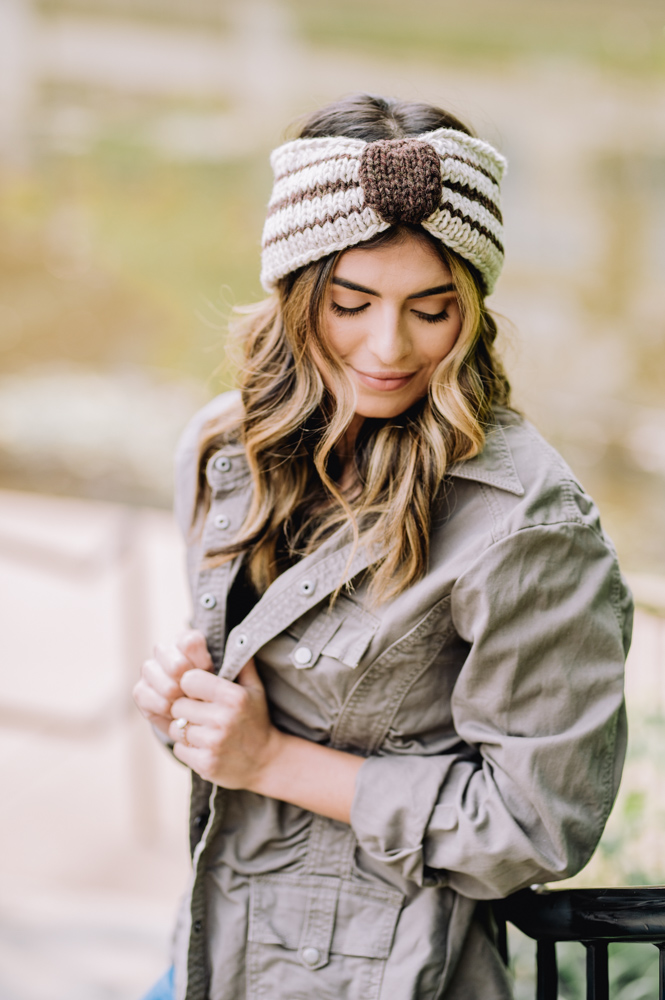
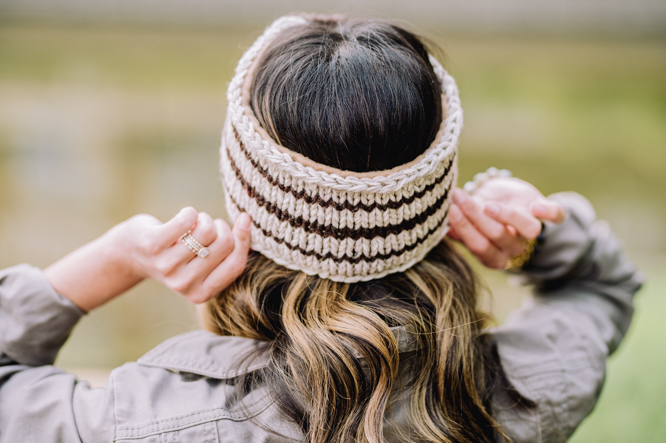
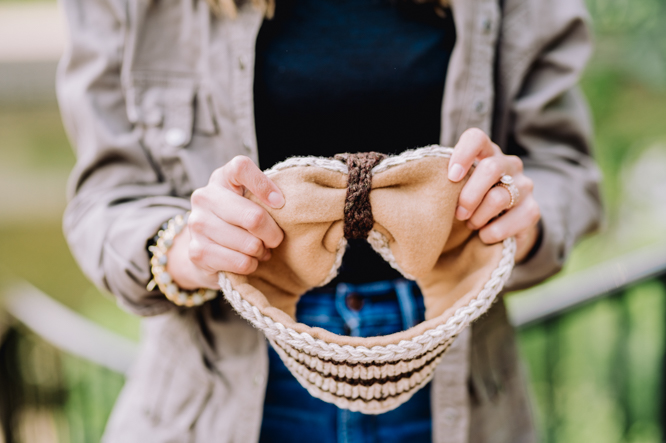
Worked in the round using three strands of yarn held together, this warm, chunky headband is the perfect autumn and winter accessory. We’ve paired three natural colors of undyed wool to create the two-tone background, with bold chocolate stripes. A complementary fleece lining makes the headband extra cozy, while adding another shade of natural color. The piece is finished off with a dark brown tie in the front, adding a touch of character and interest to the design.
Time: Day Project
Skill Level: Easy
Size: Finished Headband Circumference Adult Small (Medium, Large), 20 (21, 22)” and 4.5” wide
Shown in size Small
Gauge: 11 sts and 16 rnds = 4” [10 cm] in St st with larger needle using three strands of yarn held tog
Materials
Yarn: Cascade Yarns Eco Merino DK (100% Merino wool; 254 yards [233 meters]/100 grams): #03 Ecru (MC, 1 ball), #04 Doeskin (CC1, 1 ball), #05 Dark Chocolate (CC2, 1 ball)
Hook/Needles: US size 10.5 (6.5 mm) and US size 11 (8 mm) 16” circular needle
Notions: Waste yarn for provisional cast-on, stitch holder (or scrap yarn), stitch marker, tapestry needle, ⅛ yard fleece fabric with matching sewing thread and sewing needle
Abbreviations
kf&b – Knit into the front, then back of the next st. (1 st increased)
skp – Sl1k, knit 1 st, pass slipped st over knit st. (1 st decreased)
Pattern Notes
Because this project is worked with 3 strands of yarn held together at all times, you will need to divide your yarns into multiple balls, before beginning the project. Divide MC into 2 equal size balls. Divide CC2 into 3 equal size balls. CC1 can be wound into a single ball.
Pattern
Headband
With larger needle and using 1 strand of MC and 2 strands of CC1 held tog (total of 3 strands), CO 55 (58, 61) sts using a basic cast-on method such as Thumb cast-on. Pm and join to beg working in the rnd.
Switch to smaller needles.
Rnds 1-3: Knit.
Do not cut yarn. Switch to 3 strands of color CC2 held tog.
Rnd 4: Knit
Do not cut yarn. Switch back to previous 3 strands (1x MC and 2x CC1).
Rnds 5-7: Knit
Do not cut yarn. Switch back to previous 3 strands (3x CC2).
Rnds 8-9: Knit
Do not cut yarn. Switch back to previous 3 strands (1x MC and 2x CC).
Rnds 10-12: Knit
Do not cut yarn. Switch back to previous 3 strands (3x CC2).
Rnd 13: Knit
Cut all strands of CC2. Switch back to previous 3 strands (1x MC and 2x CC).
Rnds 14-16: Knit
Switch to larger needles, then BO using a basic bind-off, such as a K2togtbl bind-off.
Weave in all yarn ends.
Tie
With smaller needle and using three strands of CC2 held tog, CO 3 sts with a provisional cast-on.
Note: You will be working back and forth in rows.
Odd Rows 1-7 (WS): Sl1p wyif, p2.
Even Rows 2-6 (RS): Sl1k wyib, k2.
Row 8: Kf&b 3 times. (6 sts)
Row 9: S1p wyif, p to end of row.
Row 10: Sl1k wyib, kf&b, k2, kf&b, k1. (8 sts)
Odd Rows 11-17: Sl1p wyif, p to end of row.
Even Rows 12-16: Sl1k wyib, k to end of row.
Row 18: Skp, k4, k2tog. (6 sts rem)
Row 19: Sl1p wyif, p to end of row.
Row 20: Skp, k2tog twice. (3 sts rem)
Odd Rows 21-25: Sl1p wyif, p2.
Even Rows 22-24: Sl1k wyib, k2.
Cut the yarn, leaving a long enough tail of all strands to graft the piece later on. Place the sts on a holder and set aside.
Finishing
Attaching the Lining:
Cut a piece of fleece fabric 5½” x 23” (24”, 25”). Fold the piece in half widthwise and seam the two short ends together, with ½” seam allowance, to form a ring.
Turn the knitted headband inside-out, so the WS is showing. Place the fabric ring around the knitted band, positioning the fabric seam in-line with the beginning-of-the-round on the knitting.
Fold the fabric ½” under all the way around the top and bottom of the headband and pin to the WS of the knitting.
Using matching thread, stitch the fabric in place, being sure not to go all the way through the knitting so the sts are invisible on the RS.
Attaching the Tie:
Cut two 12” strands of one of your yarns and hold them together. Tie them tightly around one side of headband, at the beg of the rnd, to cinch the headband into shape, where the tie will go.
Place the held sts from the tie piece onto one needle. Remove the scrap yarn from the provisional cast-on and place the cast on sts on a second needle. With the RS of the tie piece facing out, wrap the tie around the headband, over the yarn you just tied and graft the two ends tog using Kitchener Stitch, or the grafting method of your choice. Weave in the yarn ends.
Hello, can you please tell me where I can find all the abbreviations to work this pattern? I am a beginner and a French speaking person. Is there a French translation for this pattern? Thank you very much for your help and if I may add that your site is amazing!
Hi Roseline! So glad you love our site!
These are the abbreviations listed for this pattern, but if you need help with others not listed I’m happy to try!
kf&b – Knit into the front, then back of the next st. (1 st increased)
skp – Sl1k, knit 1 st, pass slipped st over knit st. (1 st decreased)
– Nicola, Editor
Is there a pdf of this pattern?
Hello! Thank you for your feedback. We are always looking for new ways to improve our user experience. We currently do not allow downloads of our patterns, but are exploring options in the near future. – Nicola, Editor
Hi Roseline,
Thank you for your interest in this pattern!
It is currently available as a downloadable PFD on Ravelry here:
https://www.ravelry.com/patterns/library/bronwyn-chunky-headband
Please feel free to reach out if you have any questions!
Sophia – (Designer)