

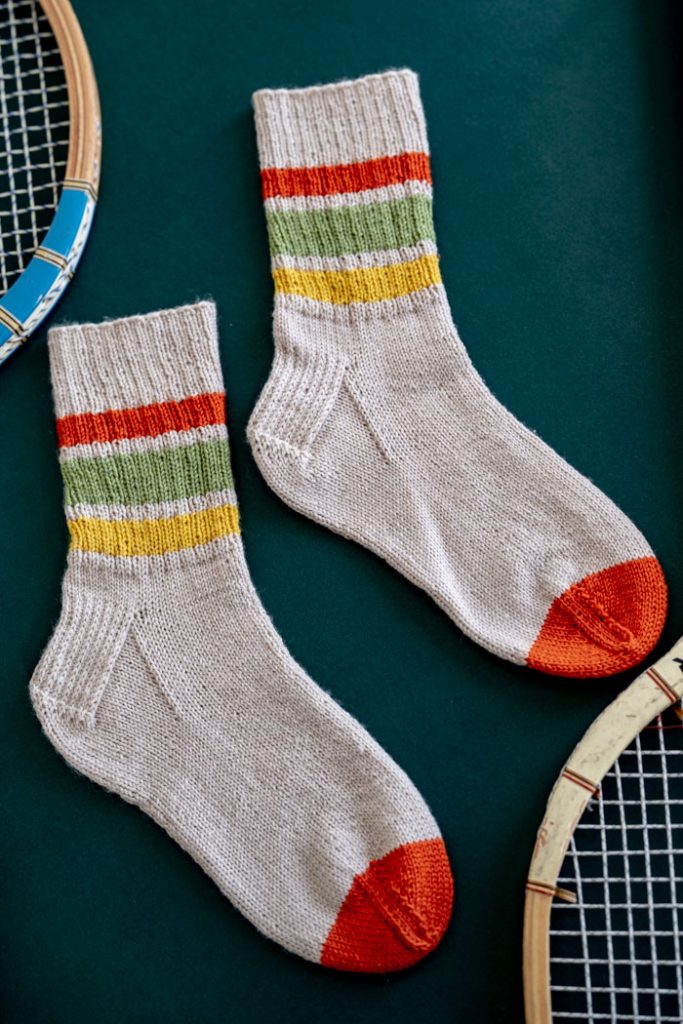
Channel vintage gym-class cool with a modern, boho twist in the Varsity Stripe Socks. Inspired by the bold athletic socks of the ’70s, this playful design features stripes in three colors, a contrasting toe and subtle stitch texture that adds depth without complexity. Easy to knit and endlessly customizable, this pattern invites you to express your personal style—whether you go for sunwashed tones, retro brights, or earthy neutrals. Slip them on and step into your own laid-back, color-loving era.
Time: Week-long project (1-2 weeks depending on knitter)
Gauge: 7-8 stitches per inch on a US Size 1
Sizes: Small (Medium, Large)
US 5/6 (7/8, 9/10). Length can easily be adjusted by following my chart in the foot section.
Shown in size Medium (US 7/8)
Materials
 Yarn: Fingering Weight Yarn. Sample knit in: Cascade Yarns Heritage (75% Superwash Merino Wool/25% Nylon; 437yds/100g per skein)
CC Colorways for Stripes:
CC1 Pumkin (orange) Also used for toe. 14 grams used.
CC2 Fern (green). 11 grams used.
CC3 Mustard (yellow). 6 grams used.
MC Macadamia (cream). 53 grams used.
Used for small cuff, stripes, heel, foot
Needles: US 1 (2.25mm) needles—Pattern is easy to use for your method of choice: DPNs, Magic Loop, 9” circulars. I chose DPNs.
Abbreviations
SSK—Slip Slip Knit. Slip 2 stitches purlwise, one at a time, then knit together through the front loop.
Notes
This pattern is constructed from the top/cuff down, with a heel flap/turn and gusset, and a rounded toe. Written instructions are provided. No charts needed for this simple pattern.
Striped Sock Instructions
Cuff
With US 1 (2.25mm) needles and MC, CO 54 (63, 72) sts and join for working in the round, being careful not to twist your sts. Work a 2 x 1 rib pattern: [k2, p1] around to end, for 2” or desired length.
Leg
Begin stripes. Tip: Knit one full round of the color change to avoid the purl bumps showing on the front of the sock. Counts as one round. This creates a clean edge along the new color round.
Continue working in 2 x 1 rib for the remainder of the leg.
Change to CC1 for a total of 8 rounds.
Change to MC for a total of 4 rounds.
Change to CC2 for a total of 12 rounds.
Change to MC for a total of 4 rounds.
Change to CC3 for a total of 8 rounds.
Change to MC for a total of 4 rounds.
Continue in plain knitting with MC until piece measures 6” from cast on edge.
On the final round before the heel, size Small only increase 2 sts from a 54 CO (to 56) and size Medium only increase 1 st from a 63 CO (to 64). I use kfb on the last 3 sts to increase.
Distribute sts for your heel flap setup.
Tip: This is a good time to weave in any ends.
Slip Stitch Heel Flap
This will be worked over half of your cast on stitches. 28 (32, 36) stitches.
Row 1: *Sl 1 purlwise with yarn in back, K1; repeat across row. (28 (32, 36) stitches)
Row 2: Sl 1 purlwise with yarn in front, purl across row.
Repeat rows 1 & 2 a total of 14 (16, 18) times (the last two rows above count as one repeat). You will end with a total of 28 (32, 36) rows on your heel flap.
Heel Turn
Row 1: Sl 1 purlwise with yarn in back, k14 (16, 18), ssk, k1, turn.
Row 2: Sl 1 purlwise with yarn in front, p3, p2tog, p1, turn.
Row 3: Sl 1 purlwise with yarn in back, knit to 1 st before gap, ssk, k1, turn.
Row 4: Sl 1 purlwise with yarn in front, purl to 1 st before gap, p2tog, p1, turn.
Repeat rows 3 & 4 until all stitches on the heel have been worked. You will end after a wrong side (WS) row and have 16 (18, 20) sts left.
Gusset
Knit across the row. Using the same needle, pick up 16 (18, 20) sts along the side of the heel flap. Pick up 1 extra stitch in corner. Continue knitting across the instep stitches.
Pick up 1 extra stitch in the corner, then pick up 16 sts along the other side of the heel flap, knit the next 8 (9, 10) sts from the 1st needle.
You are now at the BOR. Place a marker if you need to.
Gusset Decrease
Round 1: knit all sts
Round 2: K to 3 sts before the instep begins, k2tog, k1. Knit all sts across instep stitches. K1, ssk, knit to end of round.
Repeat these two rounds until you have or original 56 (64, 72) stitches.
Foot
Once you are back to your original stitch count of 56 (64, 72), continue working the foot until the length measures 1.5” – 2” shorter than your desired foot length.
The Craft Yarn Council has issued the following length guidelines for the foot of the sock, measuring from the back of the heel to the end of the longest toes. I wear a size 8 shoe and stop knitting right before the toe at approximately 7.25” from the back of the heel. My foot measures approximately 9.25”.
(ALL are US sizes)
Women’s shoe sizes 4-6.5: 8 – 9” (20 – 23 cm)
Women’s shoe sizes 7-9.5: 9.25 – 10” (23 – 25.5 cm)
Women’s shoe sizes 10-12.5: 10.25 – 11” (26 – 28 cm
Men’s shoe sizes 6-8.5: 9.25 – 10” (23 – 25.5 cm)
Men’s shoe sizes 9-11.5: 10.25 – 11” (26 – 28 cm)
Men’s shoe sizes 12-14: 11.25 – 12” (28.5 – 30.5 cm)
Toe
Change to CC1
Instructions for a basic rounded toe. This is my favorite, but feel free to substitute your favorite.
Round 1: Knit all sts
Round 2: K to 3 sts before instep, K2tog, k1. K1, ssk, k across instep sts until you have 3 sts remaining, k2tog, k1. K1, ssk, k until end of round.
Repeat last 2 rounds a total of 8 times. Repeat round two 4 more times or until 16 sts remain.
Divide your 16 stitches into 8 stitches on two needles.
Finishing
Using Kitchener Stitch, graft the stitches together to close up the toe. Knit Witch shares her finish. Weave in all ends.
Are you assuming use of 2 circular needles/magic loop or DPNs?
Hi there! In the materials section, the designer writes: “Pattern is easy to use for your method of choice: DPNs, Magic Loop, 9” circulars. I chose DPNs.” I hope that helps! -Dana, Editor