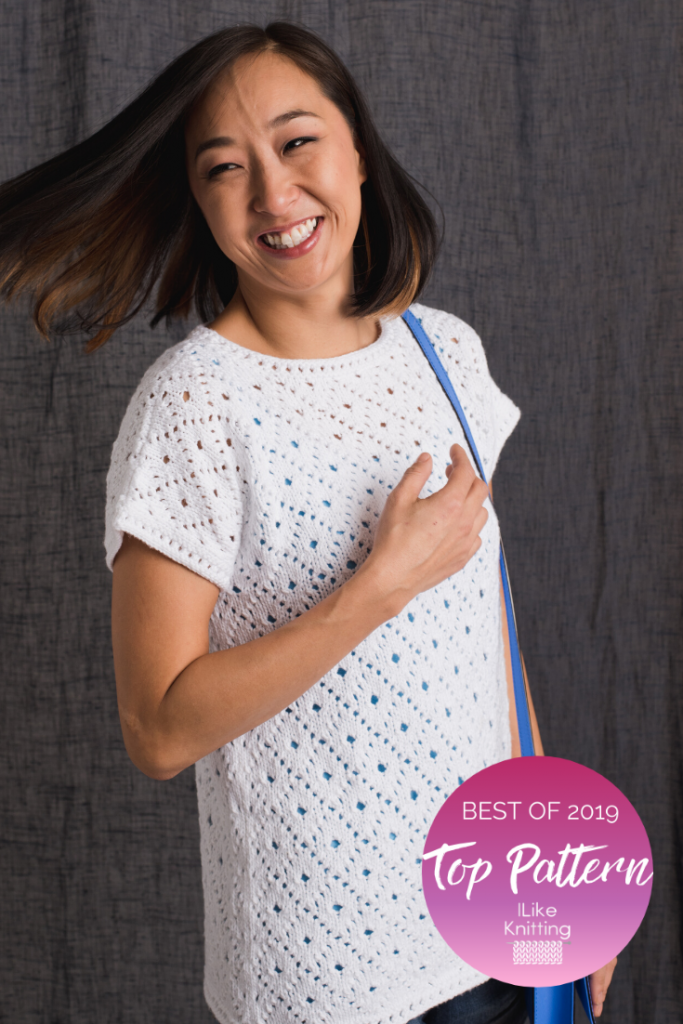
This breezy top will keep you cool all spring and summer long. It’s knit in two pieces, with seams at the shoulders and sides. Imagine how great it will look with your favorite pair of jeans!
Skill Level: Easy
Size: Finished Bust Size 32.75 (36.75, 40.75, 44.75, 48.75)” to fit bust 30 (34, 38, 42, 46)”
2-4” positive ease recommended.
Shown in size 36.75
Gauge: 20 sts and 30 rows = 4” [10 cm] in Diamond Eyelet Stitch after wet blocking
Materials
 Yarn: Universal Yarn Cotton Supreme DK (100% Cotton; 230 yards [210 meters]/100 grams): 701 White 3 (4, 4, 5, 5) balls
Needles: US size 6 (4.0 mm) 24-32” circular, US size 6 (4.0 mm) 16″ long circular for neckband.
Notions: Stitch holders, stitch marker, tapestry needle
Special Stitches
Diamond Eyelet Stitch (multiple of 10 sts + 4)
Row 1 (RS): K2, *k2tog, yo, k6, yo, ssk; rep from * to last 2 sts, k2.
Rows 2, 4 and 6: Purl.
Row 3: K3, *k2tog, yo, k4, yo, ssk, k2; rep from * to last st, k1.
Row 5: K4, *k2tog, yo, k2, yo, ssk, k4; rep from * to end.
Row 7: K2, yo, ssk, *k1, k2tog, yo2, ssk; rep from * to last 5 sts, k1, k2tog, yo, k2.
Row 8 (WS): P6, *pfb into double yarn over, p3; rep from * to last 3 sts, p3.
Row 9: K5, *yo, ssk, k2tog, yo, k6; rep from * to last 9 sts, yo, ssk, k2tog, yo, k5.
Rows 10, 12 and 14: Purl.
Row 11: K4, *yo, ssk, k2, k2tog, yo, k4; rep from * to end.
Row 13: K3, *yo, ssk, k4, k2tog, yo, k2; rep from * to last st, k1.
Row 15: Rep Row 7.
Row 16 (WS): Rep Row 8.
Rep Rows 1-16 for patt.
Pattern Notes
This top is worked from the bottom up. The back and front are worked separately, then sewn together at the shoulders and sides.
Pattern
Back
CO 84 (94, 104, 114, 124) sts.
Border
Row 1 (WS): Knit.
Row 2 (RS): Knit.
Row 3: P2, *yo, p2tog; rep from * to last 2 sts, p2.
Rows 4-6: Knit.
Row 7: Purl.
Body
Begin Diamond Eyelet Stitch pattern. Work even in pattern until piece measures 14 (15, 15, 16, 16)”, ending with WS row.
Shape Sleeves
Inc Row (RS): K2, m1, work in patt to last 2 sts, m1, k2. (2 sts inc’d)
Rep Inc Row every RS row 4 more times. (94 (104, 114, 124, 134) sts)
Next 2 Rows: Maint established patt, work in patt to end, CO 5 sts using cable cast on method. (104 (114, 124, 134, 144) sts)
Work even in patt until piece meas 8 (8.5, 8.5, 9, 9)” from beg of sleeve shaping, ending with WS row.
Shape Back Neck
Row 1 (RS): Work 34 (39, 42, 47, 52) sts in patt, join another ball of yarn and BO center 36 (36, 40, 40, 40) sts, work in patt to end.
Work both sides at once with separate balls of yarn.
Row 2 (WS): Purl to neck edge; on other side, purl to end.
Row 3: Work in patt to last 3 sts, k2tog, k1; on other side, k1, ssk, work in patt to end. (1 st dec’d each side)
Rows 4 and 5: Rep Rows 2-3. (32 (37, 40, 45, 50) sts each side)
Row 6: Purl to neck edge; on other side, purl to end.
Row 7: Work in patt to neck edge; on other side, work in patt to end.
Row 8: Purl to neck edge; on other side, purl to end.
Place all sts on holder.
Front
Work same as Back until piece meas 7 (7.5, 7.5, 8, 8)” from beg of sleeve shaping, ending with WS row.
Shape Front Neck
Row 1 (RS): Work 38 (43, 46, 51, 56) sts in patt, join another ball of yarn and BO center 28 (28, 32, 32, 32) sts, work in patt to end.
Work both sides at once with separate balls of yarn.
Row 2 (WS): Purl to neck edge; on other side, purl to end.
Row 3: Work in patt to last 3 sts, k2tog, k1; on other side, k1, ssk, work in patt to end. (1 st dec’d each side)
Rows 4-5: Rep Rows 2-3, 5 more times. (32 (37, 40, 45, 50) sts each side)
Work even until same length as back to shoulders.
Finishing
Join shoulder seams using 3-needle BO method.
Neckband
With shorter circular needles and beg at right shoulder seam, pick up and k96 (96, 106, 106, 106) sts along neck edge. PM for beg of rnd and join to work in the rnd.
Rnd 1: Purl
Rnd 2: Knit
Rnd 3: *K2tog, yo; rep from * to end.
Rnd 4: Knit.
Rnd 5: Purl.
BO all sts.
Sleeve Borders
Pick up and knit 70 (74, 74, 80, 80) sts along edge of sleeve.
Row 1 (WS): Knit.
Row 2 (RS): Knit.
Row 3: P1, *p2tog, yo; rep from * to last st, p1.
Rows 4-5: Knit
BO all sts.
Sew side seams.
Weave in ends. Block to finished measurements.


How many stitch increase, row 8, on the PFB into double yarn over?
Hello Suzanne! I’ve reached out to the designer for advice and she or I will reply as soon as possible. Thanks! – Nicola, Editor
The pfb into the double yarn over does not increase the stitch count. Two loops on the needle from the double yarn over are worked as two purl stitches on the following row.
The double yarn over in row 8 of the diamond eyelet stitch sounds difficult to me, a novice knitter. The PFB part I understand, but pfb into double yarn over?? Any way that you could explain that to me?
Hello! I’ve reached out to the designer for advice and she or I will reply as soon as possible. Thanks! – Nicola, Editor
The double yarn over is simply a way of measuring out the yarn that makes that central eyelet a little bigger than its neighbors. It is flanked with a decrease on each side, and it makes two loops around the needle, so there is no change in the stitch count.
On the following row, you work two stitches into this double yarn over by purling into the front and back of it. You begin by purling normally into the first loop of the double yarn over, dropping that loop off the needle. Then you purl through back loop into the second loop of the double yarn over. https://www.youtube.com/watch?v=8GIpzQRn37o
Thank you Very Much. As an older knitter starting in 1946 (5 yrs. old) I am Always looking for new ideas to knit. I knit from the picture, not needing a printed pattern. I knit morn., noon, and night, – whenever I’m not eating!
That’s so impressive! Happy knitting! – Nicola, Editor