

Many knitters have a memory of shrinking a wool garment accidentally while doing laundry. If you’re one of those knitters, congratulations! You’ve already knitfelted, or “fulled,” your first project.
What is knitfelting or fulling anyway? Wool fibers have small scales. When the project you knit with wool yarn is wet and then agitated and exposed to
Many knitters have a memory of shrinking a wool garment accidentally while doing laundry. If you’re one of those knitters, congratulations! You’ve already knitfelted, or “fulled,” your first project.
What is knitfelting or fulling anyway? Wool fibers have small scales. When the project you knit with wool yarn is wet and then agitated and exposed to heat, the scales become interlocked. This creates the appearance of shrinking as the project pulls together. Knitfelted fabric become very dense and doesn’t unravel. It can even be cut and rearranged.
Knitfelted fabric is great for projects like bags and cozies because they do not need to be lined. Similarly, the dense fabric makes cozy winter wearables. Because it can be cut, knitfelted fabrics are also great for creating appliques and other decorations to sew onto other projects.
Getting Started with your Knitfelted Project
Start by choosing a wool yarn that is not marked “superwash” or “washable.” (Those wools have been chemically treated to prevent fulling) Some other natural animal fibers, such as alpaca, can also be knitfelted.
Since your project will shrink in size as it felts, you will need to knit it to be larger than the finished size. Knitfelting is more of an art that a science, and there are many factors that impact how much the final project will felt. For your first knitfelting projects, choose projects like bags where exact size isn’t critical. As you gain confidence in your knitfelting abilities, you may choose patterns like hats that need to be felted to specific dimensions.
Because much of the texture of the finished project will be flattened, choose simple stitch patterns like stockinette or highly textured patterns like cables for the best results.
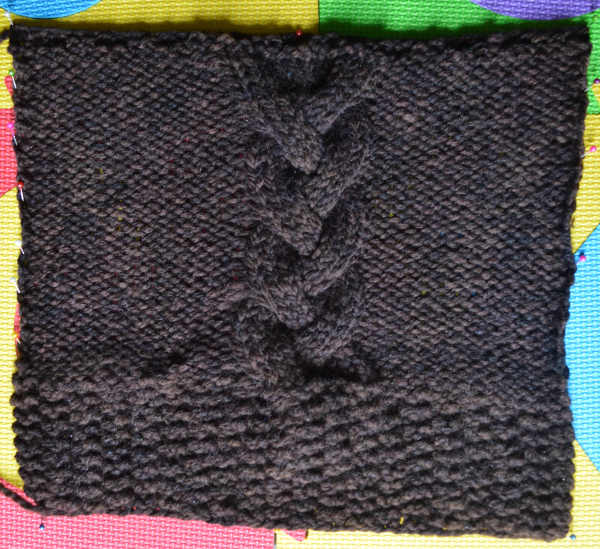
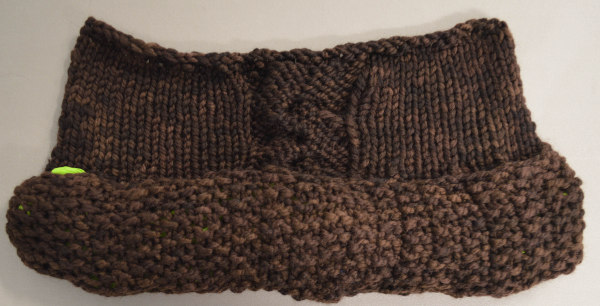
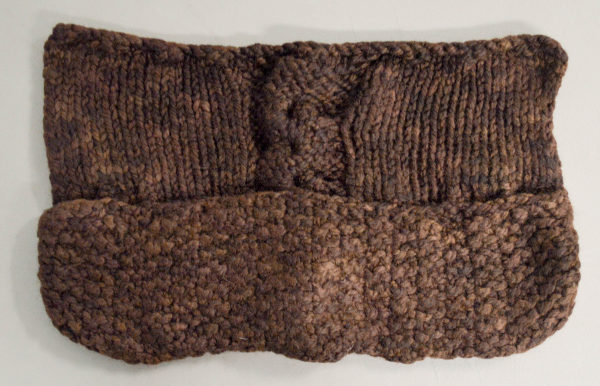
This knitted crochet hook case combines reverse stockinette stitch, plaited cables, and double moss stitch.
To prepare your finished project for the washer, weave in any yarn ends. If you want the seams to be felted, join them now. If you’d prefer to have an embroidered or overlock stitch appearance, knitfelt each piece separately and join any seams afterwards.
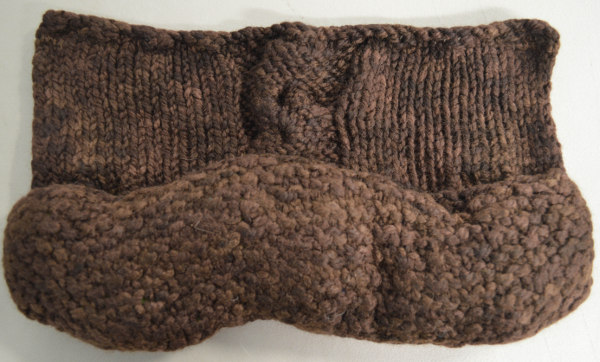
The seamed crochet hook case, from the inside.
Avoid allowing the wool fabric to press against other pieces as these may felt together. Be sure to stuff seamed projects with plastic bags before washing.
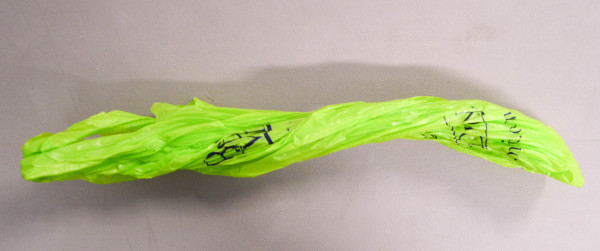
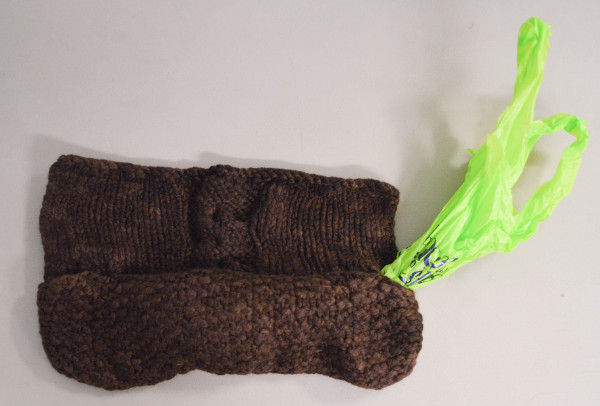
Twist a plastic bag into a long tube. Larger projects may require several bags.
Stuff the plastic bag(s) into the seamed area.
Knitfelting in the Washer and Dryer
Before you get started, remember that you can always felt more, but you can’t felt less! So take your time as you knitfelt your project. Both agitation and heat can help a project felt, so start with agitation alone.

Insert project into a large lingerie bag. Be sure to put each unseamed piece into its own bag to avoid felting.
To increase the amount of agitation without damaging your project, wash it in a half-full load. Choose a delicate spin cycle with cold water (often called the “woolens setting”). Wash with jeans or other fabrics that are unlikely to shed or pill to prevent damage to your felted project.
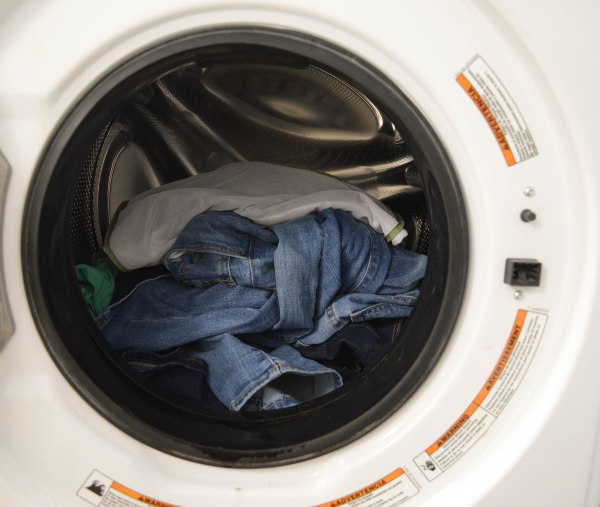
Insert lingerie bag into a half full washing machine.
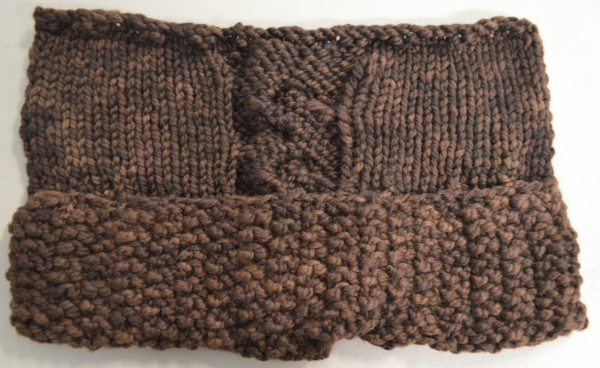
Use a small amount of detergent to stimulate the felting process. After the project comes out of the washer, examine it to see if it has knitfelted enough for your preference.
The knit crochet hook case after washing.
If you plan to felt the project further, remove any plastic bags before placing into the dryer.
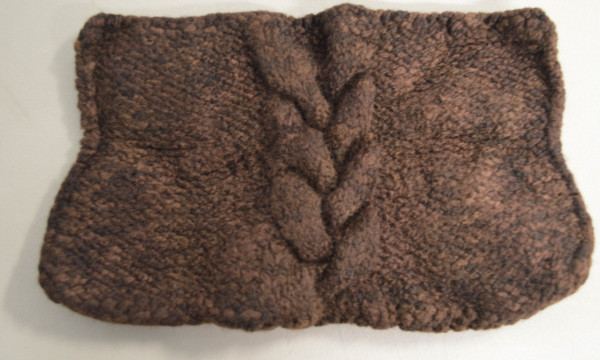
The knit crochet hook case after washing and removing the plastic bags.
If you plan to continue felting, return the knit project to the lingerie bag.
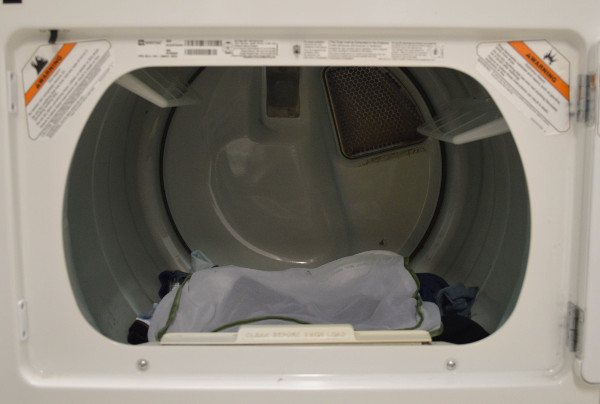
Place the lingerie bag into a half full dryer.
Dry on the low heat or delicate setting, checking every 10 minutes, until your project reaches the desired size and density.
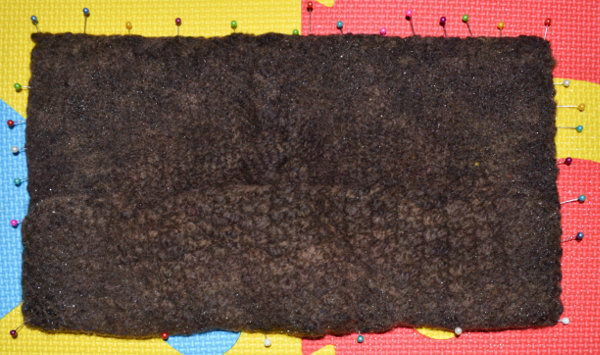
The project has reached the right size, but needs to be blocked to shape.
After you have felted the project to your desired size and density (either through the washer alone or with the aid of a dryer), be sure to block the final project to shape. If it is still wet, simply pin it to a blocking board or foam mats.

If your project is already dry, spritz it with water and block to shape.
Knitfelted projects can also be ironed on the wool setting if there is persistent wrinkling.
With these simple steps, you can felt, or full, any project you knit with wool yarn.
Think you understand the basics? Turn the page to try out felting with the Mint Chocolate Chip Bag! 