


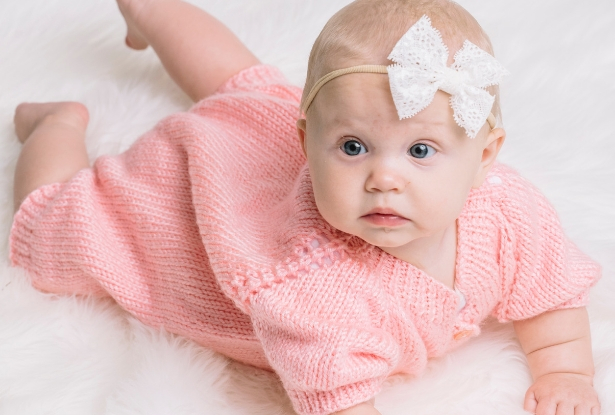
The Rosalyn Baby Romper is the perfect blend of comfort, charm, and practicality for little ones. Designed with ease in mind, this adorable romper is worked seamlessly from the top down in a classic raglan construction, ensuring a great fit and minimal finishing. The open-front design allows for easy dressing and quick changes, making it a go-to piece for both everyday wear and special occasions. Short sleeves keep it light and breathable, while the option to personalize it with your favorite buttons adds a touch of individuality. Whether you’re knitting for your own little one or creating a heartfelt handmade gift, the Rosalyn Baby Romper is sure to be cherished.
Skill Level: Easy
Size: Finished Chest Size 20 (24, 26)” to fit chest 18 (22, 24)”
Shown in size 26”
Gauge: 18 sts and 24 rows = 4” [10 cm] in St st after wet blocking
Materials
 Yarn: Red Heart Soft Baby Steps (100% Acrylic; 256 yards / [234 meters]/142 grams): E746_9700 Baby Pink (2 balls)
Needles: US size 5 (3.75 mm) 32” circular and DPNs, US size 8 (5 mm) 32” circular and DPNs
Notions: Stitch markers, stitch holders, tapestry needle, eight 0.5” buttons, sewing needle and matching thread
Abbreviations
PM: Place marker
SM: Slip Marker
Special Stitches
K1, P1 Ribbing
Row 1: *K1, p1; rep from * across.
Rep Row 1 for patt.
Pattern Notes
This pattern is worked from the top down.
Pattern
With smaller needles, CO 40 (50, 60) sts. Do not join.
Work 8 rows of K1, P1 Ribbing.
Yoke
Switch to larger needles and work as follows:
Row 1: K8 (11, 13) (Left Front), PM, k1 (seam st), PM, k2 (Left Sleeve), PM, k1 (seam st), PM, k16 (20, 26) (Back), PM, k1 (seam st), PM, k2 (Right Sleeve), PM, k1 (seam st), PM, k8 (11, 13) (Right Front). (40 (50, 60) sts)
Row 2: Purl.
Row 3: (Knit to marker, yo, SM, k1, SM, yo) 4 times, knit to end. (8 sts inc’d)
Rep Rows 2-3 until you have 18 (23, 28) sts for each Front, 22 (26, 32) sts for each Sleeve, 36 (44, 56) sts for Back, and 4 seam sts. (120 (146, 180) sts)
Separate Body and Sleeves
Work 19 (24, 29) sts for Left Front sts plus the seam st, CO 6 sts for underarm. Place 22 (26, 32) Sleeve sts on holder. Work 38 (46, 58) sts for seam and Back sts on needles, CO 6 sts for underarm. Place 22 (26, 32) Sleeve sts on holder. Work 19 (24, 29) sts for seam st and Right Front sts. (88 (106, 128) sts)
Work in St st until piece meas 10 (12, 14)”.
Legs
BO 4 sts, work next 36 (45, 56) sts, place these sts on holder, BO next 8 sts for bottom of Back, work to end of row.
BO 4 sts and work to end of row. (36 (45, 56) sts)
BO 1 st at the beginning and end of every other row 4 times. (28 (37, 48) sts)
Switch to smaller needles.
Work in K1, P1 Ribbing for 1”.
BO all sts loosely.
Work the same on the other leg.
Sleeve (make 2)
Using larger DPNs, CO 3 sts, knit next 22 (26, 32) sts from holder, CO 3 sts. (28 (32, 38) sts)
Work in St st for 1”.
Switch to smaller needles.
Work K1, P1 Ribbing for 1”.
BO all sts loosely.
Work the same for the other sleeve.
Button Band
With smaller needles and RS facing you, pick up and knit 35 (40, 44) sts from the edge of the neckline ribbing.
Work 8 rows in Garter st (knit all sts every row).
BO all sts loosely.
Buttonhole Band
Pick up and knit 35 (40, 44) sts to the edge of neckline ribbing.
Work 3 rows in Garter st.
Buttonhole Row: Make buttonholes by working (yo, k2tog). Make 8 buttonholes evenly spaced across row.
Work 4 rows in Garter st.
BO all sts loosely.
Finishing
Sew the underarm seam. Sew the front and back of the legs. Place the buttonhole band on top of
the button band (on the right side) and sew the edge together.
Weave in all ends.
Block romper to size.

I don’t understand how to do the button band or buttonhold band. It says pick up 44st from the edge of the neckline ribbing, but that isn’t going to take me down the length of the romper which is like 96 rows before you get to the leg split. I’m so confused how picking up 44st will form a button band that’s meant to cover 96 rows?? I don’t know what I’m missing here. I’ve studied all the pictures and I still don’t get that step, pleeease help!
Hello! I’ve reached out to the designer for advice and she or I will reply as soon as possible. Thanks! – Dana, Editor
When you pick up sts for the button band or the buttonhole band, you should pick up every other row, not every row. So, if you have 96 rows, it means that your row gauge does not match mine. Therefore, you have to pick up 48 sts and go from there.
you need to show a better picture of the front. It would help to see how far the Buttons go down & how the legs connect, in order to finish the crotch right.
Hello! Thank you for bringing this to our attention! Babies and photo shoots can be unpredictable, but we do have a flat photo of the romper that the designer provided. We’ve added it to the photos, and linked here: https://www.ilikeknitting.com/wp-content/uploads/Rosalyn-Baby-Romper-flat-rotated.jpg
Hope this helps! – Nicola, Editor
Hi! I’m confused as to which stitches to place the markers on during yoke part of the pattern. For example: it says knit 8 (11, 13) and then PM. Do I place a marker on the 13th stitch or would it be on the seam stitch following that? Thank you!
Hello! I’ve reached out to the designer for advice and she or I will reply as soon as possible. Thanks! – Nicola, Editor
The markers do not go on any of the stitches, they go between stitches. So, in your case, the marker goes between the 12th and 13th stitch.
I can’t see how many stitches u start with. Its possible I maybe looking but not seeing. Please could u let me know how many. Many thanks Denise
Hi Denise,
Is this the part you are looking for?
With smaller needles, CO 40 (50, 60) sts. Do not join.
Hope this helps! – Nicola, Editor
Unable to download FREE pattern for rosilyn romper. Please advise
Hi Sherry! At this time, we do not offer downloads of our patterns. On the left hand side of the screen you’ll see a print button which you are welcome to use to print out the pattern instead. Hope this helps! – Nicola, Editor