

There is no need to be daunted by cables – they’re very easy to make! Cables are just a combination of knits and purls that are simply worked out of sequence, typically on the right-side of rows, by repositioning a number of stitches to a cable needle, holding them in front or behind your work
There is no need to be daunted by cables – they’re very easy to make! Cables are just a combination of knits and purls that are simply worked out of sequence, typically on the right-side of rows, by repositioning a number of stitches to a cable needle, holding them in front or behind your work and then knitting them in a different order. Cables can be made over any number of stitches (two-stitch, four-stitch, six-stitch, eight-stitch, ten-stitch cables or more.
In this tutorial, I will show you how to work a cable across six stitches in a stitch sequence known as a c6f – a cable six front. I will also show you how to work its opposite, or “mirror,” a c6b – cable six back. If you’re still confused after this photo tutorial, check out a video tutorial at the bottom of this article on knitting cables.
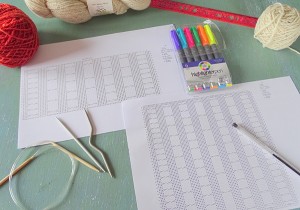
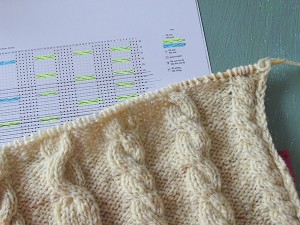
I have here my yarn, needles (I use a circular needle, but you may prefer straights) and chart to follow the pattern. I personally find that using a chart is much easier than following written instructions as I can see the cables visually represented, but written patterns work well. I also have a ruler, pen and highlighter markers nearby.
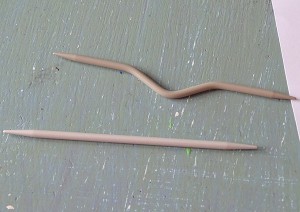
You will also need a cable needle. Try to pick one as close as possible in size to the main needles you are using for the project. Here you can see two of the most common types. If you don’t have If you don’t have a cable needle on hand, you could always use a DPN, just be careful that the stitches don’t slip off mid stitch.
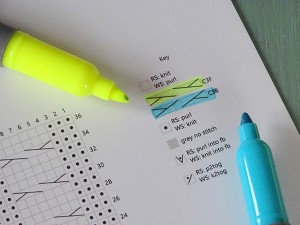
I like to highlight the different types of cables in different colors on my chart. This pattern has two different cables, so I will only use two colors, one for each type of cable.
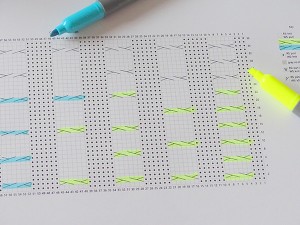
Next, following my color-coded key, I color all cable crosses on my chart. This makes it really easy to see at a glance which sequence of stitches I will be working at any point.
To make the chart really easy to follow, I draw a line through each row as I complete it.
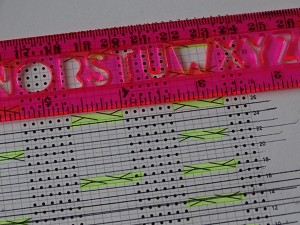
To help keep place of which row on the chart you’re on, use a ruler directly above the row you are working on. This helps you to “read” your work.
Making the cables.
The first cable we come to is a C6F; this means cable six stitches and holding the cable needle to the front of the work. This makes a left-leaning cable, as the stitches travel from the right to the left.
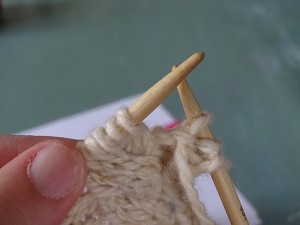
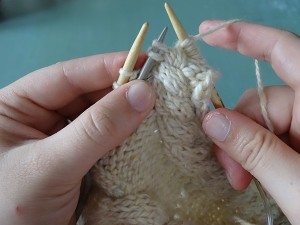
Work to the C6F and slip the next three sts onto the cable needle.
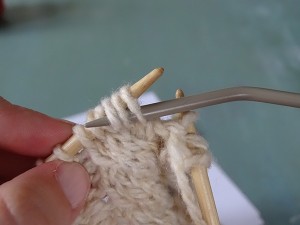
Hold the cable needle to the front of your work. This is important as this is the reason the cable crosses at the front and travels to the left. 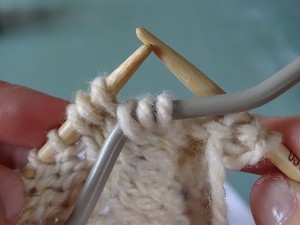
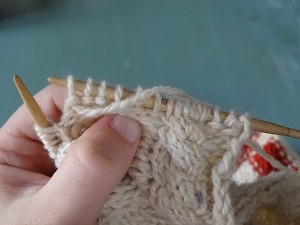
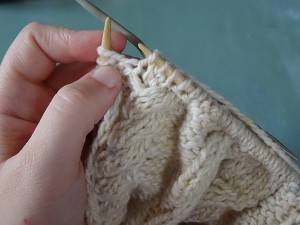
Knit the next three stitches from the left-hand needle…
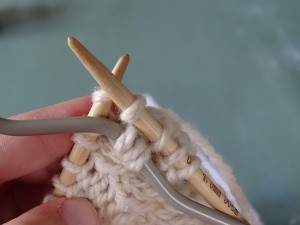
then knit the three stitches from the cable needle, being careful not to twist the stitches.
Continue along the row in the pattern until you reach the next cable.
This time it is a C6B; this means cable six stitches and holding the cable needle to the back of the work. This makes a right-leaning cable, as the stitches travel from the left to the right.
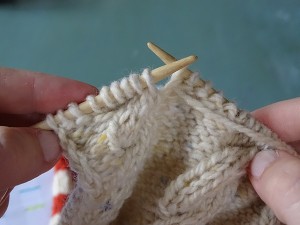
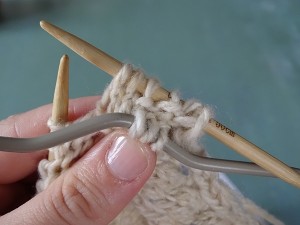
Slip the next three stitches on to the cable needle.
Now, hold the cable needle to the back of your work. This is important as this how the cable crosses to the back and travels to the right. 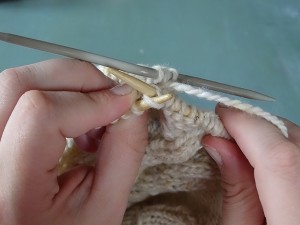
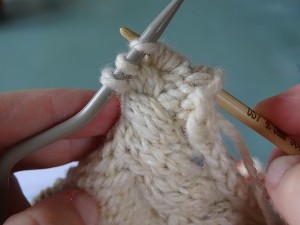
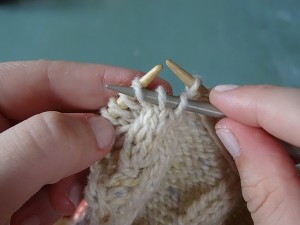
Knit the next three stitches from the left-hand needle.

Now, knit the three stitches from the cable needle.


Work to the end of the row.
The full row has been completed, and you can see how the rope-like cables can vary depending on the intervals between crosses. These crosses were completed every 4, 8, 6, 12, 6, 8 and 4 rows, with the three cables on the right mirroring the three on the left. 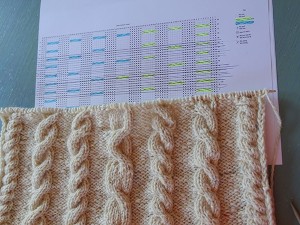
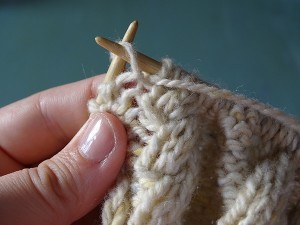
Here you can see the C6B worked over a various number of rows. The cable on the left has been worked every 4 rows while its neighbor was worked every eight rows. By working the cables at different intervals, you can get different looks: the narrower the interval, the tighter and more rope-like the cable becomes, while cables that are worked over larger intervals are more open and less dense. 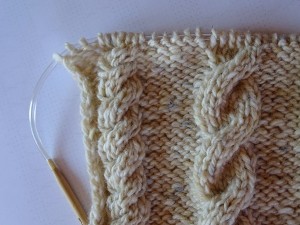
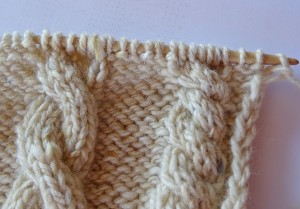
In this photo, we see two C6F. The cable on the right is worked every four rows, while the cable next to it was worked every eight.
Turn the page to try out the Easy Cabled Cushion pattern and find out for yourself just how easy cables are!
This is very helpful I never were able to do cables. I think this makes it much easier. Thank you
I started a cable sweater 40 years ago. I did not finish and now I can not find the pattern. It is a man’s sweater with braided cables in front, back and arms. Any ideas on how I can find the pattern so I can finish the sweater?
My mother taught me to knit many years ago, the first thing I wanted to knit was a cable sweater. I was told I should start with something different, a little easier but I was a bit too impatient to with my way up, so I did the sweater and my mother was so proud of my work she took it to the local knitting shop. They told her that it was better than a lot of the the work they paid knitters to do for them . Sorry if this sounds a bit big headed off me, the praise should have gone to my mother who was a very patient teacher and a much better knitter than I ever became.
My Mother would not do cable because she thought it was too complicated.
I find it so easy that I put cables on lots of things.
I knit for the local children’s hospital and many of the little sweaters and hats have cables on them.
PS. I have been able to knit since I was 6 years old, some 74 years ago.
Cables have caused me to pass on pretty patterns. Thank God – because — you SAY cable 6 – but you only cable 3. So a cable 2 would mean you only actually cable ONE??? I’m told this is reallllly easy – I sure don’t see that now.
C6F can be interpreted to mean that 6 stitches altogether are used to form the cable at the Front of the work…slip 3 onto the cable needle, keep to the front of the work, knit the next 3 stitches, then knit the 3 from the cable needle. 3+3=6!