

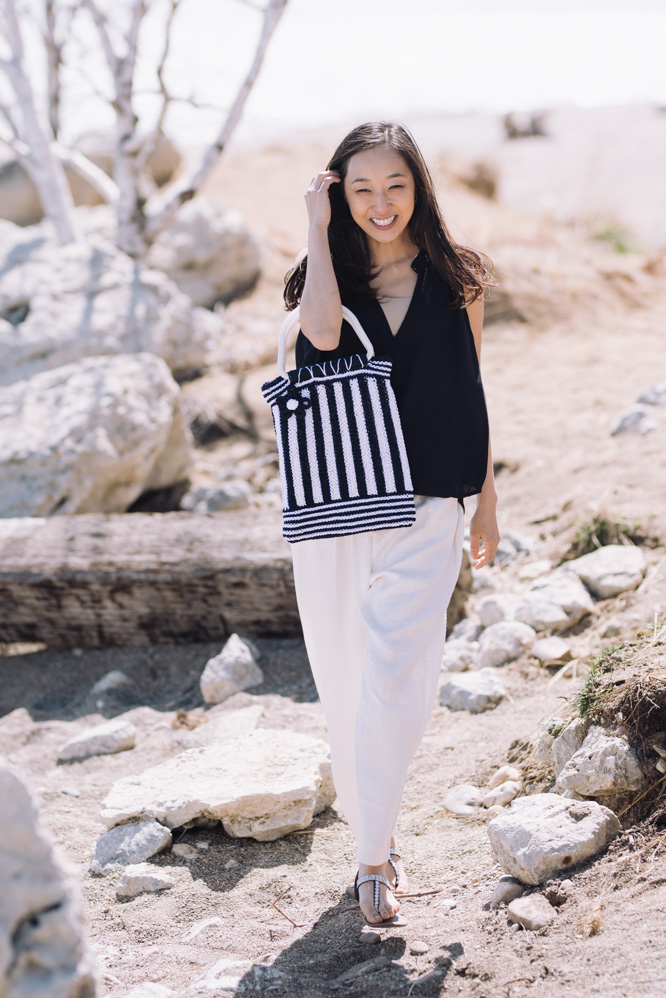
Stella is a knit bag that puts a spin on traditional nautical stripes. Made flat in the garter stitch, stitches are picked up along the bottom edges of the center panel to work the horizontal striped borders. Knit with nylon cord and lined with felt, this bag is sturdier than most for all your summer adventures.
Time: Weekend Project
Skill Level: Intermediate
Size: Approximately 13.5” high and 11.25” wide, excluding handles
Gauge: 16 sts and 32 rows = 4” [10 cm] in garter st with larger needles (Gauge is not critical for this project)
Materials
 Yarn: Omega La Espiga size 24 nylon cord (150 yards [137 meters] per roll): #20 navy (MC, 2 rolls), #01 white (CC, 2 rolls) from CreativeYarnSource
Needles: US size 7 (4.5 mm) 14” straight, US size 7 (4.5 mm), US size 4 (3.5 mm) DPNs
Notions: One pair #PHPLR107 white marble 7” Plastic D Purse handles from KingsKountry.com
One 14” high and 24” wide rectangle white acrylic felt, one 1/2” white button, tapestry needle, navy and white sewing threads, hand sewing needle
Pattern
Vertical Stripe Panel
Row 1 (WS): Beg at side edge, with larger DPNs and MC, CO 33 sts using a knitted cast on. (33 sts)
Rows 2-6: With MC, k across, change to CC at end of last row.
Rows 7-12: With CC, k across, change to MC at end of last row.
Rows 13-18: With MC, k across, change to CC at end of last row.
Rows 19-180: Rep Rows 7-18 thirteen times, then work Rows 7-12 once more. (30 stripes made)
Row 181: With MC, BO kwise.
Bottom Horizontal Stripe Border
Set-up row (RS): With end of Row 181 of Vertical Stripe Panel RS facing, using straight needles and MC, pick up and knit 1 st in end of same row, inserting needle in valleys between garter ridges of stripes, pick up and knit 3 sts in each stripe across. (91 sts)
Row 1: With MC, k, change to CC at end of row.
Rows 2-3: With CC, k across, change to MC at end of row.
Rows 4-5: With MC, k across, change to CC at end of row.
Rows 6-21: Rep Rows 2-5 four times. Do not change color at end of row.
Row 22: With MC, BO kwise.
Top Horizontal Stripe Border
Set-up row (RS): With opposite long edge of Vertical Stripe Panel RS facing, using MC and straight needles and inserting needles from right to left through garter bumps at ends of rows, pick up and knit 3 sts in end of each stripe across, pick up and knit 1 st in top of row 181. (91 sts)
Rows 1-13: Rep same as Rows 1-13 of Bottom Horizontal Stripe Border. Do not change color at end of last row.
Row 14: With MC, k.
Next 10 rows: Beg with a p row, work in Stockinette stitch ending with a k row.
Last row: BO kwise.
Handle Cover (Make 2)
With MC and smaller DPNs, CO 7 sts.
Work in garter st until piece measures 6.5”.
Last row: BO kwise, leaving a 24” yarn tail.
I-cord Flower
With MC and smaller DPNs, CO 3 sts.
Row 1: K, do not turn, slide sts to opposite end of LH needle.
Next rows: Rep last row for 12.5”.
Last row: BO kwise, leaving a 12” tail.
Divide I-cord into 5 equal sections and place a safety pin between each section. Thread yarn tail through tapestry needle, insert needle through I-cord at first pin, [insert needle through I-cord at next pin] 4 times, pull tightly to gather and sew center together.
Flower Center
Leaving a 9” beg tail, with CC and smaller dpns, CO 3 sts.
Rows 1-2: K. (3 sts)
Row 3: Kfb in first st, k1, kfb in last st. (5 sts)
Rows 4-5: K.
Row 6: K2tog, k1, k2tog. (3 sts)
Row 7: K.
Row 8: BO kwise, leaving a 9” tail.
Assembly: Use double strand white thread and sewing needle to make a running stitch around outer edge of center, place button in center of flower and pull thread to tightly gather edges around button and sew together. Pull beg and ending yarn tails through center of flower and knot tightly several times to secure.
Finishing
- With Bag RS held together, use tapestry needle and MC to whipstitch bottom edge. Alternating MC and CC where necessary to correspond with stripes of bag, whipstitch side edges together. Turn RS out.
- Using CC and tapestry needle, with straight bottom edge of handle evenly spaced between side edges of bag and even with center white stripe of top horizontal border [insert needle from WS to RS through center white stripe, over handle, and back through bag to WS] rep across to sew handle to bag.
- Wrap 1 handle cover over bottom edge of handle, having short ends at each side edge of handle, use tapestry needle and MC to sew top long edge of cover along top edge of center white stripe. Sew bottom long edge along bottom edge of center white stripe.
- Optional: Using photo as stitching guide use tapestry needle and CC to sew 5 decorative upside down V’s through handle cover and bag.
- Rep steps 1-4 to add rem handle to opposite side of bag.
- Using 12” strand of MC, insert one end through center opening of 1 flower petal, use tapestry needle to pull each end of strand to WS of bag under left side edge of handle cover. Knot ends tightly to secure.
- Fold short side edges of felt together, use hand sewing needle and white thread to sew a 0.5” seam along side and bottom edges to form lining. Turn bag WS out and insert into lining having WS together and matching side seams, use needle and white thread to whipstitch top edge of lining to top white garter bump of top horizontal border.
- Turn bag RS out and tuck lining into bag. Fold 1.5” of top border to inside of bag and use needle and navy thread to sew bag edge to lining.