

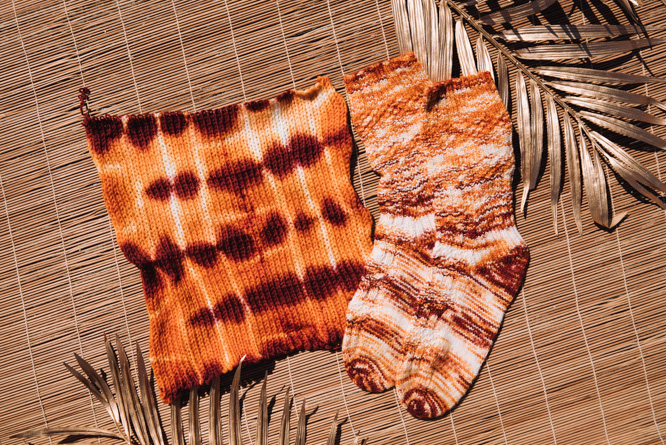
Ready to create your own unique colorways using sock blanks and tie-dye? It’s easier than you think! Get creative in your color choices and have fun creating your own tie-dye socks that are one of a kind.

Materials
- Pre-made socks or sock blank
- White Vinegar
- Jacquard Acid Dyes, 1 colour for the Socks to Dye For and 2 colours for the Sock Blanks
- Strong cotton yarn or string, not too thick or thin (5/2 cotton was used for these samples)
- Approx. ½” wide paint brush
- Glass jars/containers
- Measuring spoons and cups
- Face mask
- Rubber or disposable gloves
- Plastic covering to protect worktable
- Old towels/dishcloths
- Wear an apron or old clothes
- Cling wrap
- Microwave
- Sharp, pointed scissors
Safety
Don’t be alarmed by the name—the only acid involved is the white vinegar used in the dyeing process. However some basic precautions are advised:
- Avoid eye contact, wear rubber gloves and suitable mask as the powders may irritate the skin or eyes and breathing dust may be harmful. Keep out of reach of children.
- Utensils that have been used for dyeing should not be used in food preparation
Preparation
In a clean bucket or other container mix 2 cups of water with ¼ cup of white vinegar. Place the pre-made socks or sock blank into this and make sure it is submerged in the liquid. Leave to soak for 15 to 30 minutes while you prepare the rest of your working area.
Set out all your equipment so it is ready to use. Lay plastic protective covering on your work surface and have a damp dishcloth nearby for cleaning spills. Have another old towel/cloth/bucket nearby that you can put used equipment onto, it is amazing how much mess a tiny speck of dye powder can cause.
Squeeze the excess water out of the socks/sock blank. They should be moist but not dripping. Do not throw away the white vinegar/water mixture as you will use this later.
Tying
The points where you tie the yarn around the socks/blank will resist the dye and remain undyed. It is important to tie these very tightly otherwise the dye will seep underneath the ties. Make sure the color in the tying yarn you use does not bleed otherwise you will get a colored line instead of an undyed one – of course you could make this a deliberate design choice!
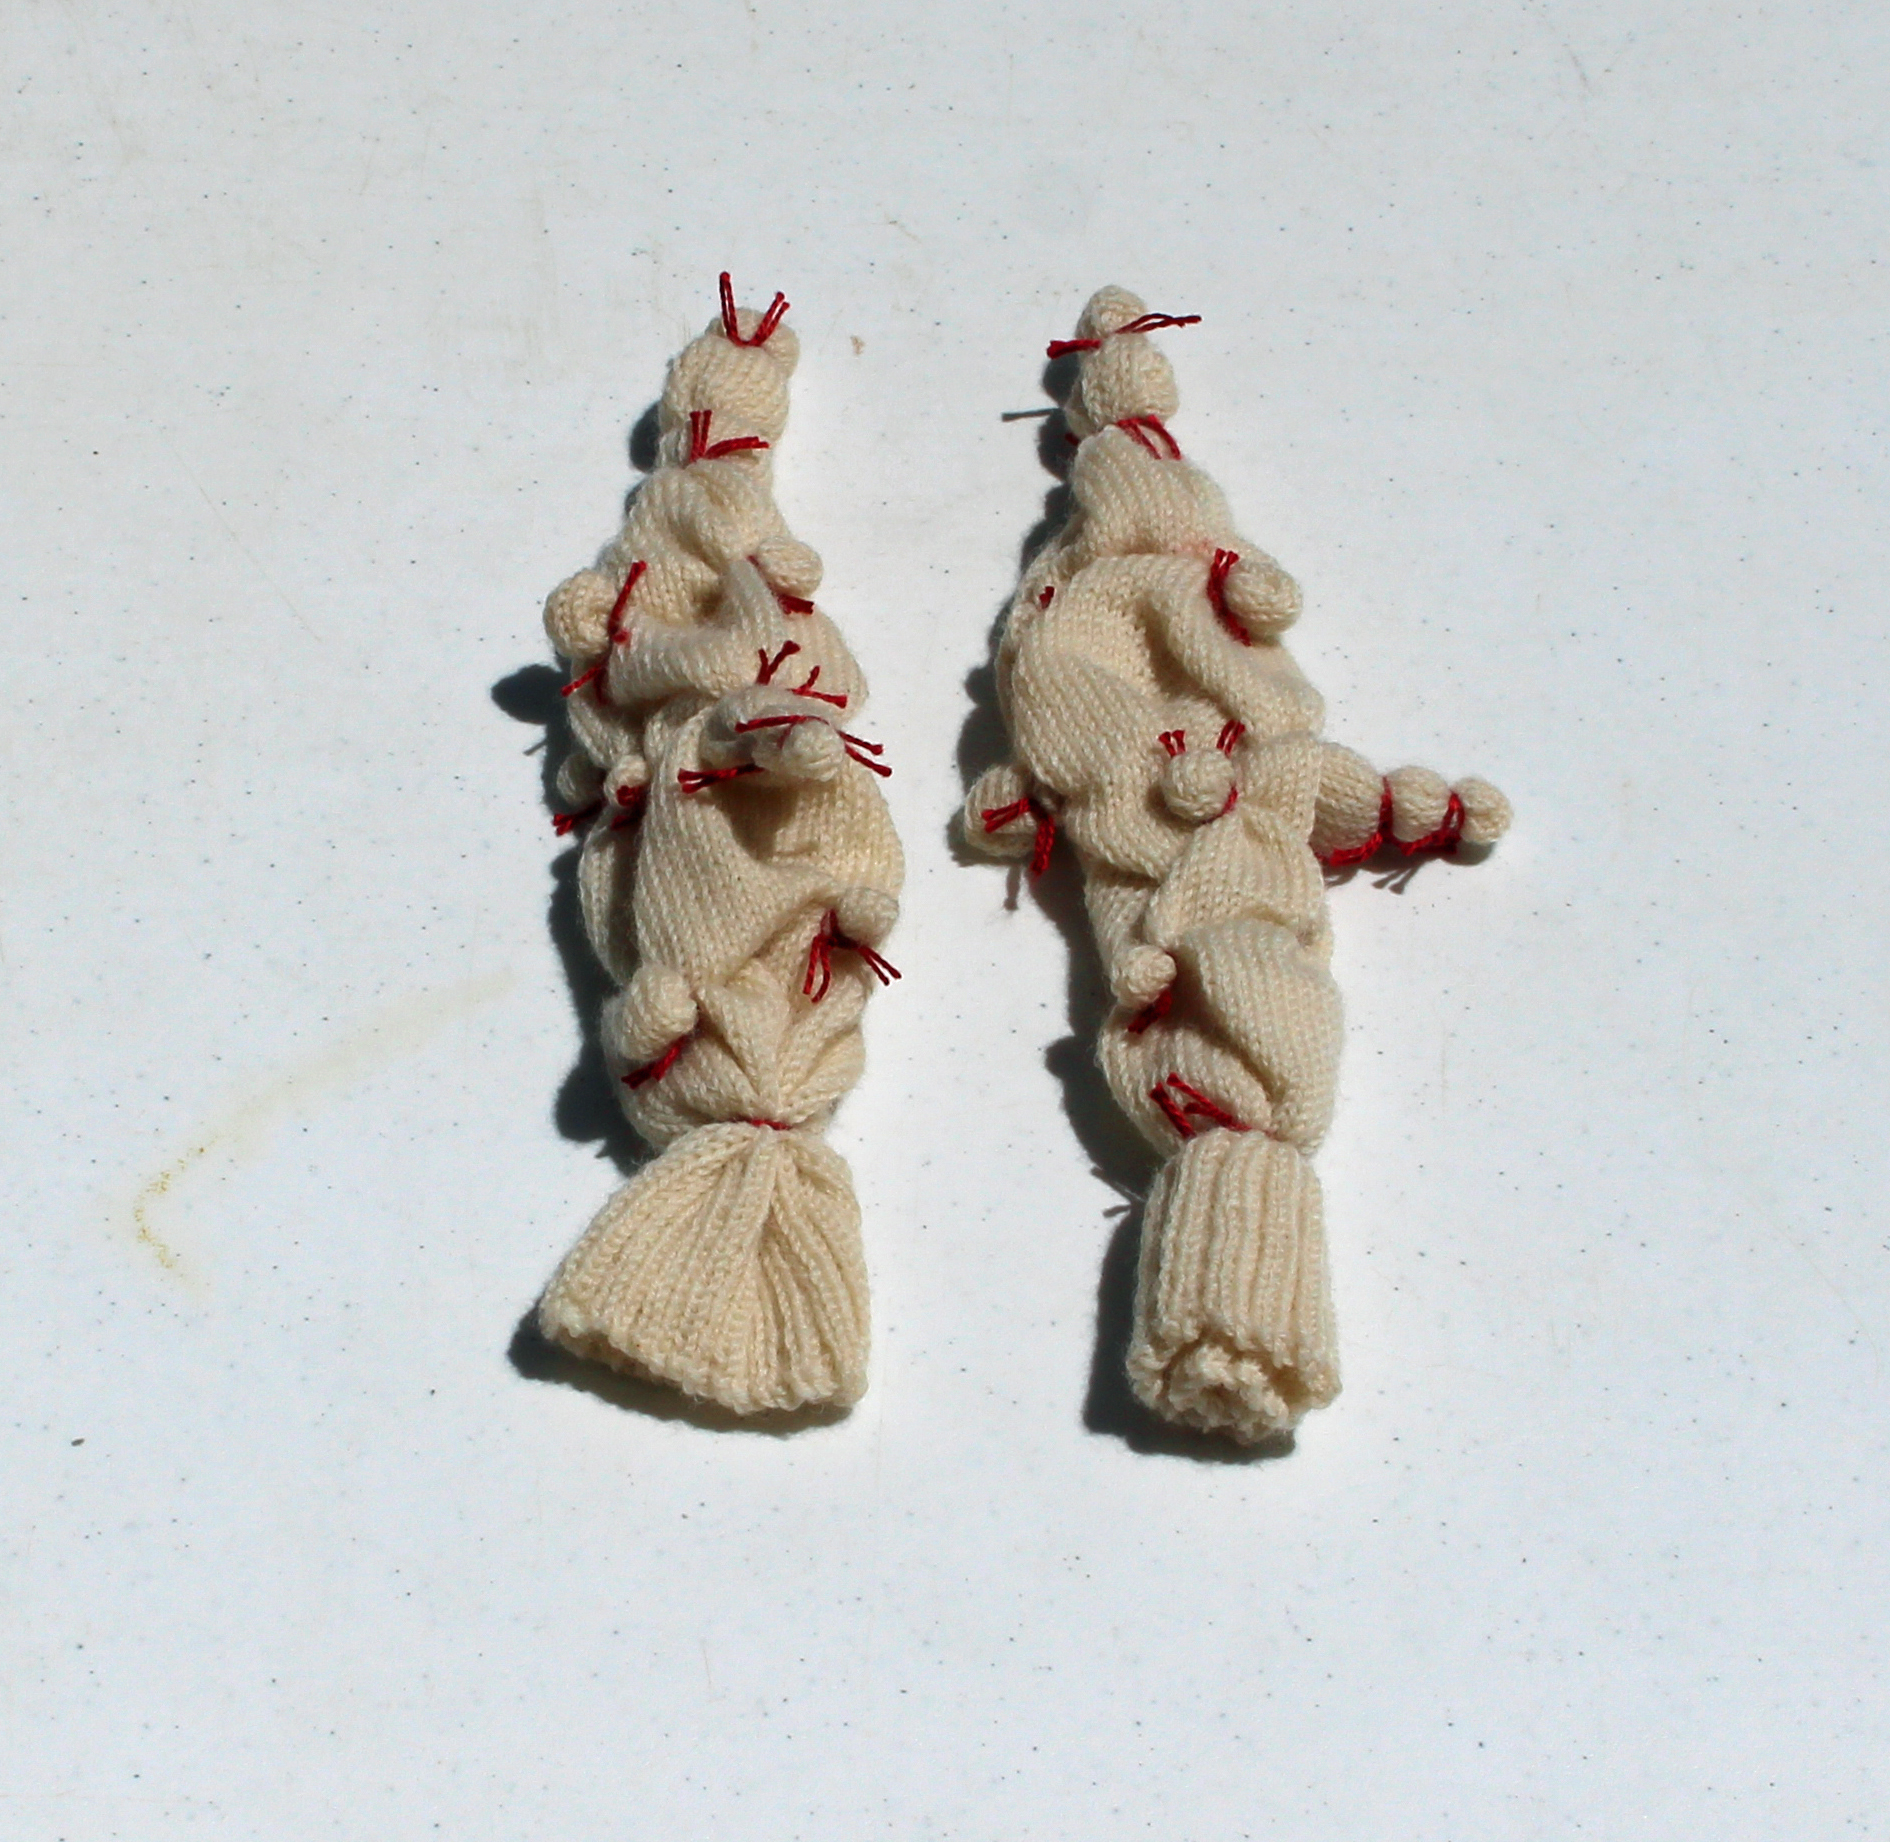
Oceana Socks
- Cut 6”/15cm lengths of tying yarn.
- To make concentric circles centered on the heel and toe, hold the end of the heel/toe in your hand and wrap the yarn tightly around the sock approx. ¾” from the end, tie a double knot in the yarn to secure it. Tie a second and third piece of yarn further out from the heel/toe, spacing them approx. ¾” apart.
- Tie a piece of yarn around the sock just underneath the cuff.
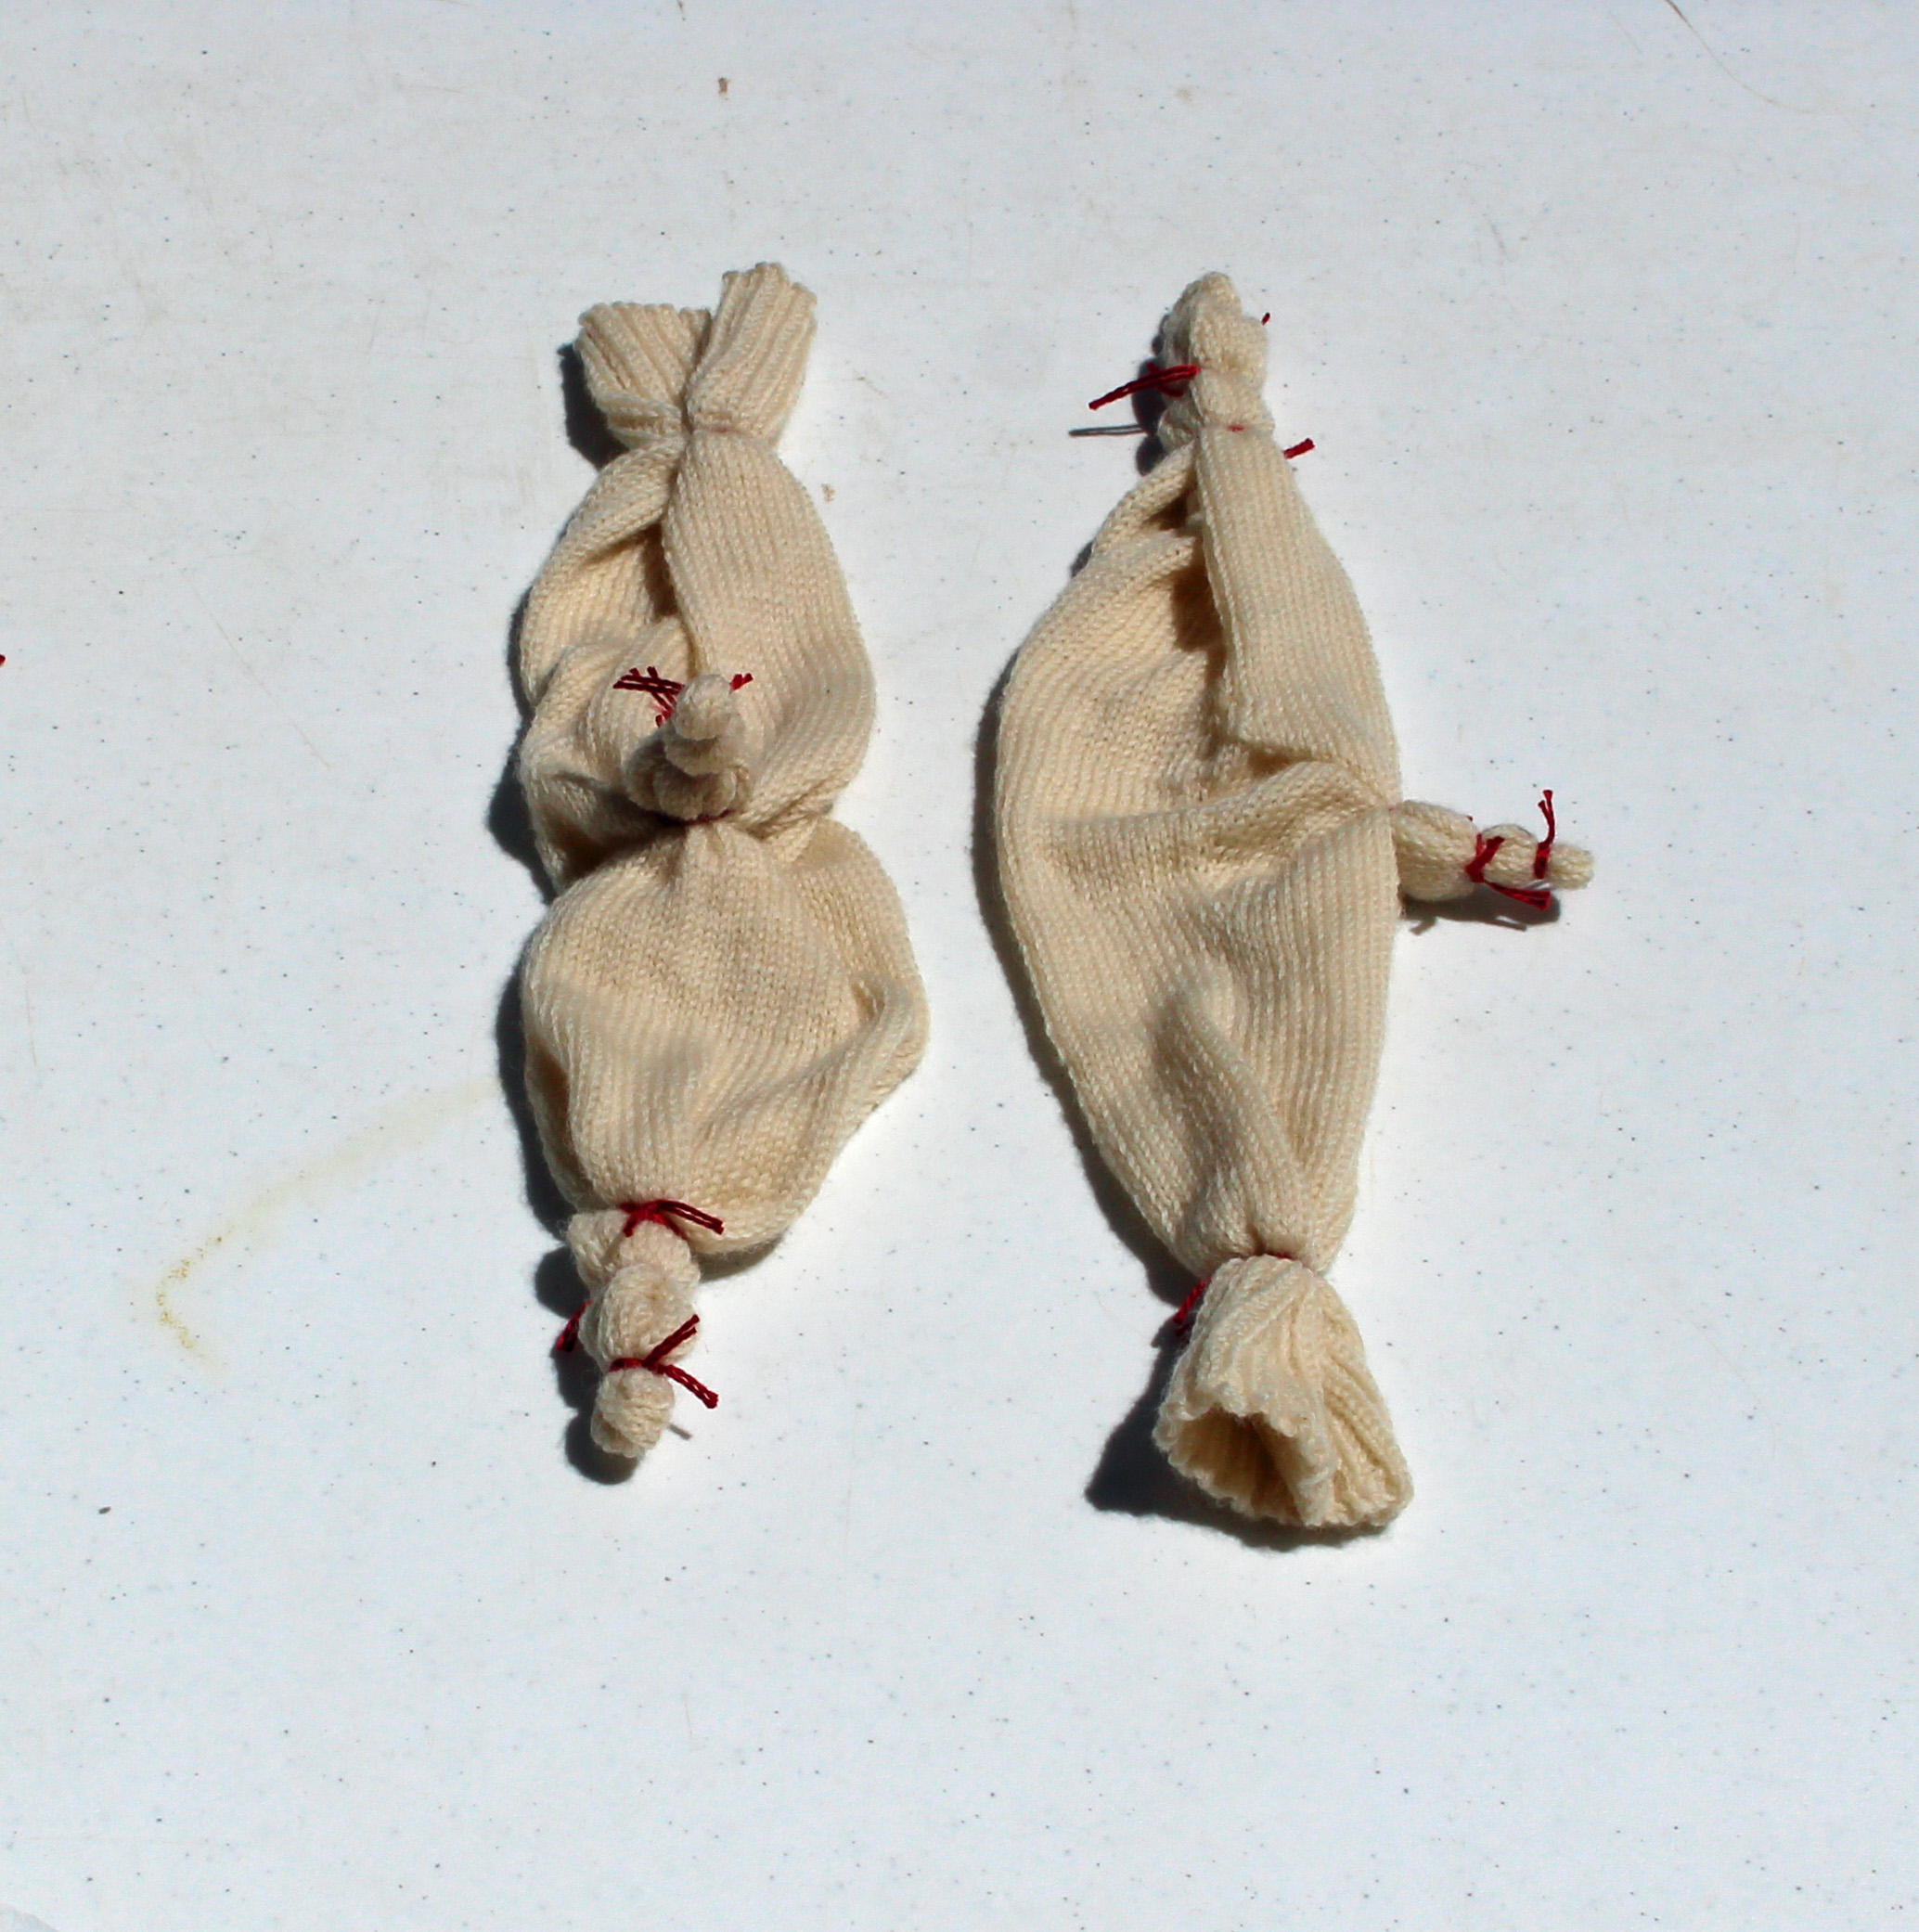
- Being sure to pick up just one layer of sock at a time, pinch a piece of the sock into a point and tie around that point. This will result in a small circle of undyed sock.
- Space the circles randomly over the sock, turn the sock regularly to make sure you do the back and sides as well.
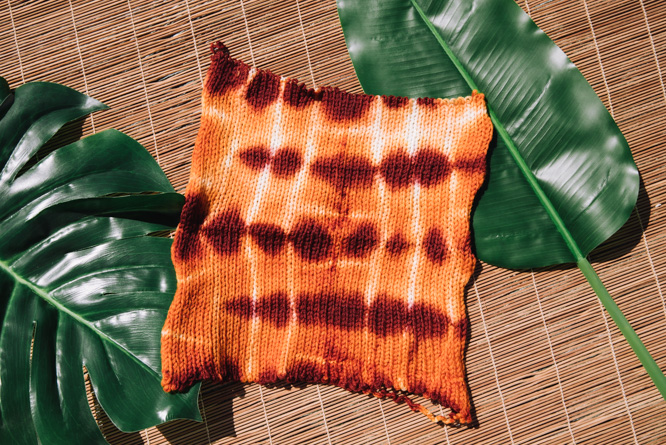
Solano Socks
- Cut 12”/30cm lengths of tying yarn
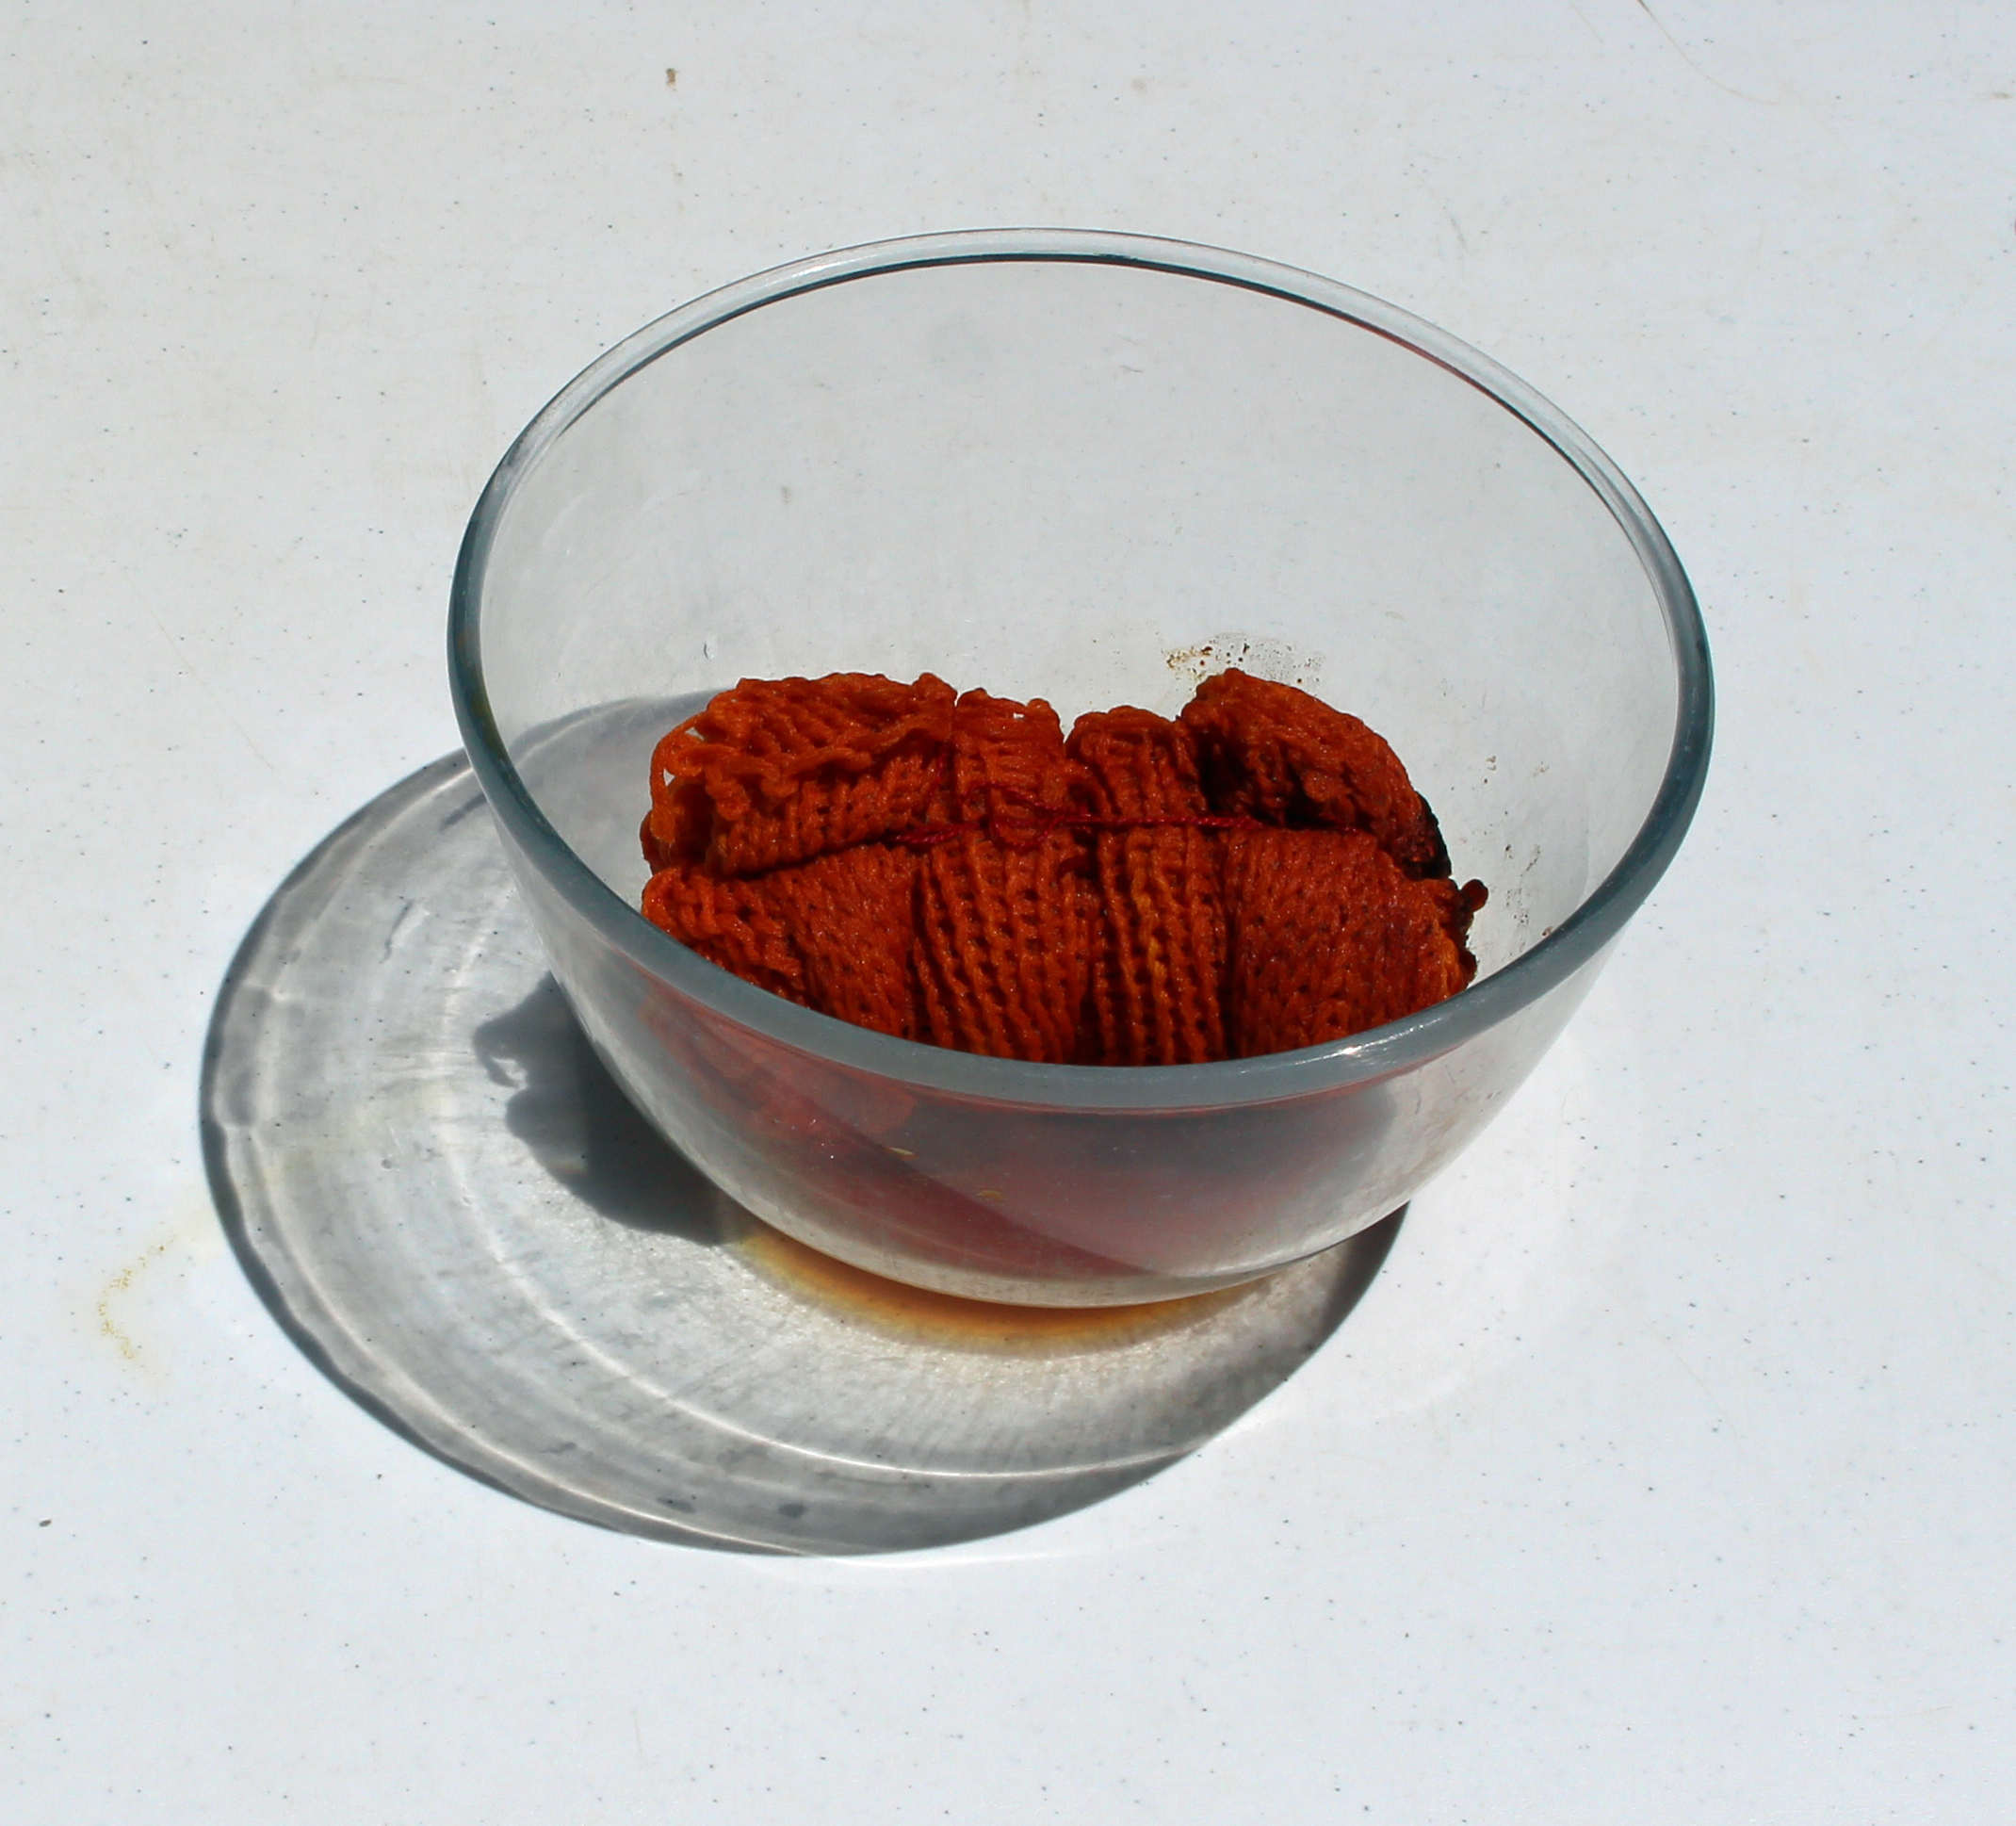
- Lay the blank out vertically on the work surface. Fold the sock blank concertina style from the bottom up, make the pleats approx. 4” wide – you don’t need to be exact with this measurement but do try to keep the pleats even.
- Tie tightly around the folded blank in 3 places.
- You can also add an optional extra tie lengthwise around the blank.
Dyeing
Make sure the socks/blank are still damp from the pre-soaking, if you have been interrupted during the tying process or need to take a break just re-soak the items for 5 minutes and squeeze out the excess liquid. If they are too dry the colors will not spread and merge nicely on the sock/blank and you may get harsh lines.
When preparing the dyes, do one color at a time, replacing the lid on the dye powder container immediately and washing the measuring spoon before continuing to the next color. The tiniest speck of color left on the spoon will contaminate the next color so keep your equipment clean.
Some dye colors are stronger than others and need greater or lesser amounts of powder to liquid to produce a good color. The quantities given below are guidelines only. More information on the use of Jacquard Acid Dyes and their strength can be found here.
- Put on your face masks and rubber gloves. It is important to wear the face mask while you undo the lids of the dye containers and handle the dyes in powder form.
- Measure the dye powder into a glass container, using a separate container for each color.
– For the Socks to Dye For the sample was dyed using 1.5 tsp of color 624 Turquoise.
– For the orange Sock Blank the base color was 1tsp 604 Burnt Orange and the highlight color was ½ tsp 611 Vermillion. - Add the retained white vinegar/water mix into each container at a ratio of 3 x the amount of dye powder and stir thoroughly, using a separate teaspoon or stirring stick for each color. This produces the dye stock that you will use in the next stage of the process.
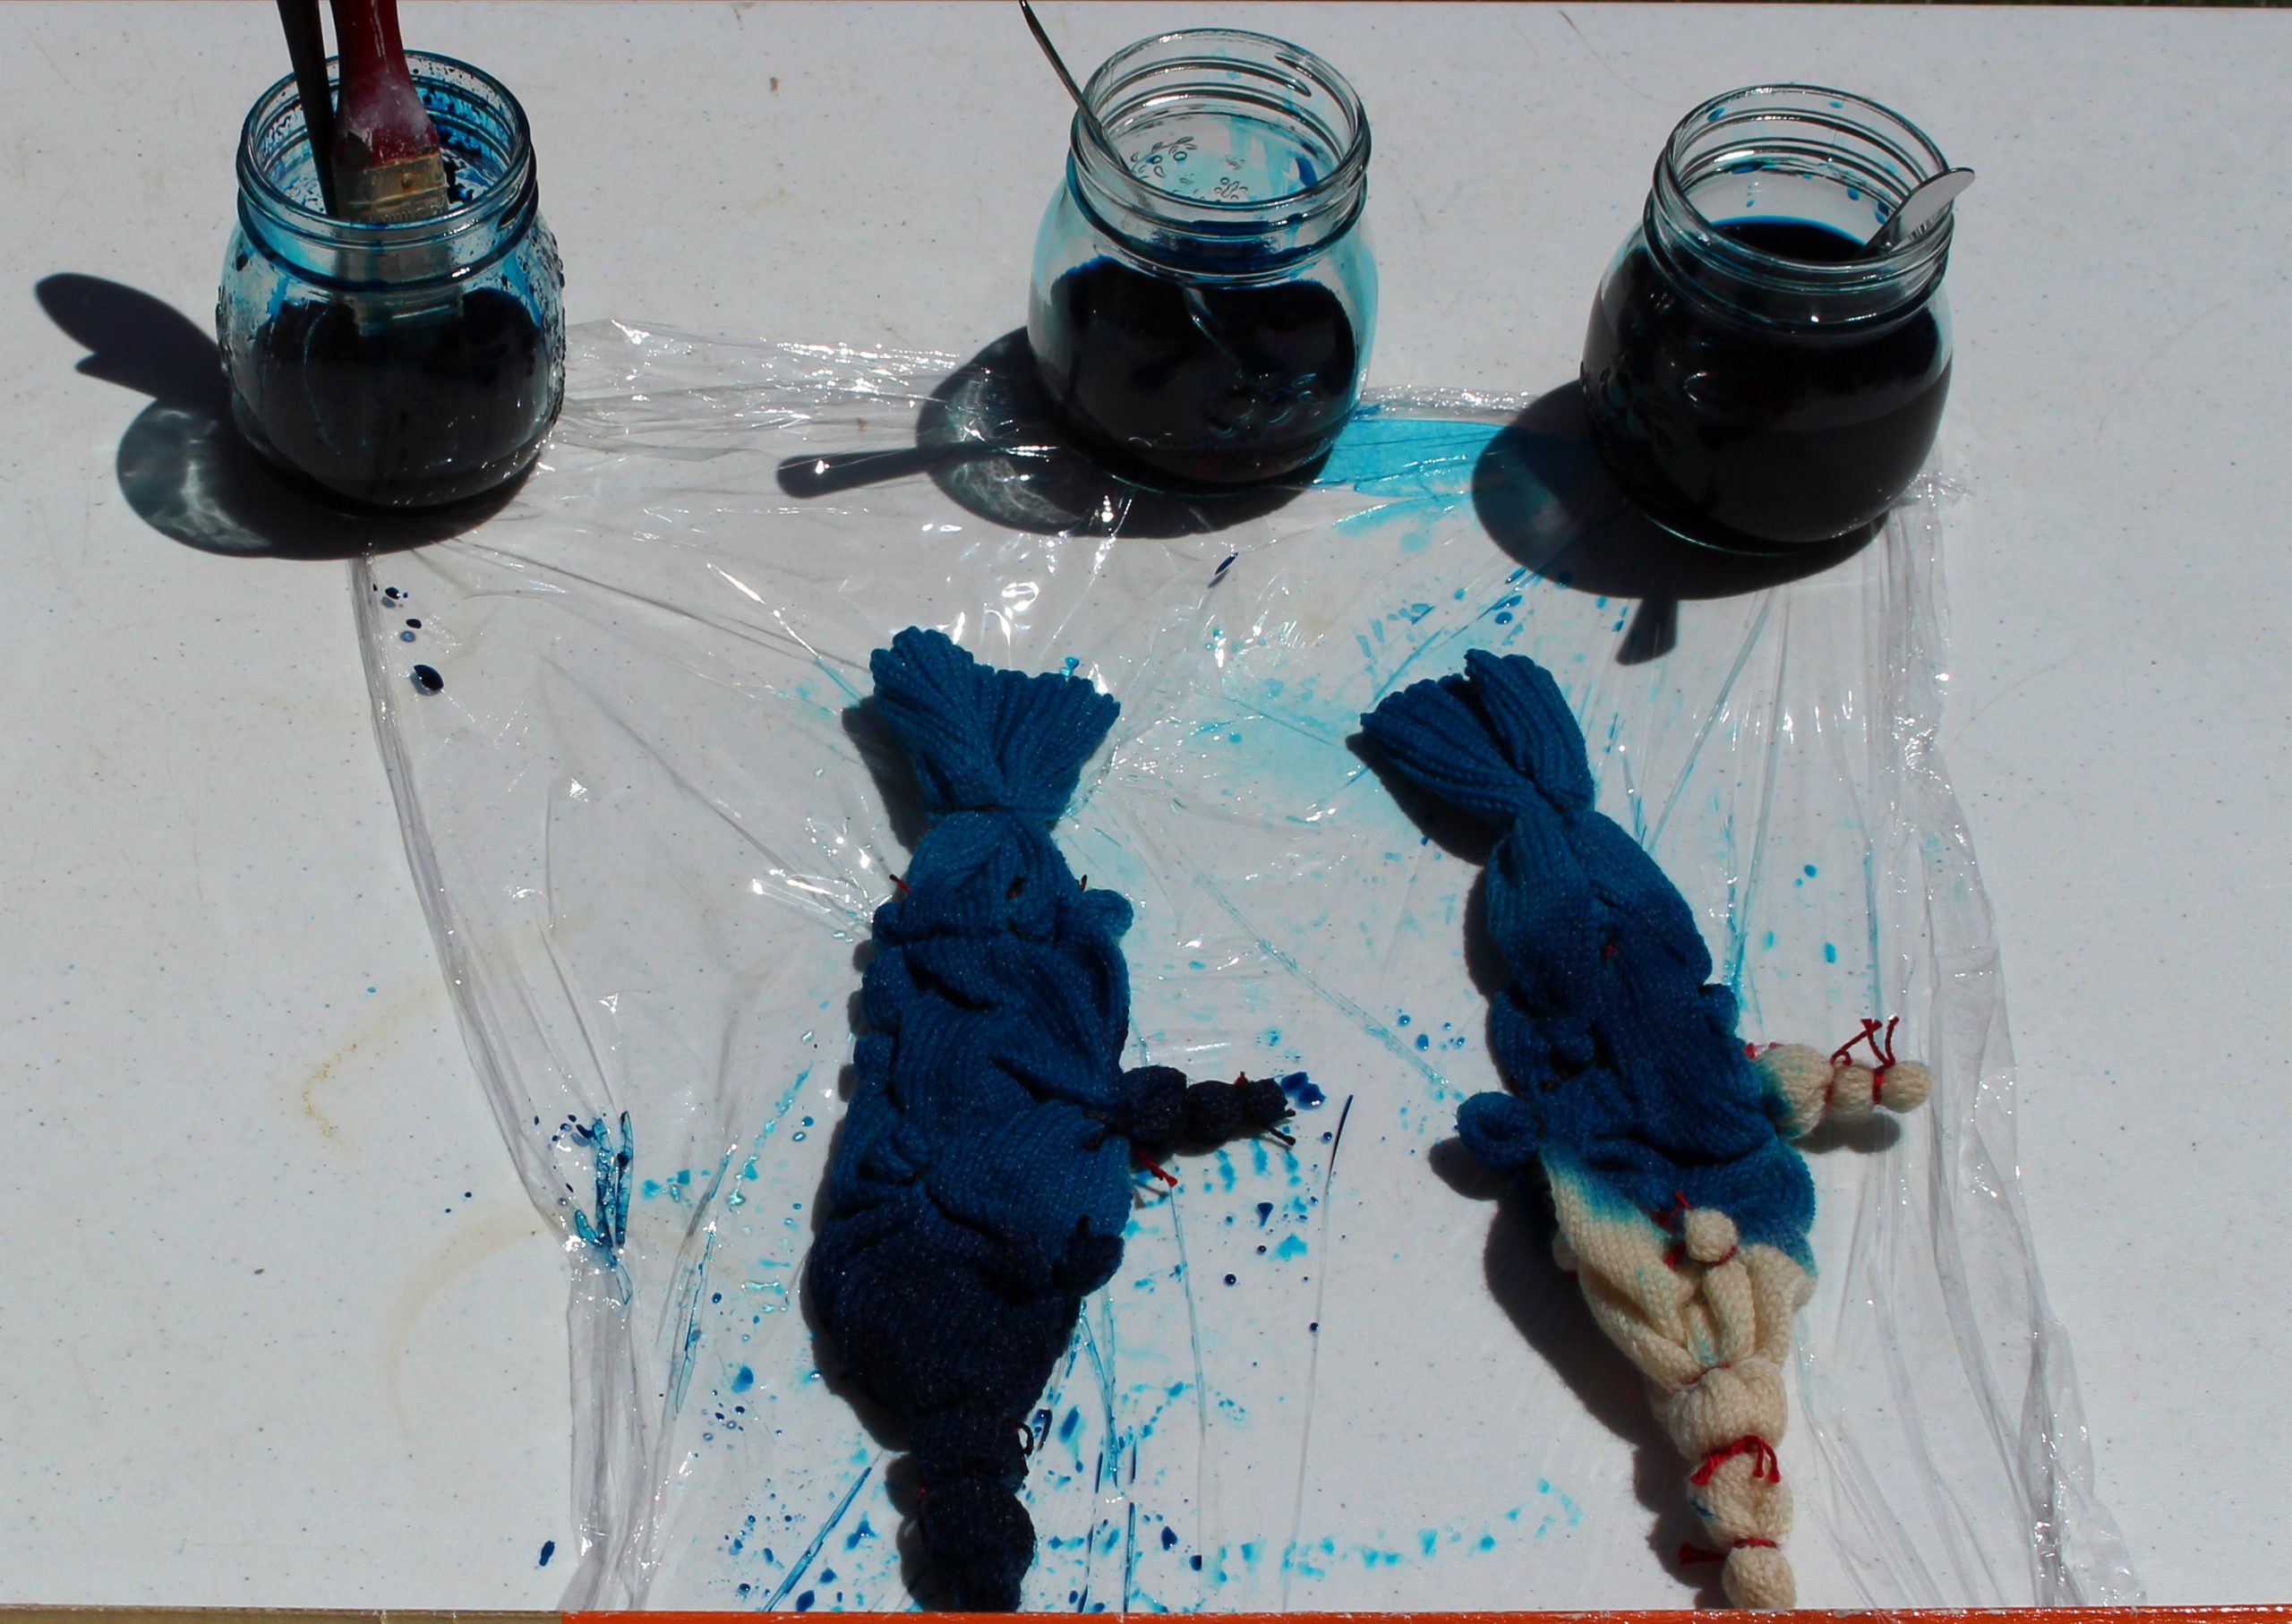
Oceana Socks
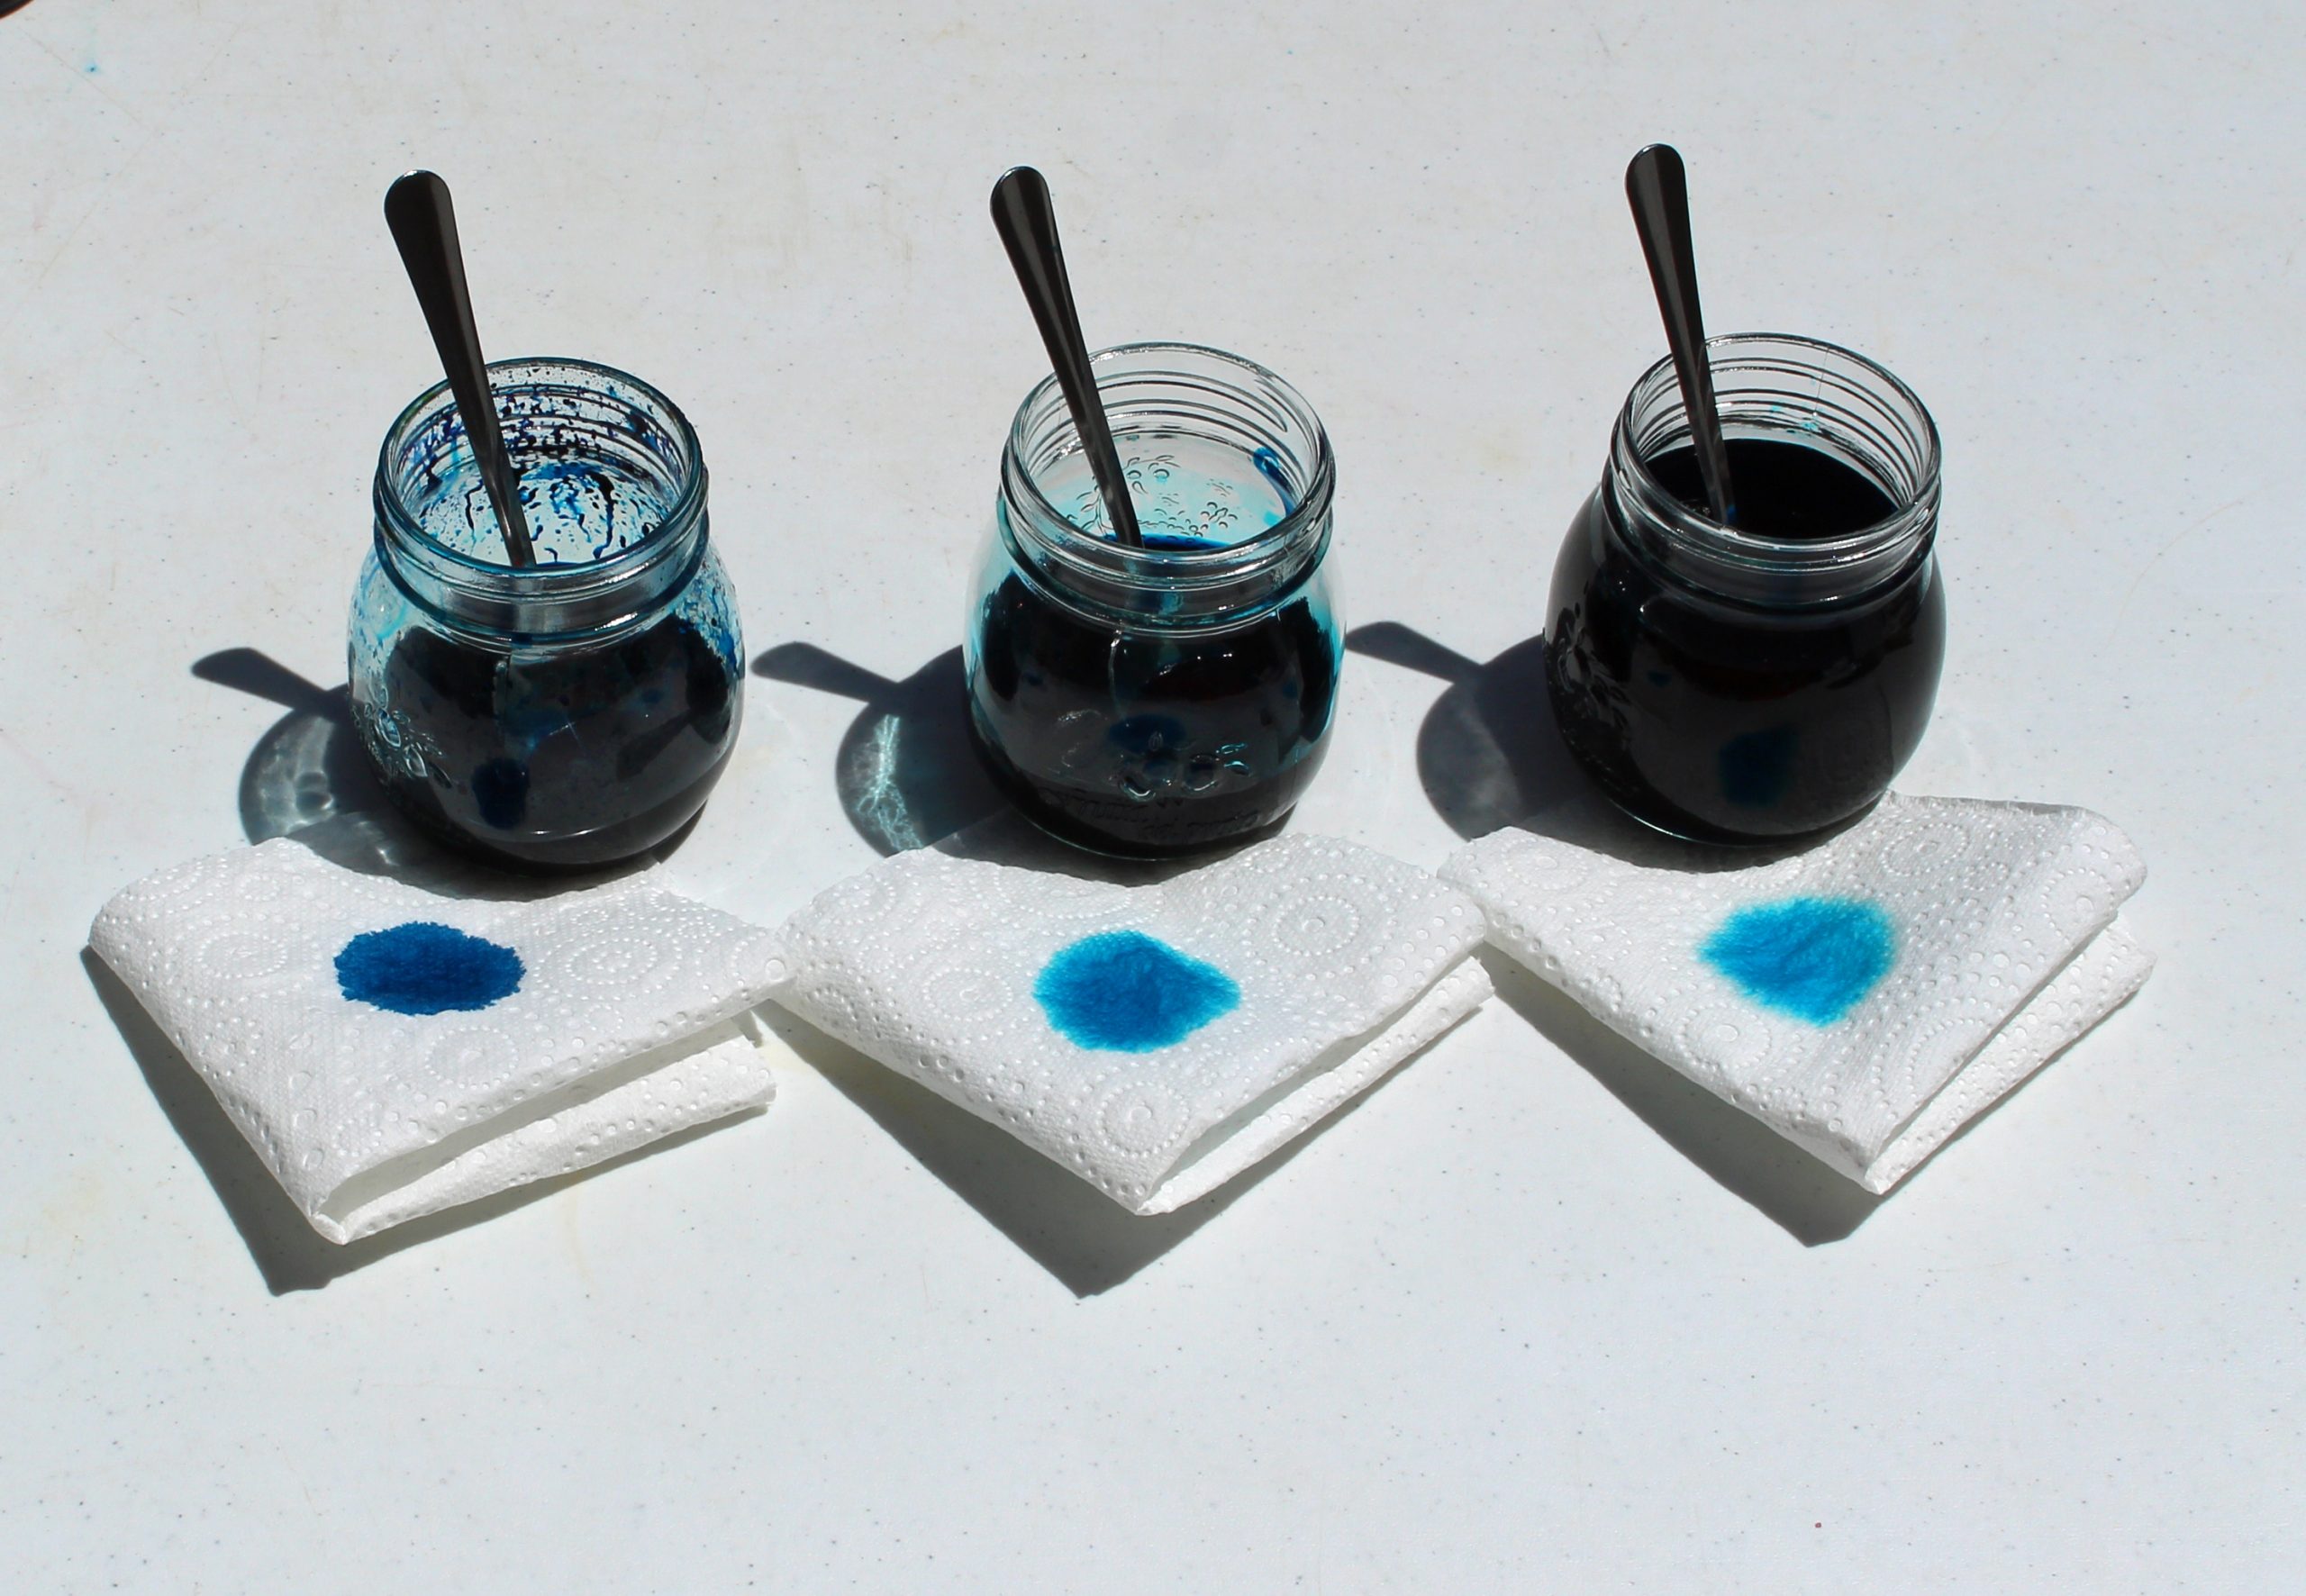
- To produce an ombre effect, remove 1tsp from the original dye stock into a second container and another 1tsp into a third container.
- Add ¼ cup of white vinegar/water to the original container.
- Add ½ cup of white vinegar/water to the second container.
- Add 1 cup of white vinegar/water to the third container.
- You now have a light, medium and dark color. As a rough test, fold a piece of white paper towel and put a drop of each color dye onto the paper. This will give you an approximation of the color depth and you can add more water to lighten the colors if you wish. Photo
- Starting with the lightest shade, use your paintbrush to apply the dye to the sock. You need the dye to penetrate into the sock yarn so press the brush onto the sock firmly. Turn the sock over to cover the back as well and don’t forget the sides. Do not apply so much dye that it puddles under the sock.
- Move along the sock applying the middle color next, and then finish with the darkest shade.

- Dampen the paintbrush with the middle color and use it to blend between the other two shades to avoid sharp lines between them.
Solano Socks
- Two colors are used for the sock blank, a base color and a highlight. The base color needs to be in a container large enough to hold the sock blank. Add 1 cup of white vinegar/water to the base color and put the sock blank in with one of the flat sides facing down. The dye liquid will not cover the sock blank. Leave the sock blank in the dye for 15 minutes then turn the blank 180degrees over and put it back into the dye for a further 15 minutes.
- Remove the sock blank from the base dye and squeeze gently.
- Place the blank onto your covered work surface.
- Add ¼ cup of white vinegar/water to the highlight color
- Turn the sock blank onto its side so that the folded edges are on top. Using the paintbrush, apply the highlight color to the folded edges, pressing the paintbrush down gently to encourage the dye to penetrate the sock blank yarn.
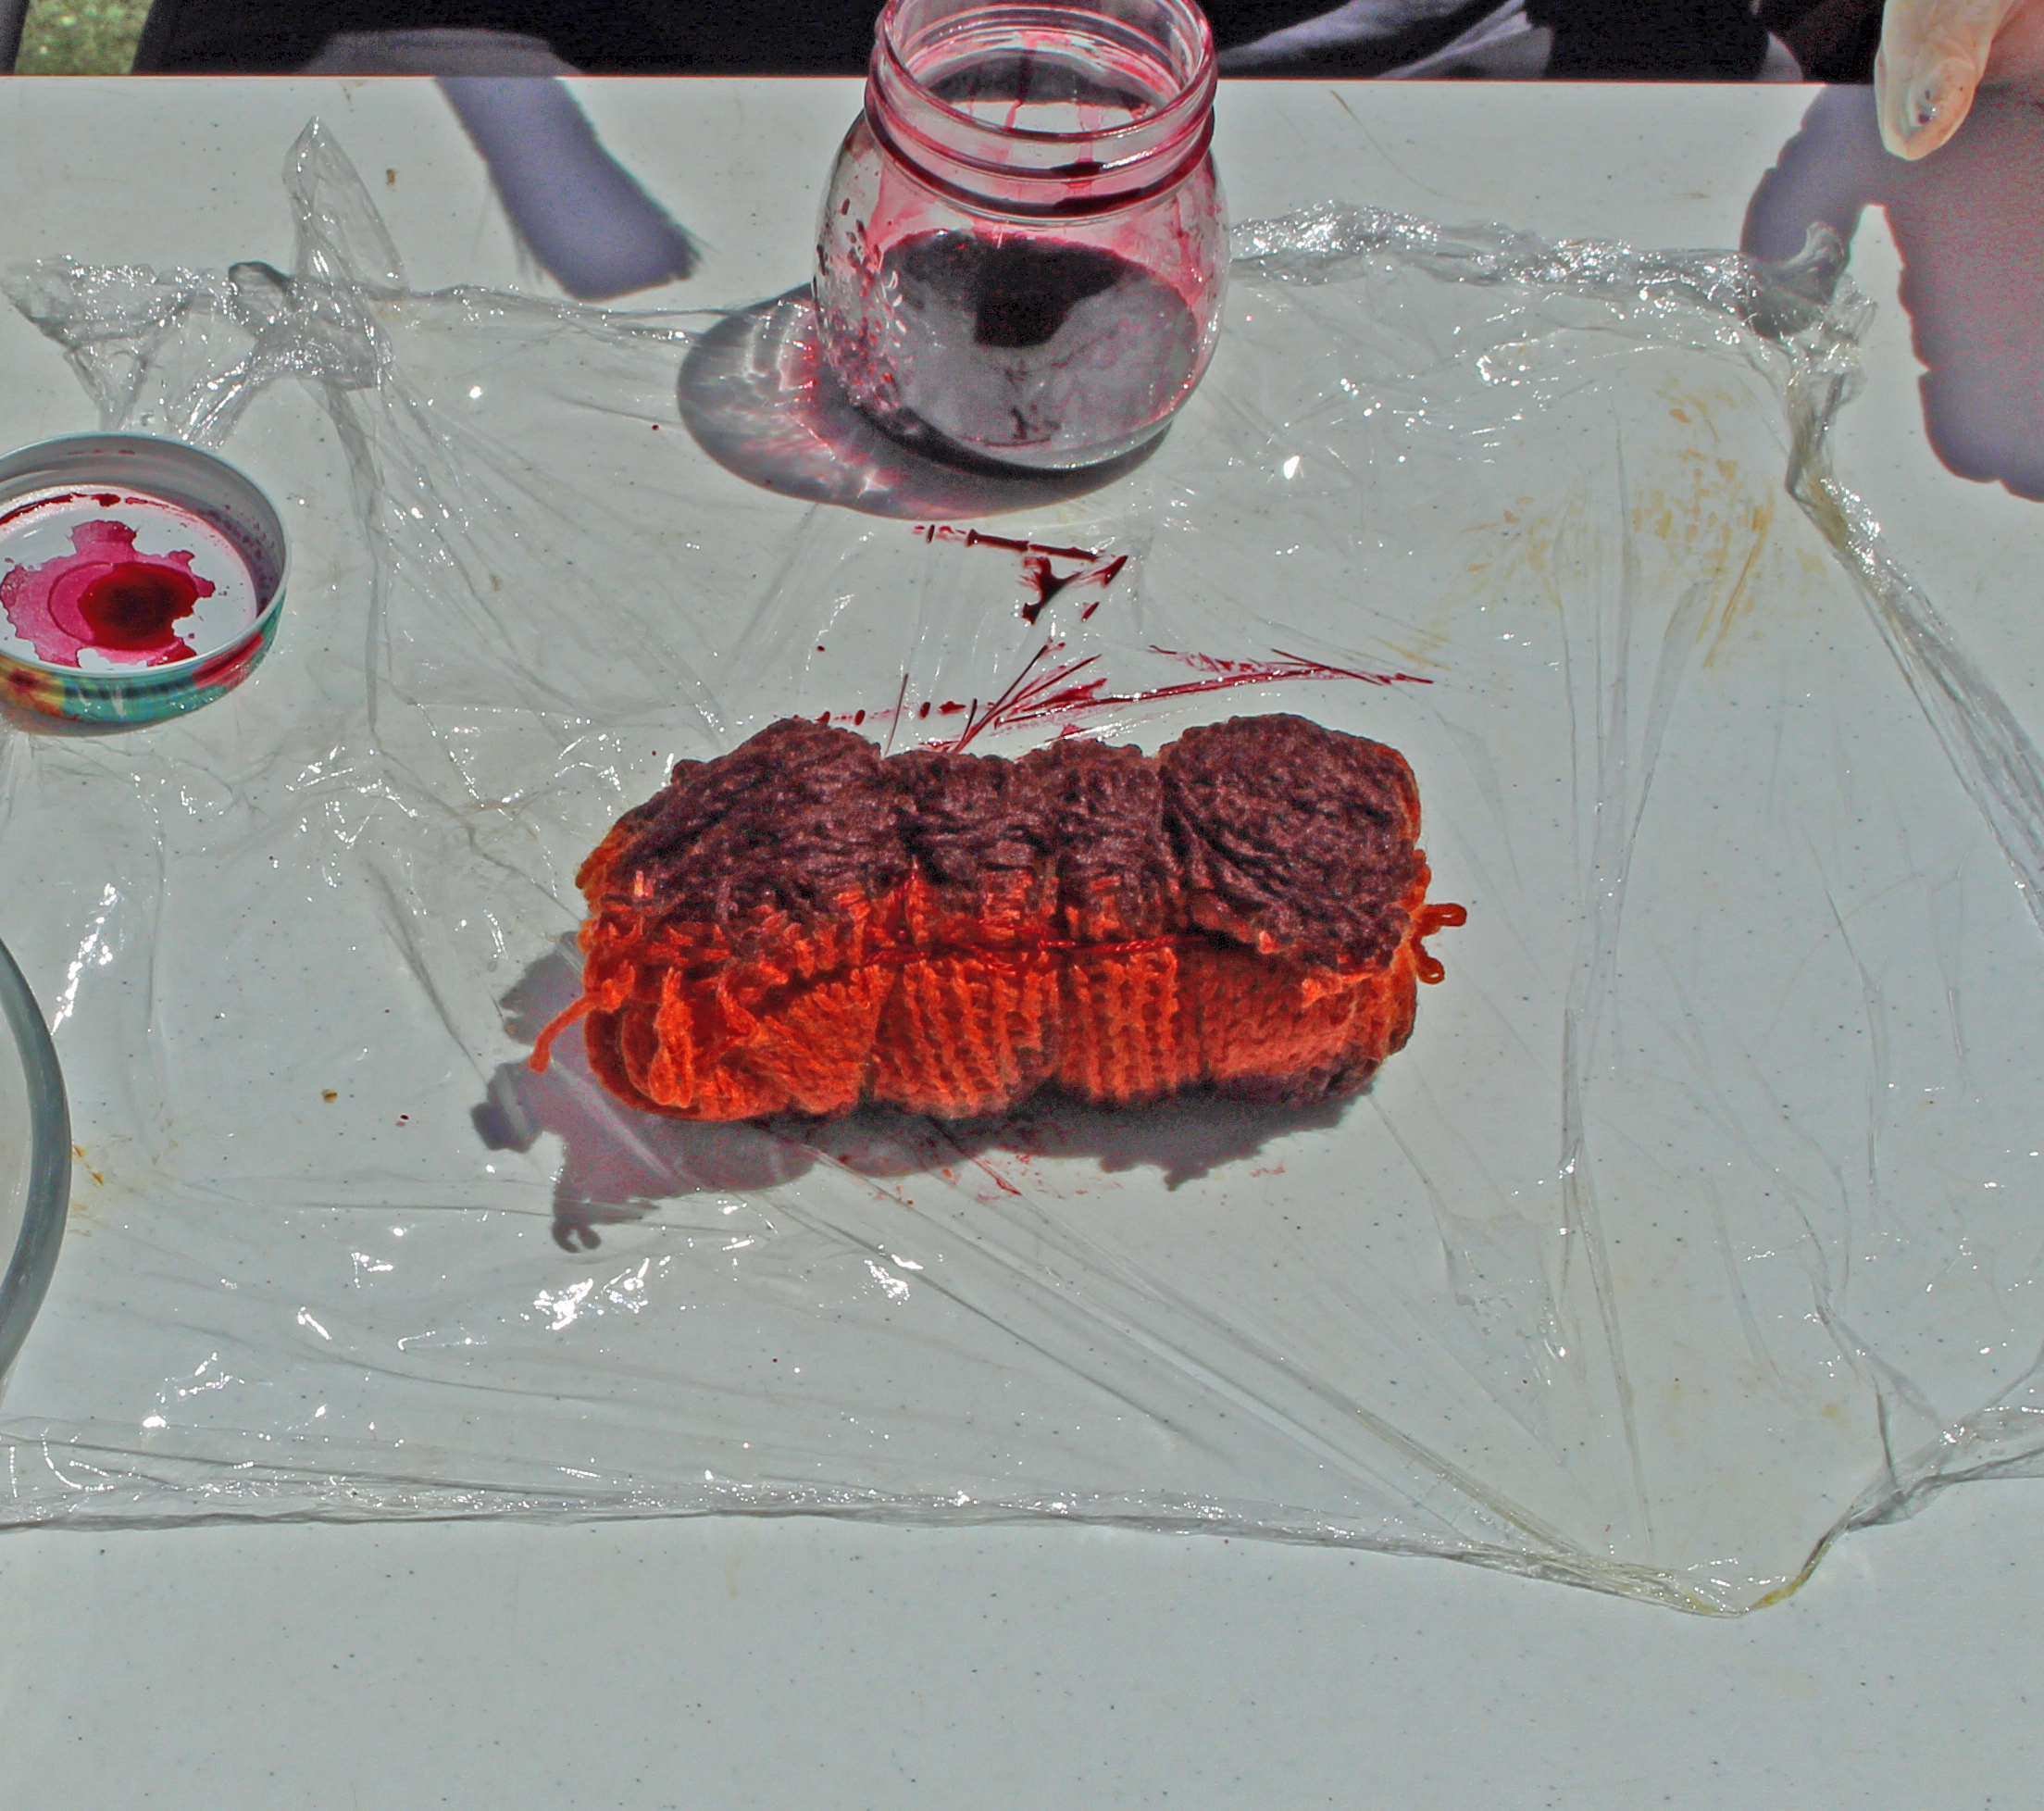
- Turn the sock blank onto the side just painted and paint the opposite side with the highlight color.
Setting the dye
- Wrap the dyed sock/sock blank lightly in cling wrap. Leave the ends of the cling wrap open so that steam can escape.
- During the microwave process the sock/sock blank will get very hot. Do not handle them with bare hands.
- Place the wrapped socks/blank on a microwave proof tray and microwave on high for 2 minutes. Turn the socks/blank over and microwave for a further 2 minutes.
- Allow the socks/blank to stand for 5 minutes and then microwave for 2 minutes.
- Leave the socks/blank in the cling wrap until it is completely cool.
- Remove the cling wrap and carefully use very sharp, pointed scissor to cut the ties.
- Rinse the socks/blank under warm water until the water runs clear.
- To remove any vinegar smell remaining, use a wool wash such as Soak to give the socks/blank some care after the dyeing and microwave treatment.
LOVE the tie dye idea! Can we get a pattern/tie dye for a knitted tank top instead of socks? Thought it would be really cool to knit a basic strapper tank top tie dye and give for gifts! Went looking for pattern and was unsuccessful. Please help
Hi Patricia! Such a fun idea! We have two new tank tops that I think could be knit in a way that would be great for tie dyeing!
https://www.ilikeknitting.com/magazine/knitting-top-patterns/the-weekend-tank/
https://www.ilikeknitting.com/magazine/knitting-top-patterns/the-wear-everywhere-tank/
Let us know if you give it a try, we’d love to see photos! – Nicola, Editor