


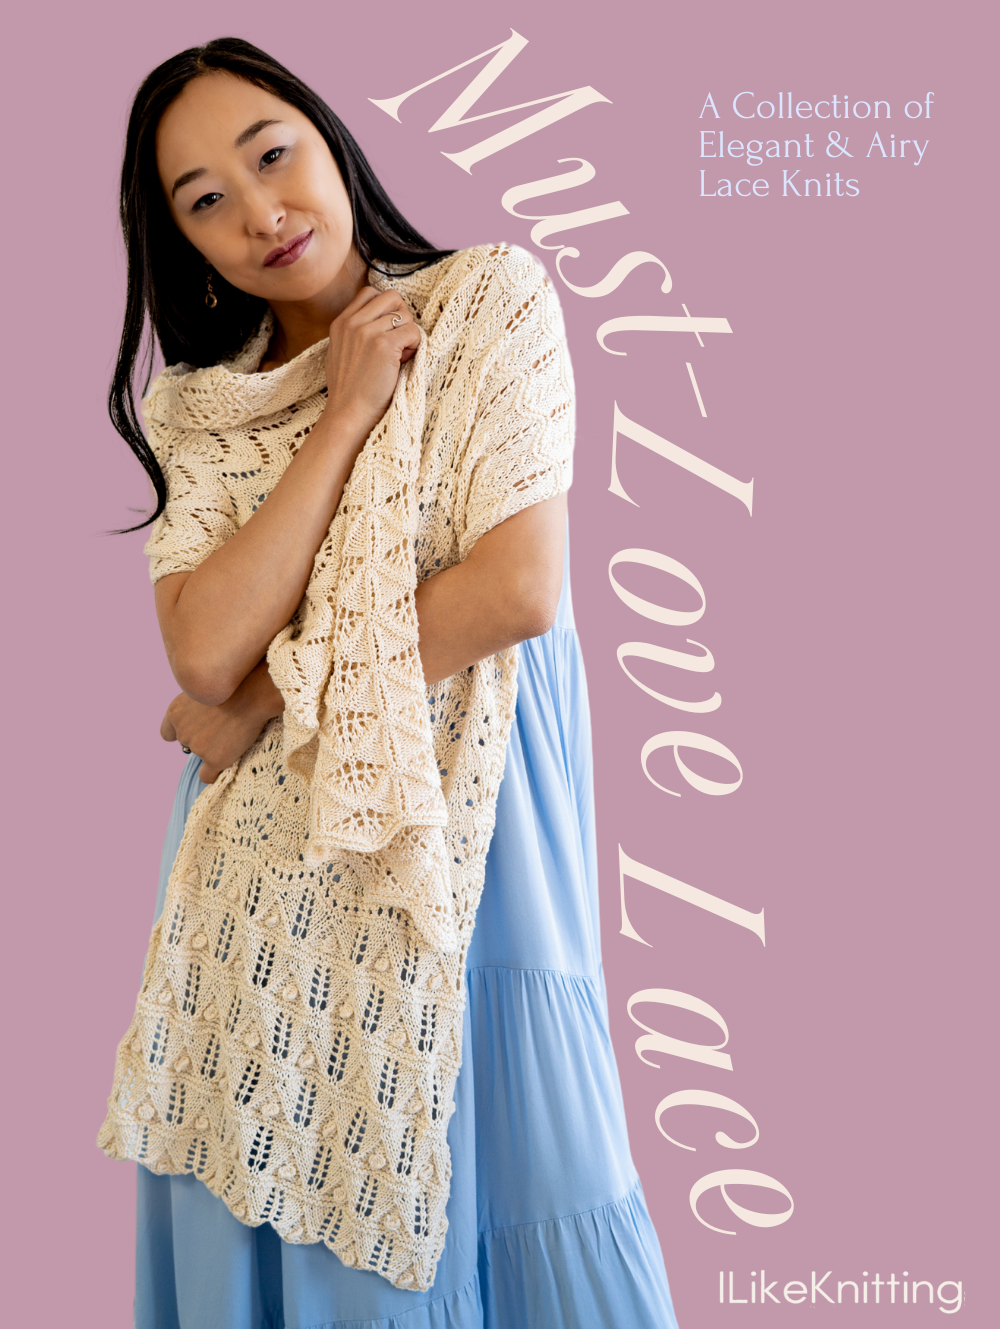
The Blooming Lace Sweater is the epitome of elegance and versatility, perfect for pairing with skirts, jeans, or dresses. Crafted from a luxurious Merino and Silk blend, this sweater is as soft as it is stylish, draping beautifully for a flattering fit. With positive ease, it’s designed to be worn comfortably over a dress or with a pretty skirt. The delicate lace and eyelet details provide just the right amount of femininity, perfectly balancing the clean stockinette stitch background. Whether for a casual outing or a more refined event, this sweater will quickly become a wardrobe staple.
Time: 12-15 hours
Skill Level: Intermediate
Size: Finished Bust Size 36 (40, 44, 48, 52, 56, 60, 64)” to fit bust 32 (36, 40, 44, 48, 52, 56, 60)”
4” of positive ease recommended.
Gauge: 28 sts and 36 rows = 4” [10 cm] in St st, in the round, after wet blocking.
Materials
 Yarn: Cascade Yarns Heritage Silk (85% Merino, 15% Silk; 437 yards [400 meters]/100 grams): Snow (3 (3, 4, 4, 5, 5, 6, 6) balls).
Needles: US size 2 (2.75mm) 24” circular; DPNs (optional)
Notions: Markers (different color), waste yarn, tapestry needle, tape measure
Abbreviations
BOR – beginning of the row
RM – raglan marker
LM – lace marker
Special Stitches
RLE (right leaning eyelet cable): Insert tip of right needle into the 3rd st, lift it up and over the first 2 sts, letting it drop, (k, yo, k) all in next st.
Pattern Notes
This pattern is worked in the round from the top down.
Raglan increases are used to shape the yoke.
Sleeves are picked up and knitted seamlessly from the top down.
Magic loop method is used for knitting smaller circumstances with a circular needle, but double point needles can be used as well, transitioning to the circular needle when necessary.
Different color markers are suggested to be used for distinguishing between RM and LM.
Pattern
CO 118 (122, 126, 130 (134, 138, 142, 146) sts. Join to work in the rnd, being careful not to twist sts. Place BOR marker.
Eyelet Edging
Rnd 1: Purl.
Rnd 2: *K2tog, yo; rep from * around.
Rnd 3: Purl.
Raglan Set-Up
Starting at BOR marker, count 7 sts (sleeve 1), place RM, count 3 sts, place RM, count 10 (11, 12, 13, 14, 15, 16, 17) sts, place LM, count 26 sts for Lace Panel, place LM, count 10 (11, 12, 13, 14, 15, 16, 17) sts, place RM, count 3 sts, place RM, count 7 sts (sleeve 2), place RM, count 3 sts, place RM, count 46 (48, 50, 52, 54, 56, 58, 60) sts for Back, place RM, 3 sts left before BOR marker. You should now have 7 RM + BOR marker marking the raglan increases and 2 LM marking the Front Lace Panel.
Began working raglan increases and Lace Panel as follows:
Rnd 1: Knit to RM, m1, slip RM, RLE, slip RM, m1, knit to LM, slip LM, work Lace Panel following Row 1 of the Lace Chart, slip LM, *knit to RM, m1, slip RM, RLE, slip RM, m1; rep from * another 2 times. (8 sts increased)
Rnd 2: Knit all sts, slipping RM and LM as you come to them, making sure to work the Lace Panel according to the Lace Chart.
Rnd 3: Knit to RM, m1, slip RM, k3, slip RM, m1, knit to LM, slip LM, work Lace Panel, slip LM, *knit to RM, m1, slip RM, k3, slip RM, m1; rep from * another 2 times. (8 sts increased)
Rnd 4: Rep Rnd 2.
Rep these 4 rnds until you have worked a total of 18 (20, 26, 32, 38, 46, 48, 56) raglan increases, increasing every other rnd.
Continue to work in the same manner, but working raglan increases every 4th rnds, for an additional 7 (8, 7, 6, 5, 3, 3, 0) increases. You would have worked a total of 25 (28, 33, 38, 43, 49, 51, 56) raglan increases. (318 (346, 390, 434, 478, 530, 550, 594) sts are on the needle;
57 (63, 73, 83, 93, 105, 109, 119) sts for each sleeve and 2 raglan Eyelet Cables;
102 (110, 122, 134, 146, 160, 166, 178) sts for Front and Back, each)
Separating Body & Sleeves
Starting at the Back Right raglan eyelet cable, *transfer next 57 (63, 73, 83, 93, 105, 109, 119) sleeve sts onto a waste yarn, CO 8 (8, 10, 10, 10, 8, 8, 8) sts for the underarm**, knit across next 102 (110, 122, 134, 146, 160, 166, 178) sts for the front, making sure to work Lace Panel in pattern; rep * to ** once more, knit across the rem 102 (110, 122, 134, 146, 160, 166, 178) sts for the Back. (220 (236, 264, 288, 312, 336, 348, 372) sts are on the needle)
Join to knit in the rnd. Place 2 markers in the middle of the underarm sts, to mark the sides of the garment, making the first marker a BOR marker.
Body
Work in the rnd in St st, making sure to work the lace panel in pattern, working side increases every 10 rows for a total of 5 (8, 6, 5, 5, 4, 10, 9) times as follows:
Inc Rnd: Slip m, m1, knit to LM, slip m, work Lace Panel in pattern, slip m, knit to next m, slip m, m1, knit to end. (2 sts increased)
After side increases are completed, 230 (252, 276, 298, 322, 344, 368, 390) sts are on the needle.
Continue to knit even until the body is measuring 11 (11, 11.5, 11.5, 12, 12, 12.5, 12.5)” from underarm and after completing Row 20 of the Lace Chart.
Lace Border
Set-Up: Knit to LM, slip m, work across first 23 sts of the Lace Panel in pattern, pm, continue to work Lace Chart pattern over the rest of the body, placing markers after each repeat, coming to the first LM and increasing 1 st for the final lace repeat for sizes 40 (48, 56, 64) only. (10 (11, 12, 13, 14, 15, 16, 17) Lace repeats around the hem)
Continue to work the Lace Border, until completing the Lace Chart.
Eyelet Edging
Rnd 1: Purl.
Rnd 2: *K2tog, yo; rep from * around to last st, k2tog with the first st.
Rnd 3: Purl.
BO all sts in knit, loosely.
Sleeves
Transfer sleeve sts to a needle.
With RS facing, starting in the middle of the underarm sts, pick up 4 (4, 5, 5, 5, 4, 4, 4) underarm sts, pick up 1 corner sts, knit across 57 (63, 73, 83, 93, 105, 109, 119) sleeve sts, pick up 1 corner sts, pick up 4 (4, 5, 5, 5, 4, 4, 4) underarm sts. Place BOR marker and join to knit in the round. (67 (73, 85, 95, 105, 115, 119, 129) sts on the needle)
Dec Rnd: K4 (4, 5, 5, 5, 4, 4, 4) underarm sts, k2tog, knit across 55 (61, 71, 81, 91, 103, 107, 117) sts, ssk, k4 (4, 5, 5, 5, 4, 4, 4) underarm sts. (2 sts decreased; 65 (71, 83, 93, 103, 113, 117, 127) sts on the needle)
Continue to knit in St st in the rnd until the sleeve is measuring 6” from the underarm.
Eyelet Band
Rnd 1: Purl to last 2 sts, p2tog.
Rnd 2: *K2tog, yo; rep from * around to last st, k2tog with the first st. (1 st decreased; 64 (70, 82, 92, 102, 112, 116, 126) sts on the needle)
Rnd 3: Purl.
In the next rnd, evenly increase 5 (22, 10, 23, 13, 3, 22, 12) sts. (69 (92, 92, 115, 115, 115, 138, 138) sts are on the needles)
Knit in the rnd for 4”.
Lace Border
Began working the Lace Chart in the rnd, completing Rnds 1-20.
Eyelet Edging
Rnd 1: Purl.
Rnd 2: *K2tog, yo; rep from * around.
Rnd 3: Purl.
BO all sts in knit, loosely.
Rep for the second sleeve.
Finishing
Weave in the loose ends.
Wet and block the garment to even the stitches and open up the lace.
Lay flat to dry.
Hi I love this sweater. I’m wondering if there are written instructions for the lace pattern, or just the chart. I don’t do well with charts.
There are written instructions below the chart once you download it.
Beautiful sweater! I just started knitting it. Please help with my confusion.
After round 4, With the raglan increases, where it says
Continue to work the same manner, but working raglan increases every 4th rnds for an additional 7 rnds, I’m confused about where to knit the raglan increases.
Thank you,
Bonnie
Hello Bonnie,
The raglan increases in this pattern worked in two parts.
First, the increases worked on every other round (as described in the pattern, Rnds 1 & 3). After specified number of increases in reached, the rate changes to every 4th round. This is the second part of raglan increases, to be worked at a more gradual rate (only increasing on Rnd 1).
I see in the past you were exploring option for pattern downloads. Did you ever come up with a plan for that? It would be most helpful to your members. Thank you.
Hi there! Not yet, but it is in the works! – Nicola, Editor
I just read a post that you do not allow us to save patterns. Or is that not true.
Hello Stella! Thank you for your feedback. We are always looking for new ways to improve our user experience. We currently do not allow downloads of our patterns, but are exploring options in the near future. – Nicola, Editor
I see a Lace Chart mentioned in the instructions. Where is this chart?
Hi Mary, charts are always on the right hand side of the pattern. I’ve linked it here as well: https://www.ilikeknitting.com/wp-content/uploads/Blooming-Lace-Sweater-Chart.pdf
-Nicola, Editor
Hi Nicola,
Please help me. I’m confused on the raglan increasing. The pattern says to increase every 4th rnds. To 25 raglan increases. I’m not sure how to do this since you only increase on row 1 and 3.
Please clarify the raglan increases.
Thank you,
Bonnie
I bought a subscription and NEVER received any patterns!
Hi there, looks like you might be having trouble accessing your account? Our customer service team can make sure everything is in order if you shoot them an email. We are happy to help! Thanks
I love this sweater cannot figure out how to save it on my iPad?
Hello Suzanne! Thank you for your feedback. We are always looking for new ways to improve our user experience. We currently do not allow downloads of our patterns, but are exploring options in the near future. – Nicola, Editor
I love the delicate look of the lace and the shape of the raglan sleeve. I have never made a sweater with the raglan sleeve. Do they hold their shape well? I am also new to this site and have never used a chart. Are there any lessons here on how to use charts.
Thank you for your help and for the beautiful sweater.
Where is the lace chart? Did I need to purchase this pattern ..I am a gold member
Hi Linda! The chart is on the right hand side of the page under the photos and I’ll paste it here too: https://www.ilikeknitting.com/wp-content/uploads/Blooming-Lace-Sweater-Chart.pdf
As a gold member, you will never need to purchase individual patterns as you will have access to all new patterns and patterns in our archive. If you’re having trouble accessing, make sure you are logged in, otherwise reach out to our customer service team for assistance. https://www.ilikeknitting.com/contact-us/
Let me know if you need anything else! – Nicola, Editor
Love it.
Thank you!
This looks interesting and quite tempting!
Thank you! I hope you’ll give it a try.
Thank you!
Love this