

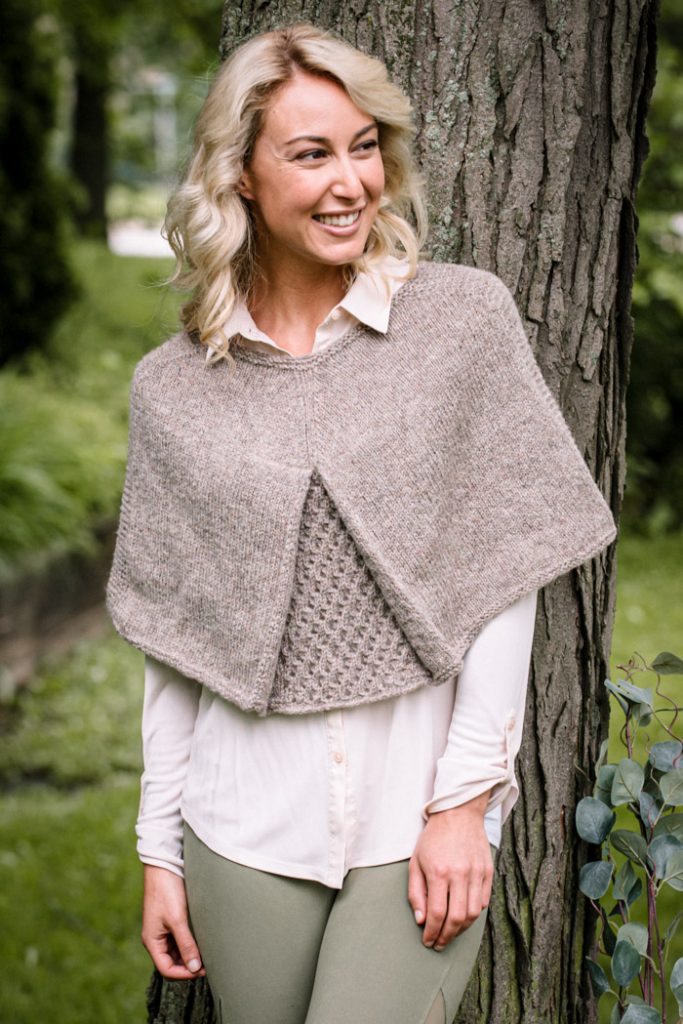
This capelet is worked in the round from the bottom up, with a simple honeycomb lace pattern hiding behind front pleats and repeated at the back. This lace pattern is reminiscent of the texture and color of Marina Di Chioggia pumpkins. Basic stockinette and garter stitch let the pleats take center stage in a cozy accessory that will stay put around your shoulders when fall’s chill arrives.
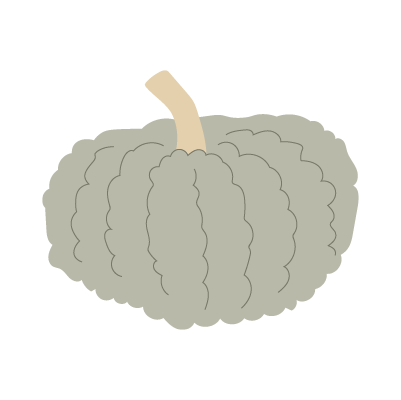 What does Marina Di Chioggia mean?
The Marina Di Chioggia is named after the Italian city, Chioggia, where this pumpkin was first grown. Translated literally, its Italian name (zucca barucca) means “squash with warts.”
Skill Level: Intermediate
Size: 48” circumference at widest point, 22” neck circumference and 16” deep.
Gauge: 20 sts and 28 rnd = 4” [10 cm] in St st after wet blocking
18 sts and 28 rnds = 4” [10 cm] in Honeycomb Lace stitch after wet blocking
Materials
 Yarn: Harrisville Designs flyWHEEL (100% Pure Virgin Wool; 170 yards [155 meters]/50 grams): #965 Driftwood, 4 skeins
Needles: US size 6 (4.0 mm) 32” and 16” circular needles
Notions: Markers in 4 different colors or styles, 2 spare DPNs, tapestry needle
Special Stitches
Honeycomb Lace stitch pattern
Rnds 1-2: Knit.
Rnd 3: *K2tog, YO twice, skp; rep from *.
Rnd 4: *K2, k1 tbl, k1; rep from *
Rnds 5-6: Knit.
Rnd 7: *YO, skp, k2tog, yo; rep from *.
Rnd 8: *K1 tbl, k3; rep from *.
Rep Rnds 1-8 for patt.
Pattern Notes
This pattern is worked in the round from the bottom up with a front pleat. A chart and written instructions are included for the Honeycomb Lace stitch pattern.
Pattern
With longer circular needle, CO 292 sts. Pm and join to work in the rnd.
Set-up Rnd: P8, pm color A, p52, pm color B, p16, pm color C, k28, pm color C, p16, pm color B, p52, pm color A, p16, pm color A, p22, pm color C, k52, pm color C, p22, pm color A, p8.
Rnd 1: K to 1 st before marker B, sl 1 wyib, sl m, k to 1 st before first marker C, sl 1 wyif, sl m, work Rnd 1 of Honeycomb Lace stitch pattern to next m, sl m, sl 1 wyif, k to next m, sl m, sl 1 wyib, k to 3rd marker C, work Rnd 1 of Honeycomb Lace stitch pattern to next m, k to end.
Rnd 2: P to 1 st before marker B, k1, sl m, p to first marker C, work Rnd 2 of Honeycomb Lace stitch pattern to next m, sl m, p to marker B, sl m, k1, p to 3rd marker C, work Rnd 2 of Honeycomb Lace stitch pattern to next m, sl m, p to end.
Rnd 3: K to 1 st before first marker B, sl 1 wyib, sl m, k to 1 st before first marker C, sl 1 wyif, sl m, work next rnd of Honeycomb Lace stitch pattern to next m, sl m, sl 1 wyif, k to next m, sl m, sl 1 wyib, k to 3rd marker C, work next rnd of Honeycomb Lace stitch pattern to next m, k to end.
Rnd 4: P to first marker A, k to 1 st before first marker B, k to 1 st before first marker C, p1, work next rnd of Honeycomb Lace stitch pattern to next m, p1, k to 2nd marker B, k to marker A, p to next m, k to marker C, work next rnd of Honeycomb Lace stitch pattern to next m, k to marker A, p to end.
Rep Rnds 3-4 until piece meas approx. 11” from CO edge.
Next Rnd: Work to 16 sts before first marker B, slip these 16 sts before marker B to a DPN and remove m, slip next 16 sts up to first marker C to a 2nd DPN, remove m and rotate 2nd DPN clockwise 180 degrees.
With first DPN in front, 2nd DPN in the middle and left needle at back, knit first st from each of the 3 needles together (k3tog). Continue knitting 1 st from each of the 3 needles together until 14 sts from lace panel have been worked, then knit 1 st from each DPN together twice. Pm.
Slip next 14 sts up to 2nd marker C onto a DPN and remove m, slip next 16 sts up to 2nd marker B onto a 2nd DPN, remove m and rotate 2nd DPN counterclockwise 180 degrees.
With left needle in front, 2nd DPN in the middle and first DPN at the back, knit 1 st from left needle and middle DPN together twice, then continue knitting 1 st from each of the 3 needles together (k3tog) until all sts from lace panel have been worked.
Note: It is very easy to accidentally drop stitches when working the pleats, so take extra care to count sts as you work to make sure none are missed.
Work to end of rnd as established. (232 sts)
Work 1 rnd even.
Rnd 1: Work to marker, sl m, k2tog, work to 3 sts before next m, ssk, k1, sl m, k1, k2tog, work to 2 sts before next m, ssk, work to next m, sl m, k2tog, work to next m, sl m, ssk, work in Honeycomb Lace stitch pattern as established to 2 sts before next m, k2tog, sl m, work to next m, ssk, work to end. (8 sts decreased)
Rnd 2: Work even as established.
Rep Rnds 1-2, 7 times more, then rep Rnd 1, 8 times more. (104 sts)
Work 4 rnds in Garter Stitch (knit 1 rnd, purl 1 rnd), beginning with whichever rnd you need to match the Garter Stitch on the sides.
BO loosely.
Finishing
Weave in all ends.
Wash and block to finished dimensions, folding pleats into place and pinning lace to open.
Comments are closed.