

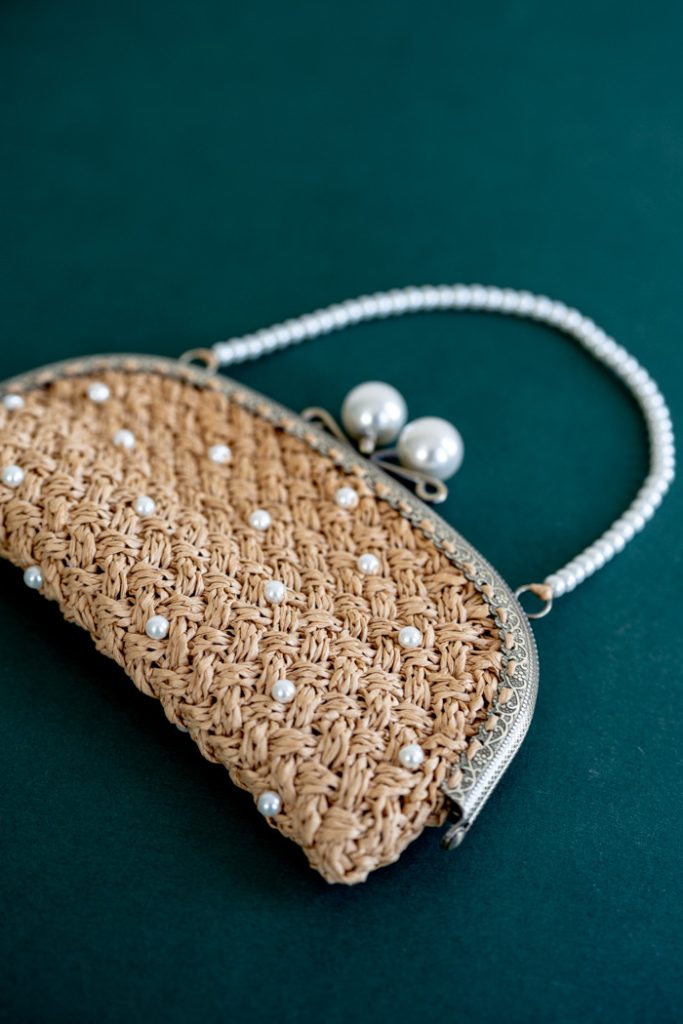
The Saltwater Pearls Raffia Purse is a sleek, handheld accessory that blends natural texture with subtle shine. Knit with raffia-style yarn for a structured feel, this clutch features a simple, modern silhouette that works well for dressier summer looks. An oversized pearl closure adds a touch of elegance, while the compact size makes it ideal for carrying your essentials. Whether paired with a breezy sundress or linen separates, this purse brings a polished finish to any warm-weather outfit.
Time: WEEKEND PROJECT
Skill Level: Easy
Size: 4” x 8” (not including strap or pearl clasp)
Gauge: 32 sts and 32 rows = 4” [10 cm] in Basketweave Stitch, before blocking
Materials
 Yarn: Wool and the Gang Ra-Ra Raffia (100% Paper; 273 yards [250 meters] / 3.5 ounces [100 grams]): Desert Palm (1 skein)
Hardware/Embellishments:
21cm Bronze Pearl Purse Frame from ROYALcraftPT on Etsy
1 – 32” strand 6mm Ivory Glass Pearl Beads by FavoredMemories on Etsy
Needles: US size 6 (4mm) straight needle
Notions: Tapestry needle (you will want one small enough to get through the holes on your purse frame), cable needle (optional), 10” x 10” lining fabric (sample shown has a tan silk charmeuse lining) and matching sewing thread and needle, 21cm Bronze Purse Frame, approx. 80 – 6mm Ivory Glass Pearl Beads
Abbreviations
2/2 RC = slip next 2 st to cable needle, holding cable needle in back: K2, K2 from cable needle
2/2 LC = slip next 2 st to cable needle, holding cable needle in front: K2, K2 from cable needle
Pattern Notes
While raffia yarn creates a unique and rewarding finished result, it has a very stiff non-elastic nature, which makes it trickier to work with than most yarns. The added tightness of working a cabled pattern, results in a very stiff fabric, which is perfect for this purse design. A few tips for using Raffia with this project: 1) Choose a sturdy needle, such as metal or strong wood, that will handle the tight pressure as you cross the cable stitches, 2) The combination of raffia and cable stitches makes for a very tight fabric, so try to work your purl rows a little looser than usual, to ease up the tension, following each cable row, 3) While the raffia yarn is not prone to tangling, be sure if you do encounter a tangle, not too pull too hard, because raffia will not stretch when pulled, it’s paper structure will just tear, and 4) Take breaks often to rest your hands and wrists, as you work.
Pattern
Cast on 32 sts.
Setup Row: Purl (WS)
Row 1: K2, *2/2 RC; rep from * until 2 sts remain, K2.
Row 2: Purl
Row 3: *2/2 LC; rep from * to end of row.
Even Rows 4, 6 & 8: Cast on 4 sts, P to end, cast on 4 sts. (40, 48, 56 sts)
Row 5: K2, *2/2 RC; rep from * until 2 sts remain, K2.
Row 7: *2/2 LC; rep from * to end of row.
Row 9: K2, *2/2 RC; rep from * until 2 sts remain, K2.
Even Rows 10, 12 & 14: Purl
Row 11: *2/2 LC; rep from * to end of row.
Row 13: K2, *2/2 RC; rep from * until 2 sts remain, K2.
Row 15: *2/2 LC; rep from * to end of row.
Row 16: Cast on 4 sts, P to end, cast on 4 sts. (64 sts)
Row 17: K2, *2/2 RC; rep from * until 2 sts remain, K2.
Even Rows 18 & 20: Purl
Row 19: *2/2 LC; rep from * to end of row.
Rows 21-44: Repeat rows 17-20 six more times.
Row 45: Cast off 4 sts, K2, *2/2 RC; rep from * until 2 sts remain, K2. (60 sts)
Row 46: Cast off 4 sts, P to end of row. (56 sts)
Rows 47-51: Repeat Rows 11-15.
Row 52: Cast off 4 sts, P to end of row. (52 sts)
Row 53: Cast off 4 sts, K2, *2/2 RC; rep from * until 2 sts remain, K2. (48 sts)
Even Rows 54 & 56: Cast off 4 sts, P to end of row. (44, 36 sts)
Row 55: Cast off 4 sts, *2/2 LC; rep from * to end of row. (40 sts)
Row 57: Repeat row 53. (32 sts)
Even Rows 58 & 60: Purl
Row 59: *2/2 LC; rep from * to end of row. (32 sts)
Cast off. Weave in the two yarn ends.
If you’re using raffia yarn, you may wish to steam the piece lightly, before continuing, to shape the knitted piece to the frame. To steam the piece to the correct shape; pin the piece to a mat, pulling the increase/decrease edges out to as rounded of a shape as possible. Place a thin, clean cloth over the top of the knitted piece and apply light steam over the cloth, hovering the iron just above the cloth, without pressing. With a just a little steam, the piece should retain its newly flattened shape.
Finishing
Attach Beads: Using a length of yarn, or sewing thread, stitch the pearl beads in place, scattered across the RS of the knitted piece.
Attach Fabric Backing: Lay your knitted piece onto your lining fabric and cut out a matching piece of fabric about ½” larger than your knitted piece. Place the knitted piece and the lining fabric wrong sides together and stitch together, turning the edge of the fabric lining under a little bit as you go, so there are no raw edges.
Join to Purse Frame: Open the purse frame and lay it over one side of the bag. Using a length of yarn, or a strong sewing thread, stitch the frame in place, using the frame’s stitching holes. Then turn the bag around and stitch the other side of the frame to the bag. Once the frame is attached, use short lengths of yarn to stitch up the sides of the knitted bag from the outside.
Purse Strap
We added a beaded strap to the bag by stringing 50 (or your desired length) leftover pearl beads onto a length of yarn. You can also use beading wire or heavy weight thread. Once you have the desired length, simply attach each end of the yarn to the purse frame, at the base of the beaded chain. You can loop the yarn through the loops on the purse frame several times, then run several inches of yarn tail back up through the beads, to secure the yarn. Alternatively, you can attach the strap to clips, to make the strap removable.