


Knit bobbles are a great way to add texture, dimension and visual interest to your next knitting project and are formed through a combination of increasing and decreasing stitches. For each increase there is a corresponding decrease so the stitch count for each row remains consistent. The shift between adding and taking away stitches alters
Knit bobbles are a great way to add texture, dimension and visual interest to your next knitting project and are formed through a combination of increasing and decreasing stitches. For each increase there is a corresponding decrease so the stitch count for each row remains consistent. The shift between adding and taking away stitches alters the knit fabric to create the upraised texture of the bobble. Bobbles are generally worked on the wrong side of the fabric, so their impact is only visible after finishing the row and turning your project.
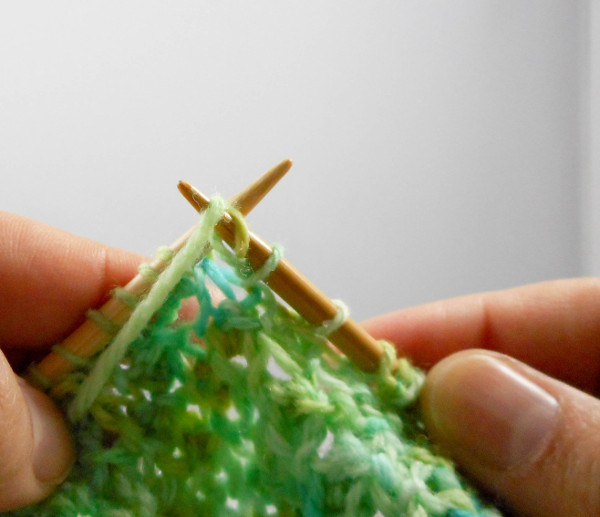
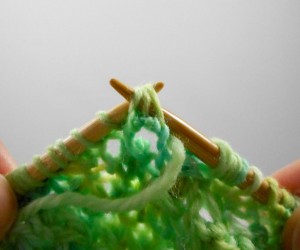
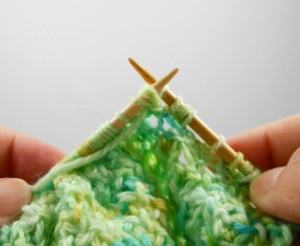
For this pattern, the increase, or bob is formed when you (k1, p1, k1) in the same stitch.
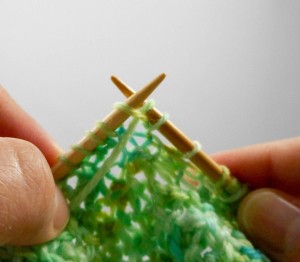
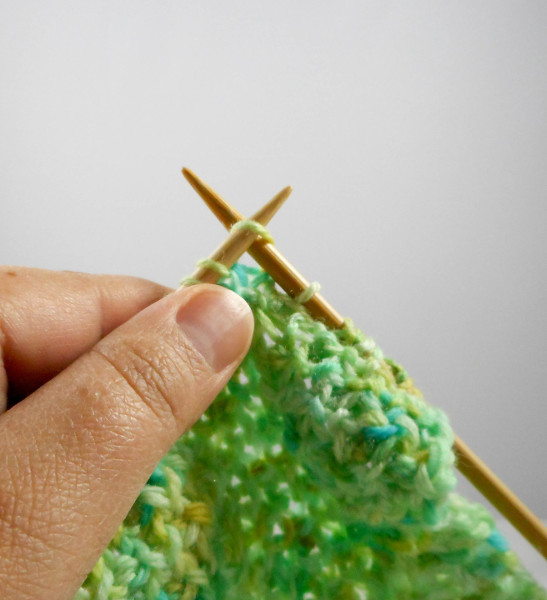
- Insert your needle as to knit.

- Yarn over counter clockwise.
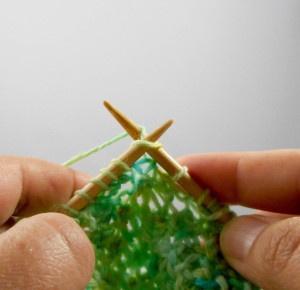
- Draw the yarn through to the front, but do not push the loop off the left needle.
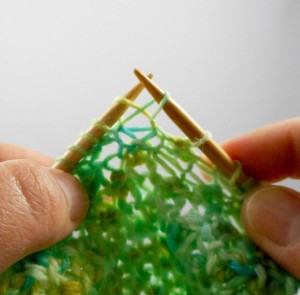
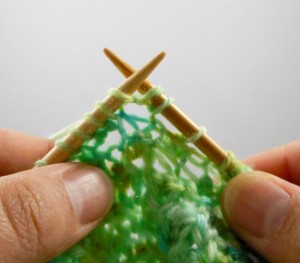
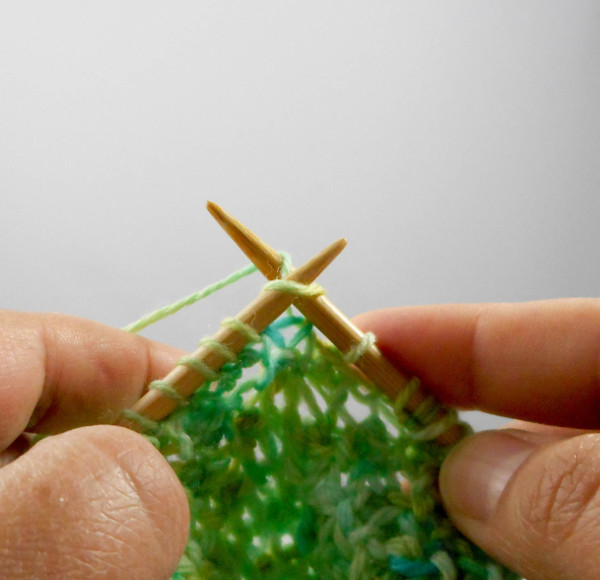
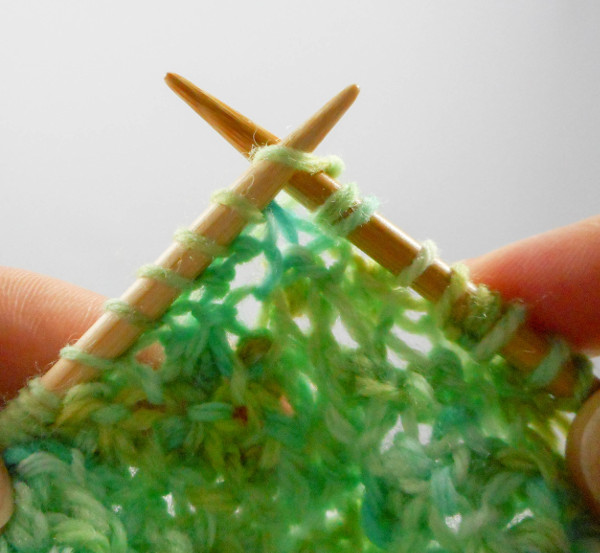
- Bring the yarn to the front.
- Insert your needle as to purl.

- Yarn over counter clockwise.
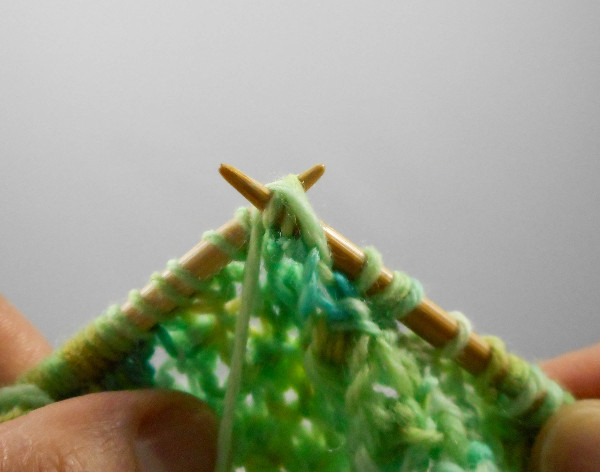
- Draw the yarn through to the back, but do not push the loop off of the left needle.
- Bring the yarn to the back again.
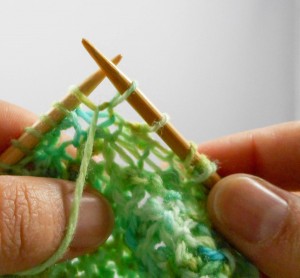
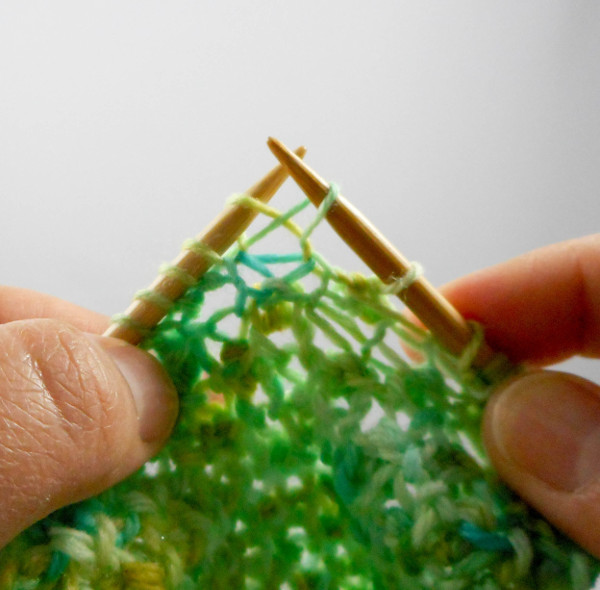
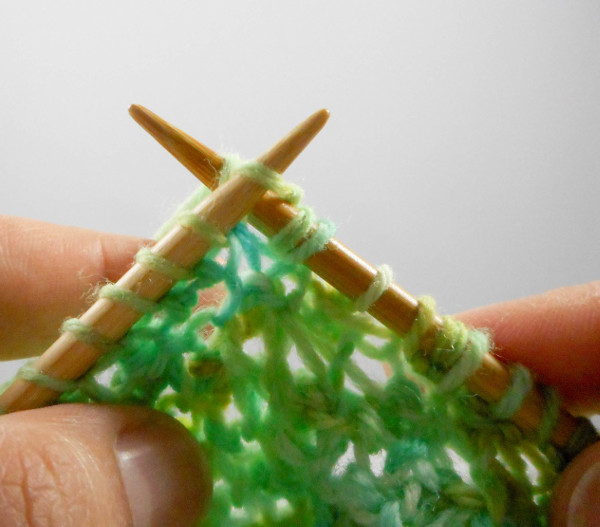
- Insert your needle as to knit.
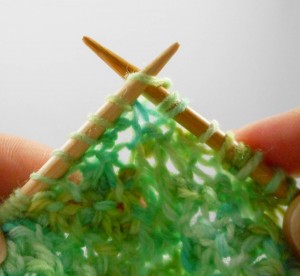
- Yarn over counter clockwise.
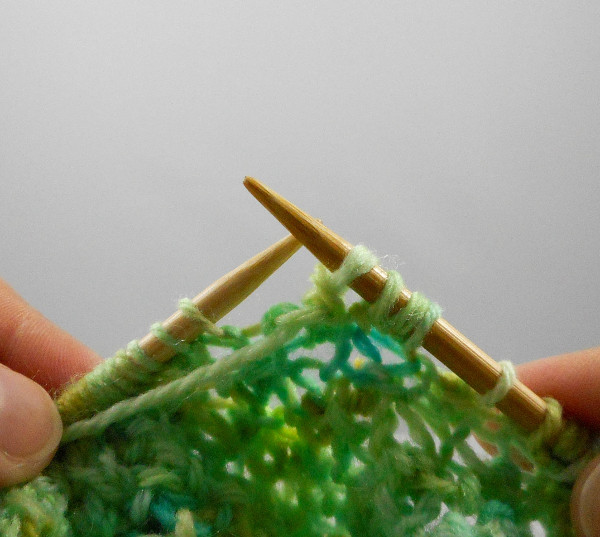
- Draw the yarn through to the front, and push the loop off of the left needle. Increase made.


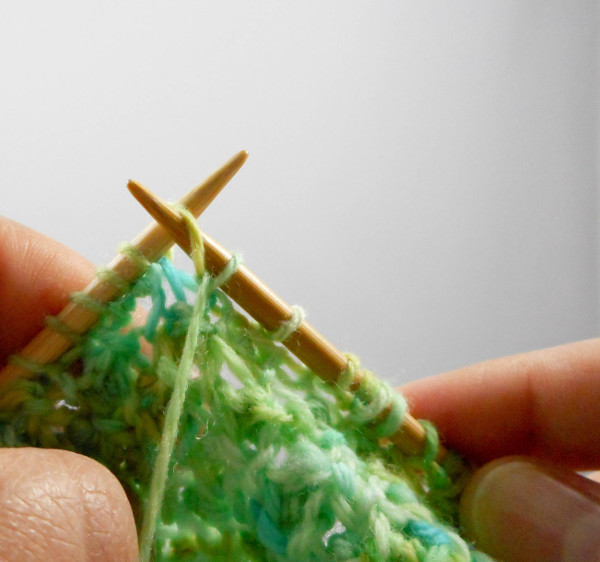


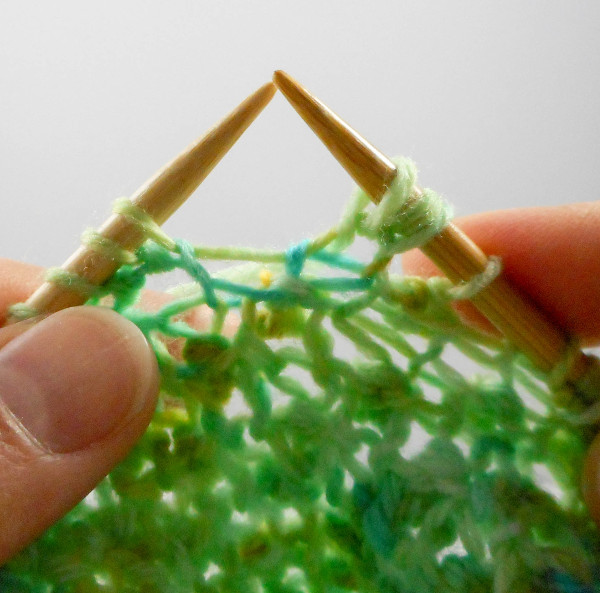
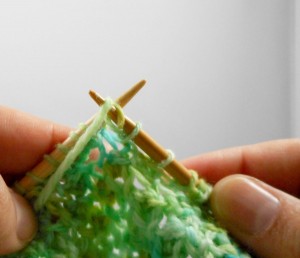
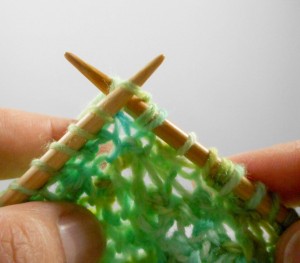
The p3tog decrease is paired with the bob increase to form the shape of the final bobble.
- With yarn in front, insert needle under the next 3 stitches as to purl.
- Yarn over counterclockwise.

- Draw the yarn through all 3 loops to the back.
- Push the loop off the left needle. Decrease made, and bobble is complete.

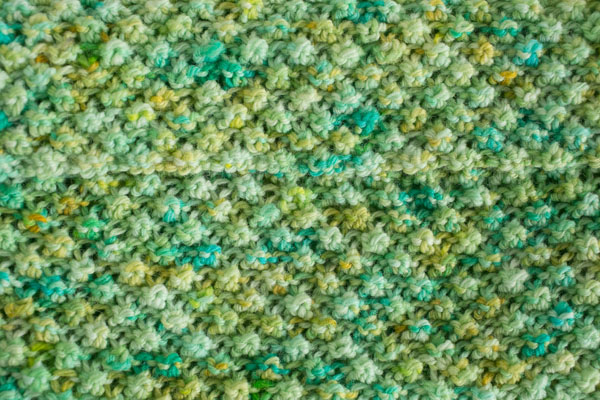
- For the Caribbean Sea Clutch, the position of the bobbles alternates on each wrong side row, creating a diagonal pattern.


You could keep the position of the bobbles the same on each wrong side row to create the appearance of columns instead, and increasing or decreasing with more stitches will create a larger bobble. Experiment with different bobble variations until you find the style you prefer.
If you think you’ve mastered the bobble technique, go ahead and give the Caribbean Sea Clutch on the next page a try. 