

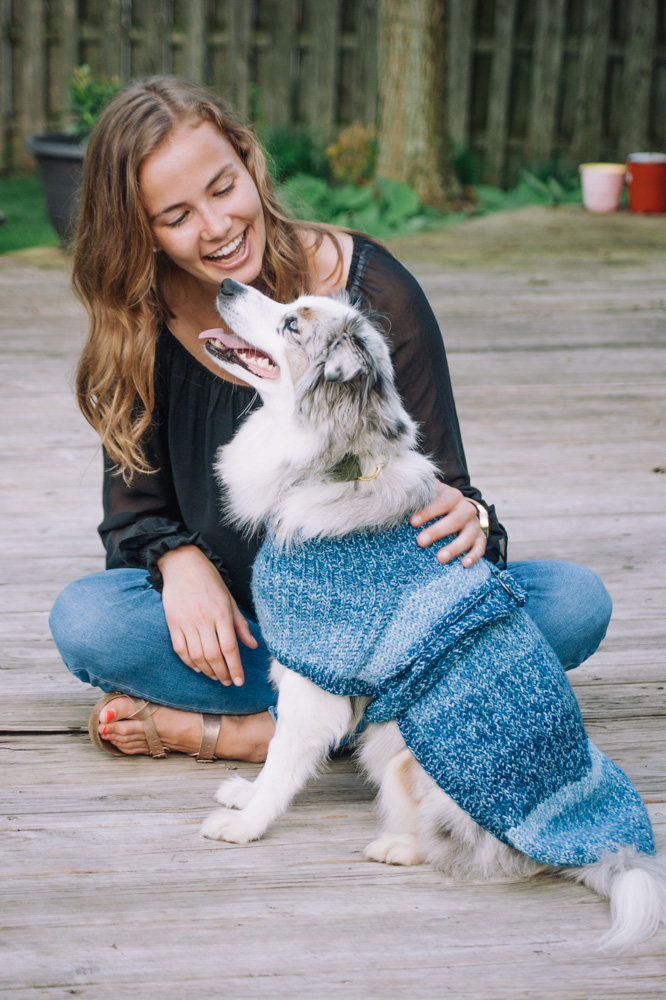
A sweater that can be considered more of a cape, is the perfect solution for wiggly dogs. With a hole for the neck, the rest of the sweater falls into place easily as a knit belt cinches around your dog’s waist for the perfect customized fit.
Time: Weekend Project (1-2 weeks) for small (larger) sizes .
Skill Level: Intermediate
Size: Finished Size 8.5 (12.5, 16.5, 20.5)” neck circumference to fit X-Small (Small, Medium, Large) / 5-10 (15-20, 35-40, 55-60) lbs
Shown in size Medium
Gauge: 16 sts and 38 rows = 4” [10 cm] in Body pattern stitch
22 sts and 28 rows = 4” [10 cm] in 1×1 Rib
Materials
 Yarn: Lion Brand Mandala Ombré (100% Acrylic; 344 yards [315 meters]/150 grams): #204 Harmony (1 (1, 2, 3) balls)
Needles: US size 7 (4.5 mm) 16” circular or DPNs, 32” circular, US size 5 (3.75 mm) straight or 16” circular
Notions: 2 Stitch Markers, stitch holder or waste yarn for holding front panel sts, tapestry needle, two 2” D-rings
Abbreviations
K1b (knit 1 st below): Knit into the st below the first st on the left needle as if the 2 sts are 1 st.
Ssp: Slip, slip, purl these 2 sts together through the back loops.
Pattern Notes
The collar is worked in the round with the front panel and body worked flat.
When working flat, each row begins with K2 and ends with K1, sl1 wyif.
Pattern
With larger size 16” circular or DPNs, CO 46 (68, 90, 112) sts, pm, join to work in the rnd, taking care to not twist the sts.
Collar
Rnd 1: Purl.
Rnd 2: *K1, p1; rep from * around.
Rep Rnd 2 until Collar meas 2 (3, 4, 5)” from CO.
Next Rnd: *K1, p1; rep from * 12 (18, 25, 31) more times, k1, place rem 19 (29, 37, 47) sts on stitch holder for Back neck, remove marker. (27 (39, 53, 65) sts for front panel)
Change to larger 32” circular when sts no longer fit comfortably on the 16” circular or DPNs. The longer circular needle makes it easier to pick up the sts along the sides of Front Panel in preparation for working the body.
Front Panel
Note: Beg working flat.
Row 1 (WS): Knit to last st, sl1 wyif.
Row 2: K2, *k1b, k1; rep from * to last st, sl1 wyif.
Rep Rows 1-2 until piece meas 4 (6, 8, 10)” from CO, ending after a RS row.
Place Front Panel sts on stitch holder, do not cut yarn.
Back
With RS facing, pick up and k11 (17, 21, 25) sts along the edge of the front panel, *k1, p1; rep from * across held Back neck sts to last held st, k1, pick up and k11 (17, 21, 25) sts along the edge of the Front Panel. (41 (63, 79, 97) sts)
Set up (WS): K1, *k1, p1; rep from * to last 2 sts, k1, sl1 wyif.
Row 1 (RS): K2, *k1b, k1; rep from * to last st, sl1 wyif.
Row 2: Knit to last st, sl1 wyif.
Rep Rows 1-2 until Back meas 7 (11, 15, 19)” or desired length from end of Collar ribbing, ending after a WS row.
Note: On the last WS row, pm after the first 13 (19, 25, 33) sts and before the last 13 (19, 25, 33) sts.
Begin Shaping Decreases
Row 1 (RS): K2, ssk, work in established patt to 2 sts before first marker, k2tog, sm, work in established patt to second marker, sm, ssk, work in established patt to the last 4 sts, k2tog, k1, sl1 wyif. (4 sts dec’d; 37 (59, 75, 93) sts)
Row 2: K2, p1, knit to 1 st before first marker, p1, sm, knit to second marker, sm, p1, knit to last 3 sts, p1, k1, sl1 wyif.
Rep Rows 1-2, 3 (6, 9, 13) more times. (25 (35, 39, 41) sts)
Next Row (RS): Remove markers as you come to them, k2, sssk, work in established patt to last 5 sts, k3tog, k1, sl1 wyif. (21 (31, 35, 37) sts).
Next Row: K2, p2tog, knit to last 4 sts, ssp, k1, sl1 wyif. (6 sts dec’d; 19 (29, 33, 35) sts)
Next Row: K2, ssk, work in established patt to last 4 sts, k2tog, k2. (2 sts dec’d; 17 (27, 31, 33) sts)
Border
Note: Border is worked in the round.
Continuing with working yarn and needle, with RS facing pick up and k39 (61, 83, 107) sts along edge of body, working across held front panel sts, *p1, k1; rep from * 12 (18, 25, 31) more times, p1, pick up and k39 (61, 83, 107) sts along edge of body, pm for beg of rnd. (122 (188, 250, 312) sts)
Next Rnd: *K1, p1; rep from * around.
Rep last rnd until Border meas 0.5 (0.5, 0.75, 1)”, or desired depth, from pick up rnd.
BO all sts.
Belt
With smaller straight needle, CO 11 (13, 13, 15) sts.
Row 1 (WS): K2, *p1, k1; rep from * to last st, sl1 wyif.
Row 2: *K1, p1; rep from * to last st, sl1 wyif.
Rep Rows 1-2 for 1 (1.25, 1.5, 1.75)”, ending after a WS row.
Next Row (RS): K2, *k1b, k1; rep from * to last st, sl1 wyif.
Next Row: Knit to last st, sl1 wyif.
Rep last 2 rows until Belt meas 17.5 (23.5, 29, 33.75)” from CO, ending after a RS row.
Next Row (WS): K2, *p1, k1; rep from * to last st, sl1 wyif.
Next Row: *K1, p1; rep from * to last st, sl1 wyif.
Rep last 2 rows for 1 (1.25, 1.5, 1.75)”, ending after a RS row.
Next Row (WS): K1, purl to last st, k1.
Next Row: Knit.
Rep last 2 rows 2 more times, then rep WS row once. (7 rows total)
BO all sts.
Finishing
Weave in ends and block if desired.
Assembly
With WS facing of Belt, place the straight section of both D-rings at the transition between the 1×1 Rib and the St st, fold the St st to the WS over the D-rings. Seam to the first St st row.
Weave in ends.
I am so stuck
Hi Patricia, if you let us know what part you’re struggling with, we can reach out to the designer for help. Thank you! -Dana, Editor
Hello… what does. wyif mean, please?
Hello! wyif means “With Yarn in Front” – Nicola, Editor
So sad it doesn’t go big enough for my 100lb dog… I would love to see this pattern go up to a 3XL.
Hi Julia, we’ve reached out to the designer for some potential tips on sizing it up, she or I will reply as soon as possible. Thanks! – Nicola