

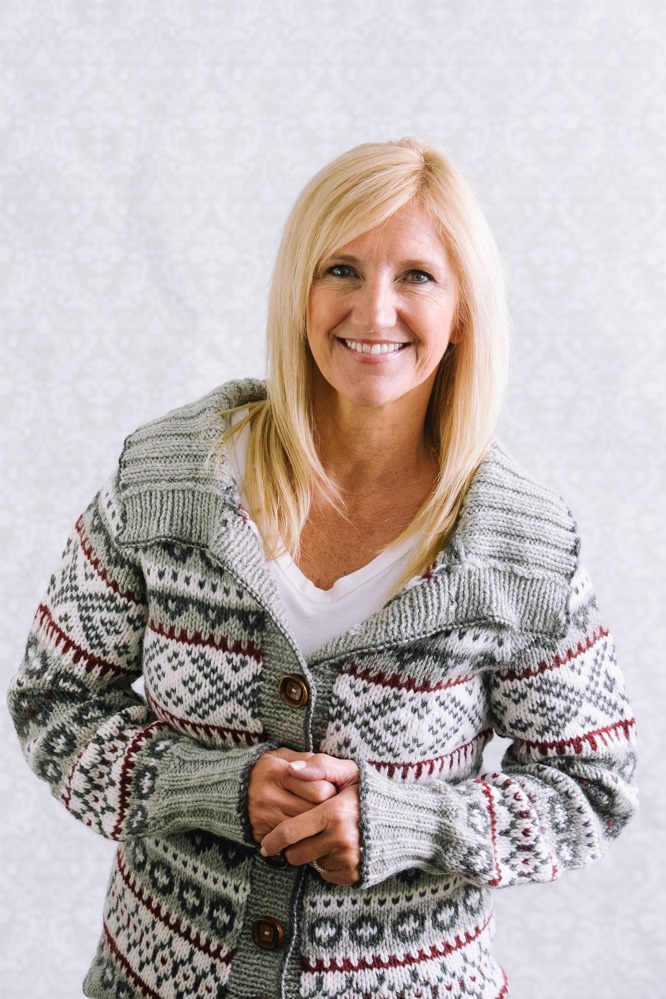
Worked in a bulky weight yarn, this classic fair isle pattern is perfect for staying warm on even the coldest nights. Pair it with a hot cup of tea and your favorite book for an evening of relaxation. Plus – confused about Fair Isle? Watch a brief introduction to the fair isle technique.
Skill Level: Intermediate
Size: Finished bust size 33 1/2 (37 3/4, 42 1/4, 46 1/2, 49 1/2)” to fit bust 32 (36, 40, 44, 48)”;
2-4” positive ease recommended. Shown in size 37 3/4”
Gauge: 15 sts x 17 rows = 4” [10 cm] in stranded St st using larger ndls after wet blocking; 17 sts x 24 rows = 4” [10 cm] in 1×1 rib using smaller ndls after wet blocking
Materials
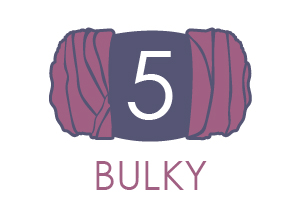 Yarn: Universal Yarn Deluxe Chunky (100% wool; 120 yards [110 meters]/100 grams): #91902 Smoke Heather (MC, [4 (4, 5, 5, 6) hanks], #91902 Charcoal Heather (CC1, [2 (2, 2, 3, 3) hanks], #3700 Pulp (CC2, [2 (2, 2, 3, 3) hanks], #91904 Pomegranate Heather (CC3, 1 hank]
Needles: US size 10 (6.0 mm) circular needles (24”) and set of 5 dpns, US size 8 (5.0 mm) circular needles (24”) and set of 5 dpns
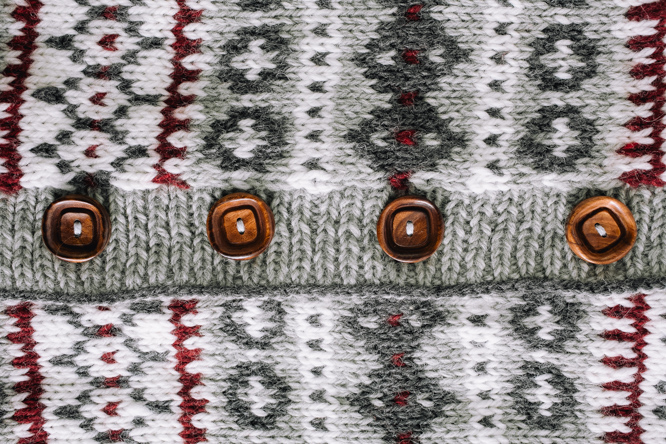
Notions: Markers, stitch holders, tapestry needle, 8 11/4” buttons, US size 7 (4.5 mm) crochet hook
Pattern Notes
This cardigan is worked from the bottom up in one piece. The body is worked back and forth in rows. The sleeves are worked in the round. The body and sleeves are joined at the armholes and the yoke is shaped with raglan decreases.
To change colors in this project, use the fair-isle (stranded) method. Only two different colors are used per row. Try holding one color in each hand, or pick up and drop colors as needed.
Guidelines have been given for centering fair-isle patterning in some sweater pieces. Center fair-isle patterns in each piece as much as possible. When increasing or decreasing in fair-isle pattern, maintain stitches in pattern as much as possible.
Pattern
Sleeves
With CC1 and smaller dpns, cast on 32 (32, 36, 36, 36) sts. Break CC1. PM and join to work in the rnd.
Cuff
Rnd 1: With MC, * k2, p2; rep from * to end. Rep Rnd 1 until Cuff meas 4” from cast-on edge. Switch to larger dpns.
Inc rnd: Knit, increasing 5 (7, 5, 7, 9) sts evenly across rnd by working a m1 inc approximately every 6 (5, 5, 5, 4) sts. Knit 1 rnd. [37 (39, 41, 43, 45) sts]
Increase Section, Establish Pattern
Inc rnd: Following Row 1 of Sleeve chart, k1, m1, work in patt to last st, m1, k1 – 2 sts inc’d.
Cont in Sleeve chart patt, rep Inc rnd every 8 (6, 6, 6, 4) rnds, 6 (3, 7, 7, 2) times, then rep Inc rnd every 10 (8, 8, 8, 6) rnds, 1 (5, 2, 2, 8) times – 53 (57, 61, 63, 67) sts. Work even in patt through Row 69 of Sleeve chart.
Next rnd: With CC2, knit to last 3 (4, 5, 6, 7) sts, bind off next 6 (8, 10, 12, 14) sts. Place rem 47 (79, 51, 51, 53) sts on holder. Set aside.
Body
With CC1 and smaller circular needle, cast on 108 (124, 136, 152, 164) sts. Break CC1.
Hem
Row 1 (RS): With MC, p1, * k2, p2; rep from * to last 3 sts, k2, p1.
Row 2 (WS): K1, * p2, k2; rep from * to last 3 sts, p2, k1.
Rep Rows 1 & 2 until Hem measures 3” from cast-on edge, ending with WS row. Switch to larger circular needle.
Inc row (RS): Knit, increasing 11 (11, 15, 15, 17) sts evenly across row by working a m1 inc approximately every 10 (11, 9, 10, 9) sts – 119 (135, 151, 167, 181) sts. Purl a WS row.
Establish Pattern
Note: To add length to the sweater, add rows of plain stockinette stitch here with MC.
Row 1 (RS): Work Row 1 of Body chart to end.
Rows 2-69: Work Rows 2-69 of Body chart, changing colors as indicated.
Next row (WS): With CC2, p25 (28, 31, 34, 37), bind off 6 (8, 10, 12, 14) sts, p57 (63, 69, 75, 79), bind off 6 (8, 10, 12, 14) sts, p25 (28, 31, 34, 37).
Join Body and Sleeves, Raglan Shaping
Read through entire section before beginning.
Row 1 (RS): Work Row 1 of Yoke chart across Right Front to 2 sts before armhole bind off, k2tog, pm; working across first Sleeve sts, ssk, work to last 2 Sleeve sts, k2tog, pm; working across Back, ssk, work to last 2 sts, k2tog, pm; working across second Sleeve sts, ssk, work to last 2 Sleeve sts, k2tog, pm; working across Left Front, ssk, work in patt to end. (8 sts dec’d)
Row 2 (WS): Work Row 2 of Yoke chart to end.
Dec row: * Work in patt to 2 sts before m, k2tog, sl m, ssk; rep from * 3 more times, work in patt to end. (8 sts dec’d)
Cont in Yoke chart pattern, rep Dec row every RS row, 14 (14, 13, 12, 13) more times – 25 (31, 39, 47, 49) Back sts, 9 (12, 16, 20, 22) sts each Front, 15 (17, 21, 23, 23) sts each Sleeve rem.
Small (Medium, Large, 1X) Sizes Only
Next row (RS): Rep Dec row. (8 sts dec’d)
Next row (WS): * Work in patt to 2 sts before m, ssp, sl m, work in patt to m, sl m, p2tog; rep from * 1 more time, work in patt to end – 4 sts dec’d; 1 st each raglan line on Fronts and Back.
All Sizes
At the same time, on Row 25 (27, 29, 31, 33) of Yoke chart, proceed to Neck Shaping section.
Neck Shaping
Row 1 (RS): Bind off 4 (5, 5, 5, 7)) sts, work in patt to end.
Row 2 (WS): Bind off 4 (5, 5, 5, 7) sts, work in patt to end.
Row 3: K2tog, work in patt to last 2 sts, ssk – 1 st dec’d at each side of Neck edge.
Row 4: Work in patt to end.
Rows 5-8: Rep Rows 3 & 4, 2 more times.
After all decs are complete, the last Yoke chart row worked should be 32 (34, 36, 38, 40). Bind off all sts with MC.
Finishing
Sew underarm seam.
Collar
With MC, smaller circ ndl, and WS facing, pick up and knit 100 sts evenly around Neck edge.
Row 1 (RS): With MC, p1, * k2, p2; rep from * to last 3 sts, k2, p1.
Row 2 (WS): K1, * p2, k2; rep from * to last 3 sts, p2, k1.
Rep Rows 1 & 2 until Collar meas 5”. Bind off all sts loosely in patt using CC1.
Buttonband
With MC, smaller circ ndl, and RS facing, beg at top edge of Collar, pick up and knit 22 sts along side of Collar, 102 (104, 106, 108, 110) sts down Left Front (about 1 st for every row), and 15 sts along side of Hem. (139 (141, 143, 145, 147) sts)
Row 1 (WS): * P1, k1; rep from * to last st, p1.
Row 2 (RS): * K1, p1; rep from * to last st, k1.
Rows 3-11: Cont in rib as established. Break MC. With CC1, bind off all sts firmly, kwise, leaving 12” tail at beginning and end of row. With crochet hook, sl st with CC1 tails along sides of Buttonband.
Buttonhole Band
With MC, smaller circ ndl, and RS facing, beg at lower right Hem, pick up and knit 15 sts along side of Hem, 102 (104, 106, 108, 110) sts up Right Front, and 22 sts along side of Collar. (139 (141, 143, 145, 147) sts)
Row 1 (WS): * P1, k1; rep from * to last st, p1.
Row 2 (RS): * K1, p1; rep from * to last st, k1.
Rows 3-4: Rep Rows 1 & 2.
Row 5 (WS): [P1, k1] 11 times, * p2tog, [yo] 2 times, ssk, [p1, k1] 5 times; rep from * 6 more times, s, [yo] 2 times, ssk, [p1, k1] to last st, p1. (8 buttonholes)
Row 6: * [K1, p1] to double yo, [k1, p1] into double yo; rep from * for all buttonholes, work in rib to end.
Rows 7-11: Cont in rib as established. Break MC. With CC1, bind off all sts firmly, kwise, leaving 12” tail at beginning and end of row. With crochet hook, sl st with CC1 tails along sides of Buttonband.
Weave in ends and wet block. Sew buttons to Buttonband opposite buttonholes.
2024 03 05
Concerning pick up and knit for the collar: does it include the shaped portion of the neck edge as well as the main part?
Also: 100 stitches are to be picked up for all sizes, is that correct? I am going to work on the smallest size and it looks like there will only be 73 neck edge stitches, or about 90 if collar uses shaped portion of the neck edge.
I still can’t find the charts. Where is the ‘download section on the right side of the pattern’?
Hello, we have since updated our website format. Charts are available to logged-in Gold Members. Once you are logged in, you will see a blue button at the bottom of the pattern page where you will click and save the chart to you computer or device. – Nicola, Editor
Thanks!
Where is the fair isle chart portion of pattern?
Hi Ireneh, I am so sorry for the inconvenience. It seems the charts did not load to the website correctly. We have re-added them. You will find all three under the Downloads section on the right side of the pattern. Enjoy!
Caitlin, Managing Editor of I Like Knitting
where are the charts to follow for Fair Isle Cardigan?
Hi Virginiag, I apologize for the inconvenience. It seems the charts did not load to the website correctly. We have re-added them. You will find all three under the Downloads section on the right side of the pattern. Enjoy!
Caitlin, Managing Editor of I Like Knitting