

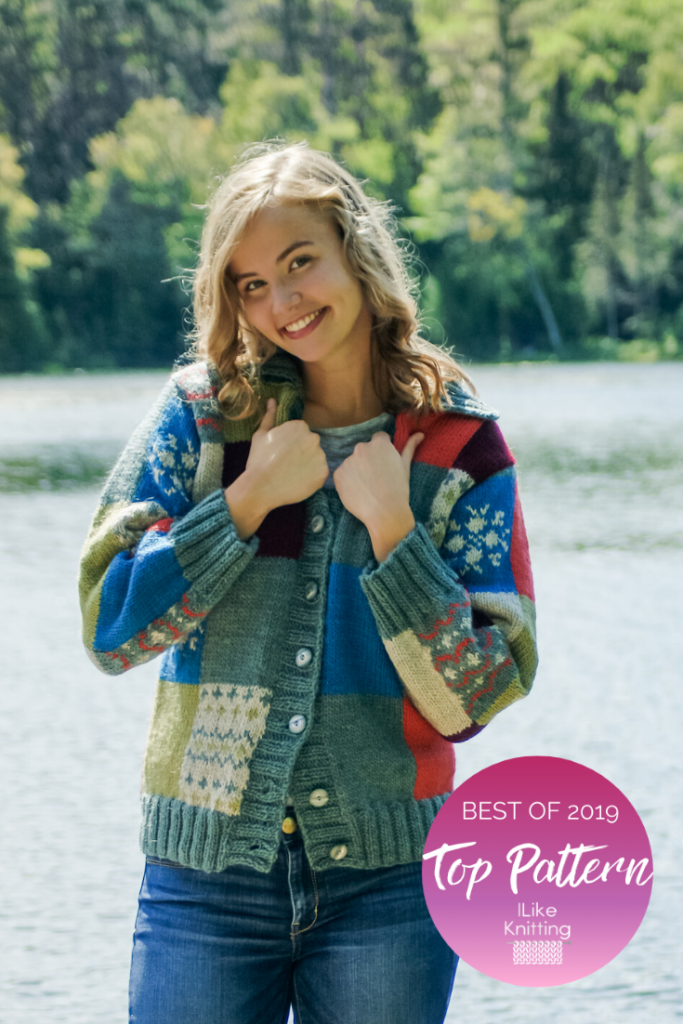
An easy fitting silhouette is the backdrop for this patchwork-style jacket. The body is worked in one piece to the underarms where it is divided for fronts and back. A ribbed collar and modified set-in sleeves complete the look. Get ready to be as cozy as can be with this must-have piece for the season.
Skill Level: Advanced
Size: S/M (L/XL)
Finished bust Size 40 (48)” to fit bust of 34-36 (40-42)”
4-6” positive ease recommended.
Shown in size S/M
Gauge: 16 sts and 22 rows = 4” [10cm] in St st
Materials
 Yarn: Brown Sheep Lamb’s Pride Worsted (85% Wool/ 15% Mohair; [190 yds 173meters/ 4oz/113g]: #M158 Smoky Sage (MC, 3 (4) balls, #M01 Sandy Heather (A, 1 (2) balls; #M101 Bing Cherry (B, 1 (2) balls; #122 Mossy Fern (C, 1 (2) balls; #M117 Alaska Sea (D ,1 (2) balls; #M159 Deep Coral (E, 1 (2) balls
Needles: US size 8 (5.0 mm) 24” circular
Notions: Stitch markers and holders, (8) 1” buttons, tapestry needle
Special Stitches
2×2 Rib (multiple of 4 sts + 2)
Row 1 (WS): P2, *k2, p2; rep from * across row.
Row 2 (RS): K2, *p2, k2; rep from * across row.
Rep Rows 1-2 for patt.
Pattern Notes
Circular needle is used to accommodate large number of sts. Do not join, work in rows.
Pattern blocks are symmetrical.
Read all chart rows from right to left.
To avoid puckering on Fair Isle and Snowflake blocks, carry yarn not in use loosely across back of work.
To avoid holes when changing colors between blocks, always bring new color up and over old.
Placement of blocks is referenced on diagrams as follows: Solid colors are shown as letters and Patterns are listed as numbers.
Red letters/numbers are for Left Sleeve. Green letters/numbers are for Right Sleeve. Work all added sts of sleeve increases in MC. When 3 rows of blocks are complete, work remainder of sleeve in MC.
Pattern
Body
With MC, CO 150 (182) sts.
Work even in 2×2 Rib for 3”, inc 2 sts on last WS row. (152 (184) sts)
Set Up Pattern
Row 1 (RS): K19 (23) sts each in the following sequence: 1, C, B, MC, D, 4, E, MC. Referring to Block Placement Diagram, work even in est patt until Body meas 16 (17)” from CO edge, ending with a WS row.
Divide for Fronts and Back
Next Row (RS): Keeping to est patt, k28 (32) sts for Right Front and place on holder, BO 20 (28) sts for right underarm, k56 (64) sts for Back and leave on needle, BO 20 (28) sts for left underarm, k28 (32) sts for Left Front and place on second holder.
Back
Beg with a WS row, work even on Back sts only until piece meas 8.5 (9.5)” above BO underarm sts, ending with a WS row.
Shape Back Neck and Shoulders
Mark center 18 (22) sts.
Next Row (RS): K19 (21) sts, place marked sts on one holder for Back Neck, and rem 19 (21) sts on second holder for Left Shoulder.
Working on right shoulder sts only, dec 1 st at neck edge every row 3 times. (16 (18) sts)
BO rem sts.
Sl sts from first holder to LH needle. With RS facing, join yarn to next st and BO Back Neck sts.
Sl sts from second holder to LH needle and work to end of row. Dec 1 st at neck edge every row 3 times. (16 (18) sts)
BO rem sts.
Left Front
Sl sts from second holder to needle. Beg with a WS row, work even in est patt until Left Front meas 6 (7)” above bound-off underarm sts, ending with a RS row.
Shape Neck
Next Row (WS): BO 7 (8) sts, work to end of row.
Dec 1 st at neck edge every row 5 (6) times. (16 (18) sts)
Work even in est patt until Armhole meas same as for Back above BO underarm sts.
BO rem sts.
Right Front
Sl sts from first holder to needle. Beg with a WS row, work even in est patt until Right Front meas 6 (7)” above bound-off underarm sts, ending with a WS row.
Shape Neck
Next Row (RS): BO 7 (8) sts, work to end of row
Dec 1 st at neck edge every row 5 (6) times. (16 (18) sts)
Work even in est patt until Armhole meas same as for Back above BO underarm sts.
BO rem sts.
Sew shoulder seams.
Button Band
With RS facing, join MC at Left Neck edge, pick up and knit 3 sts for every 4 rows along edge to bottom. Adjust sts, if necessary, to have a multiple of 4 sts plus 2.
Work even in 2×2 Rib for 10 rows.
BO in rib patt.
Buttonhole Band
With RS facing, join MC at lower edge, pick up and knit same number of sts as for Button Band.
Work even in 2×2 Rib for 5 rows. Mark band placement for 8 buttonholes, evenly spaced.
Buttonhole Row (RS): Work in rib as est to first marker, [yo, p2tog, work to next marker] 7 times, yo, p2tog, work to end of row.
Work in est rib patt for 4 more rows.
BO in rib patt.
Collar
With MC and WS facing, join yarn at ‘seam’ of Left Front Button Band and Body, pick up and knit 1 st in each st or row around neckline, ending at ‘seam’ of Right Front Button Band and Body. Adjust sts, if necessary, to have a multiple of 4 sts plus 2.
Work even in 2×2 Rib until collar meas 6”.
BO very loosely in est rib.
Sleeves
With MC, CO 54 (56) sts.
Work even in 2×2 Rib until Cuff meas 3”, inc 3 sts on last WS row. (57 (59) sts)
Row 1 (RS): K19 (23) sts each in the following sequence: A, MC, B. Referring to Block Placement Diagram, work in est patt inc 1 st each end every 8 rows 8 (11) times working added sts in MC. (73 (81) sts)
When all incs are completed, work even until Sleeve meas 18 (19)” from CO edge, ending with a WS row. Mark each end st for underarm.
Work even for 2.5 (3.5)” more.
BO all sts.
Finishing
Sew Sleeves into armholes, matching underarm markers to center of BO underarm sts of body.
Sew Sleeve seams.
Sew on buttons.
Weave in ends. Block.
I can’t find the charts for this beautiful Patchwork Meadow Jacket. Could you please provide them? Thanks!
Hi Pamela! Charts are available to logged-in Gold Members. Once you are logged in, you will see a blue button at the bottom of the pattern page where you will click and save the chart to you computer or device. – Nicola, Editor
I’m going to knit this pattern! How do I store it? I’m used to using Notability can I transfer the pattern and charts there?
As long as this is for personal use only, that should be fine. – Nicola, Editor
Where are the charts???
This should be fixed now, please let me know if you are still experiencing issues. – Nicola, Editor
This is my favourite sweater.I will deffinatly knit it
Where are the charts?