

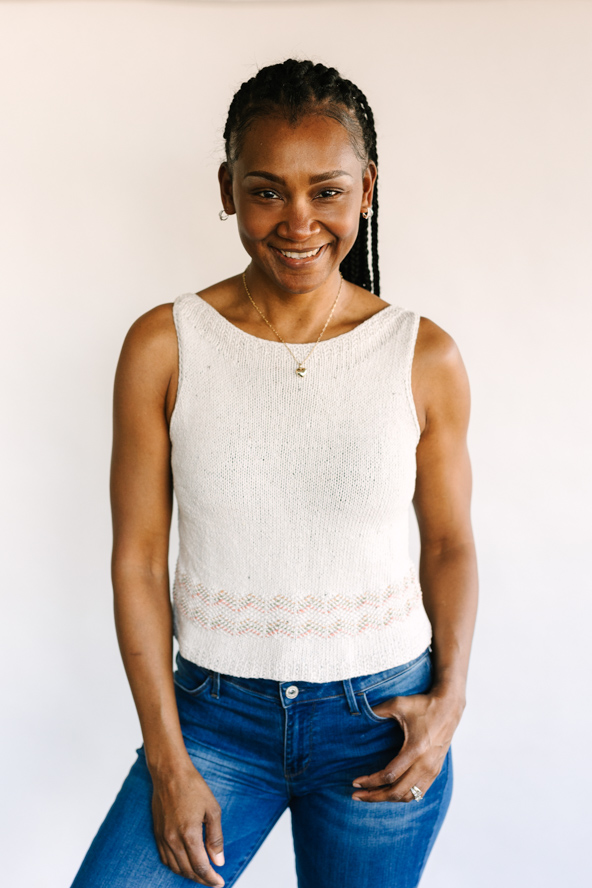
Ziggie is a super-easy spring tank top that will also show off your embroidery skills. Knit bottom up in stockinette stitch, Ziggie features a lower band in seed stitch where you can use your imagination with your tapestry needle.
Time: 20-35 Hours pattern
Skill Level: Easy.
Size: Finished Bust Size 31.5 (35, 40, 44, 47.5)” to fit bust 32 (36, 40, 44, 48)”.
0-1 negative ease recommended.
Shown in size 36.
Gauge: 22 sts and 29 rows = 4” [10 cm] in st st
Materials
 Yarn: Rowan Denim Revive (95% Cotton, 5% other fibers; 109 yards [100 meters]/50 g): 210 Cream (MC; 4 (5, 5, 6, 7) balls), 218 Sand (CC1; 1 balls), 219 Pistachio (CC2; 1 balls), 220 Coral (CC3; 1 balls).
Note: for CCs you will only need few (9-10) yards/meters.
Needles: US size 5 (3.75 mm) circular needles.
Notions: Stitch markers, tapestry needle.
Downloads
Special Stitches:
German short rows (DS-st): After the turn, slip the first stitch with yarn in front. Then take yarn to the back of work. This makes two loops (Double Stitch) from the pulled, slipped stitch.
If the next stitch is a knit stitch, knit the stitch as you normally would.
If the next stitch is a purl stitch, bring the yarn back (the yarn will have gone around the needle from behind and back in front) and purl the next stitch.
When you find this DS-st in a subsequent row, knit as if it was one (like a k2tog/p2tog).
Pattern Notes
This sweater is made seamless from the bottom up in the round to underarms; then the piece is divided for front and back, and finally joined back at the collar.
Unless otherwise stated, you should slip marker(s) every time you find one.
For CO and BO I suggest using stretchy methods and/or use a larger needle size.
Pattern
Body
Ribbing
With MC, CO 169 (185, 225, 241, 257) sts, join in the rnd, being careful to not twist the sts.
Sl first CO st from LHN to RHN, pass the last CO st over slipped st. Place beg of rnd (BOR) marker (168 (184, 224, 240, 256 sts).
Rnd 1: (K1, p1) around
Rnd 2: Knit.
Rep last 2 rnds 3 more times.
Lower Body
Rnds 1-8: Knit.
Embroidery section
Rnd 1: (K1, p1) around
Rnd 2: (P1, k1) around
Rep last 2 rnds 8 more times.
Upper Body
Rnd 1: Knit.
Rep last rnd 50 (52, 52, 52, 54) more times.
Place back sts (84 (92, 112, 120, 128) sts) on holder and leave front sts on needle. (84 (92, 112, 120, 128 sts. Remove BOR marker.
Front
Armhole shaping
Row 1 (RS): BO 2 sts, K2, p1, k to end. (82 (90, 110, 118, 126) sts
Row 2 (WS): BO 2 sts, p to 2 sts to end, sl2p wyif. (80 (88, 108, 116, 124) sts
Row 3: K2, p1, ssk, k to 5 sts to end, k2tog, p1, sl2p wyib. (78 (86, 106, 114, 122) sts Updated 4/3/2023
Rnd 4: Purl to 2 sts to end, sl2p wyif.
Rep last 2 rnds 12 (14, 16, 16, 16) more times. (54 (58, 74, 82, 90) sts
Neckline shaping (short rows)
Set-up row 1 (RS): Knit to 2 sts to end, sl2p wyib.
Set-up row 2 (WS): Purl to 2 sts to end, sl2p wyif.
Rep last 2 rnds 0 (1, 1, 2, 2) more times.
Right shaping
Row 1 (RS): K2, p1, k13 (15, 15, 17, 17) turn.
Row 2 (WS) and all even rows (up to Row 14 (16, 16, 18, 18)): P to 2 sts to end, sl2p wyif.
Row 3: K2, p1, k11 (13, 13, 15, 15), turn.
Row 5: K2, p1, k9 (11, 11, 11, 13, 15), turn.
Row 7: K2, p1, k7 (9, 9, 11, 11), turn.
Row 9: K2, p1, k5 (7, 7, 9, 9), turn.
Row 11: K2, p1, k3 (5, 5, 7, 7), turn.
Row 13: K2, p1, k1 (3, 3, 5, 5), turn.
Sizes – (36, 40, 44, 48) only
Row 15: K2, p1, k x (1, 1, 3, 5), turn.
Sizes – (-, -, 44, 48) only
Row 17: K2, p1, k x (x, x, 1, 1), turn.
Left shaping
Row 1 (RS): Knit to 2 sts to end, sl2p wyib (54 (58, 74, 82, 90) sts
Row 2 (WS): P 16 (18, 18, 20, 20), turn.
Row 3 and all next odd rows (up to Row 17 (19, 19, 19, 19)): Knit to 2 sts to end, sl2p wyib.
Row 4: P14 (16, 16, 18, 18), turn.
Row 6: P12 (14, 14, 16, 16), turn.
Row 8: P10 (12, 12, 14, 14), turn
Row 10: P8 (10, 10, 12, 12), turn
Row 12: P6 (8, 8, 10, 10), turn
Row 14: P4 (6, 6, 8, 8), turn
Row 16: P2 (4, 4, 6, 6), turn
Sizes – (36, 40, 44, 48) only
Row 18: P x (2, 2, 4, 4), turn.
Sizes – (-, -, 44, 48) only
Row 20: P x (x, x, 2, 2), turn.
Neckline
Row 1: Knit to 2 sts to end, sl2p wyib (54 (58, 74, 82, 90) sts
Row 2: Purl to 2 sts to end, sl2p wyif.
Rep last 2 rnds 0 (1, 1, 2, 2) more times.
Place front sts on hold and cut yarn.
Back
Place sts hold into needle.
Work as in Front, without cutting yarn at the end.
Collar
Set-up Rnd: Knit back sts to end, place front sts hold on LHN (with RS facing), sl first st from LHN to RHN, pass the last st over slipped st and knit to end, sl first st from LHN to RHN, pass the last st over slipped st, place BOR marker. (106 (114, 146, 162, 178) sts
Rnd 1: (K1, p1) around.
Rnd 2: Knit.
Rep last 2 rnds 3 more times.
BO
Finishing
Embroider with CC1, CC2 and CC3 according to chart.
Weave in ends. Wash and block to desired measurements.
Master Knitting Abbreviations Used
BO – bind off
BOR– beginning of rnd.
CO – cast on
K – knit
K2tog – knit 2 stitches together
LHN– Left Hand Needle
P – purl
Rep – repeat(s)
RHN– Right Hand Needle
RS– Right size
Sl2p – slip 2 purlwise
Ssk – slip, slip, knit these 2 stitches together – a decrease
St(s) – stitch(es)
St st – stockinette stitch
Wyib – with yarn in back
Wyif – with yarn in front
*– repeat the instructions following the single asterisk as directed
I am working on the Ziggie Tank , everything moving well to Front armhole shaping , row 3
K2, p1, ssk, k to 6 to end, k2tog, p1, sl 2p Wyib
I only count five instructions for last 6 stitches can someone clarify for me please? Otherwise excited to be nearing the end of this project.
Rows 3 and 4 in this section repeated 14 times for my size so want to get it right, thank you
Hello Brenda! I’ve reached out to the designer for advice and she or I will reply as soon as possible. Thanks! – Nicola, Editor
Dear Brenda,
You are right. There is a typo and should read “k to 5 sts to end,…” I will ask Nicola to fix it. Sorry for the inconvenience and enjoy your knitting!-Cristina