

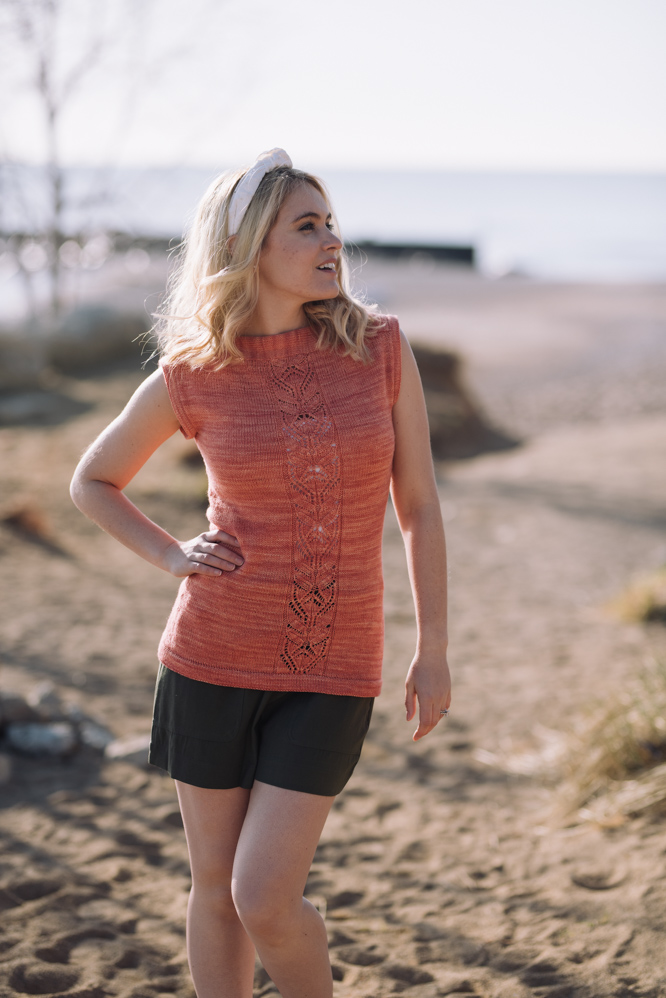
Ellie is a gorgeous tee knit in a dusty coral color that’s perfect for summer. With a boat neck construction and a leafy lace panel in the front and the back, this tee is an instant classic. Worked top down and in the round, this advanced pattern has stunning results.
Time: 60 Hours Project
Skill Level: Experienced
Size: Finished Bust Size 30.25 (34, 38.25, 42, 46.25){50, 54.25, 58, 62.25}” to fit 28 (32, 36, 40, 42){48, 52, 56, 60}”
2-3” positive ease recommended.
Shown in size 34”
Gauge: 26 sts and 38 rows = 4” in St st on larger needles
28 sts and 40 rows = 4” in St st on smaller needles
Materials
 Yarn: Yarnslayer Fibers Merino Melee Fingering (85% superwash Merino wool, 15% nylon; 437 yards [400 meters]/100 grams): SS3 (2 (2, 2, 2, 2){3, 3, 3, 3} skeins)
Hook/Needles: US size 3 (3.25 mm), US size 4 (3.5 mm) 24-60” and 16” circulars, and crochet hook US E/4 (3.5 mm)
Notions: Removable stitch markers, tapestry needle
Special Stitches
Left lifted increase (LLI): Insert your left needle from back to front underneath stitch two stitches below the next stitch on the right needle. Knit this stitch through the back loop, and slip it off the needle.
Purlwise left lifted increase (PLLI): Use your right needle to pull the knit stitch one row below the first stitch on your right needle, then place the stitch on the left needle, taking care to ensure it doesn’t slip over the stitch next to it. Then purl the stitch and slip it off the needle.
Purlwise right lifted increase (PRLI): Insert your right needle from back to front underneath stitch two stitches below the next stitch on the left needle, then place this stitch on the left needle. Knit this stitch, and slip it off the needle.
Right lifted increase (RLI): Use your right needle to pull the knit stitch one row below the first stitch on your right needle, then place the stitch on the left needle, taking care to ensure it doesn’t slip over the stitch next to it. Then knit the stitch and slip it off the needle.
Sssk: Slip 3 sts individually kwise, slip back, and k3tog tbl.
Sssp: Slip 3 sts individually kwise, slip back, and p3tog tbl.
Pattern Notes
Shoulder inset is worked first. Body is picked up from the inset, and worked top down, in the round.
Pattern
Shoulder Inset
With smaller needles, CO 26 (28, 30, 32, 34){36, 38, 40, 42} sts.
Right Side of Inset
Row 1 (WS): K1, purl to last st, k1.
Row 2: P1, knit to last st, p1.
Rep Rows 1-2 until piece measures 2.75 (3, 3.5, 4, 4){4.25, 4, 4.25, 4}”, ending with a RS row.
Split for Neck
Set-up row (WS): K1, p11 (12, 13, 14, 15){16, 17, 18, 19}, k1, place rem Back sts on holder.
Front of Shoulder Inset
Row 1: P1, knit to last st, p1.
Row 2: P1, knit to last st, p1.
Rep Rows 1-2 until piece measures 9 (9.25, 9.5, 9.75, 10.25){10.25, 10.5, 10.75, 11}” from split, ending with a WS row. Place sts on holder.
Back of Shoulder Inset
Place Back sts on smaller needles. Attach yarn to WS.
Work as for Front.
Left Side of Inset
Row 1 (RS): P1, knit to last st, knit to last st of Front, p1.
Row 2: K1, purl to last st, k1.
Rep Rows 1-2 until piece measures 2.75 (3, 3.5, 4, 4){4.25, 4, 4.25, 4}” from join. BO all sts.
Front
Place removable markers 5.75 (6, 6.5, 7.5, 7.5){7.75, 7.75, 8, 8}” from each end of long edge Shoulder Inset.
With RS facing and larger needles, PU 37 (39, 43, 48, 49){51, 50, 52, 52} sts to the first marker, move marker to needle, PU 23 sts to second marker, move marker to needle, PU 37 (39, 43, 48, 49){51, 50, 52, 52} sts to end of inset. (97 (101, 109, 119, 121){125, 123, 127, 127} sts)
Row 1 (WS): K1, purl to marker, slip marker (sm), work Setup Rnd of Lace Chart, sm, purl to last 4 (5, 5, 6, 6){7, 6, 7, 6} sts, W&T.
Row 2: Knit to marker, sm, work next row of Lace Chart, sm, knit to 4 (5, 5, 6, 6){7, 6, 7, 6} sts, W&T.
Rows 3-4: Work in pattern to marker, work next row of Lace Chart, sm, work in pattern to last 8 (10, 11, 12, 12){14, 13, 14, 12} sts, W&T.
Rows 5-6: Work in pattern to marker, work next row of Lace Chart, sm, work in pattern to last 13 (15, 17, 19, 19){21, 20, 21, 19} sts, W&T.
Rows 7-8: Work in pattern to marker, work next row of Lace Chart, sm, work in pattern to 18 (20, 23, 26, 26){28, 27, 28, 26} sts, W&T.
Row 9: Work in pattern to end of row, hiding wraps.
Row 10: Work in pattern to marker, sm, work next row of Lace Chart, sm, knit to last stitch, hiding wraps, p1.
Work in pattern until piece measures 4.25 (4.75, 5.25, 5.5, 5.75){6.25, 6.5, 6.75, 7.25}” from PU at shoulder edge, end with Row 15 (19, 23, 27, 29){33, 35, 39, 43} of Lace Chart. Set aside.
Back
Work as for Front.
Body
Rnd 1: K1, work in pattern across Back sts to last st, k1, CO 2 (6, 9, 10, 16){20, 28, 32, 39} sts, pm, CO 2 (6, 9, 10, 16){20, 28, 32, 39} sts, place Front sts on needles, k1, work in pattern across Front sts to last st, k1, CO 2 (6, 9, 10, 16){20, 28, 32, 39} sts, pm for beginning of rnd, CO 2 (6, 9, 10, 16){20, 28, 32, 39} sts. (202 (226, 254, 278, 306){330, 358, 382, 410} sts)
Cont in pattern while working Dec rnd every 6 (7, 7, 8, 7){9, 8, 9, 8} rnds 6 (6, 2, 3, 6){2, 4, 6, 8} times, then every 5 (6, 6, 7, 6){8, 7, 8, 0} rnds 2 (1, 6, 4, 2){5, 4, 1, 0} time(s). (32 (28, 32, 28, 32){28, 32, 28, 32} sts decreased, 170 (198, 222, 250, 274){302, 326, 354, 378} sts)
Dec rnd: K2tog, work in pattern to 2 sts before pattern side seam marker, ssk, sm, k2tog, work in pattern to last 2 sts, ssk. (4 sts dec)
Work 19 rnds even.
Inc rnd: RLI, work in pattern to side seam marker, LLI, sm, RLI, work in pattern to end of rnd, LLI. (4 sts increased)
Cont in pattern while working Inc rnd every 6 (8, 7, 9, 7) [6, 8, 10, 8] rnds 5 (5, 10, 9, 3){5, 8, 6, 3} times, then every 7 (9, 0, 0, 8){7, 9, 11, 9} rnds 5 (4, 0, 0, 7){8, 2, 3, 7} times. (40 (36, 40, 36, 40){52, 40, 36, 40} sts increased, 214 (238, 266, 290, 318){358, 370, 394, 422} sts)
Work even in pattern until piece measures 13.5 (15, 14.5, 16, 15.75){17, 17, 18.25, 18}” from underarm CO, ending with Rnd 8 (26, 26, 8, 8){26, 26, 8, 8} of Lace Chart.
Hem
Rnd 1: Knit to marker, k1, k2tog, k4, k2tog, k5, ssk, k4, ssk, knit to 2nd marker, k1, k2tog, k4, k2tog, k5, ssk, k4, ssk, knit to end of rnd. (206 (230, 258, 282, 310){350, 362, 386, 414} sts)
Rnd 2: Knit and place lifeline.
Rnds 3-11: Knit.
Rnd 12: Purl.
Rnds 13-22: Knit.
Place sts from lifeline on second needle. Attach sts from lifeline to live sts using 3-needle BO.
Finishing
Armhole edging
With larger needles and RS facing, PU 4 (12, 18, 20, 32){40, 56, 64, 78} sts along underarm, PU 28 (30, 34, 36, 38){40, 42, 44, 48} sts to inset, PU 22 (24, 26, 28, 30){30, 34, 36, 38} sts along inset, PU 28 (30, 34, 36, 38){40, 42, 44, 48} sts to underarm, place marker for beg of rnd. (82 (96, 112, 120, 138){150, 174, 188, 212} sts)
Set-up rnd: Knit and place lifeline.
Rnds 1-5: Knit.
Rnd 6: Purl.
Rnds 7-11: Knit.
Place sts from lifeline on second needle. Attach sts from lifeline to live sts using 3-needle BO.
Neck Edging
Apply single crochet border to neck edge, approximately 1 st every 2 rows.
Weave in ends. Block to measurements.
Hi there! Just noticed the stitch legend is cut off on the right hand side of the lace chart. Can you rescan/republish with the chart and legend more centered in the .png, please?
Hi Robin! Thank you for bringing this to our attention! We are working on this now and will reply once a new chart has been added. Thanks! – Nicola, Editor
A new chart has just been added! – Nicola, Editor