

Steps:
1) Thread a darning needle with the contrasting color yarn.
Insert the darning needle from the wrong side up through bottom point of the “v” of the stitch over which you’d like the color, and pull from the skein enough yarn to complete at least this column of duplicate stitches. You can always cut and tie
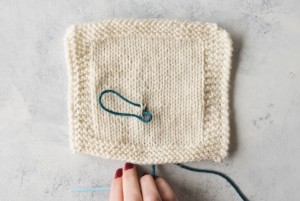
Steps:
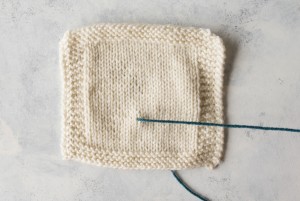
1) Thread a darning needle with the contrasting color yarn.
Insert the darning needle from the wrong side up through bottom point of the “v” of the stitch over which you’d like the color, and pull from the skein enough yarn to complete at least this column of duplicate stitches. You can always cut and tie together the CC yarn on the wrong side if you didn’t pull out enough yarn the first time around. Start with the stitch closest to the top in that column of duplicate stitches.
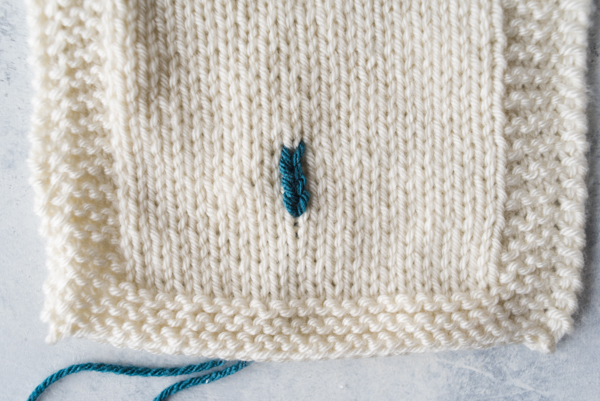
2) Insert the darning needle horizontally through both legs of the “v” above the stitch over which you’d like the color.
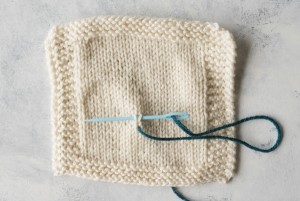
3) Pull through tightly enough to look neat, but not too tight that you can see the main color leg of the “v” beneath your contrasting color. You’ll notice the contrasting color now covers half of the stitch.
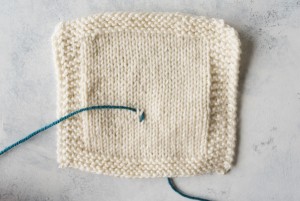
4) Insert the darning needle in the same place you did on Step 1, but this time from the right side to the wrong side, then pull through to the back. This will complete the second leg of the “v.”
With this, you have completed one full duplicate stitch.
5) To begin another duplicate stitch beneath this complete one, insert the darning needle from the wrong side up through the bottom point of the “v” of the stitch beneath the one you just completed. When completing Step 2, insert the darning needle behind the legs of the contrast color of the duplicate stitch you just completed, not the main color beneath it. Work your way down to the bottom of the column.

6) Move onto the next column and work bottom-up, or cut the yarn and weave in the ends, and begin again from the top of the next column. 